Repository Setup
Now that your accounts are configured, let's set up the project repositories. We'll fork the projects to your GitHub account and clone them to your local machine for development.
Understanding the Project Structure
What are we building? We're creating a note-taking application with two separate repositories:
- Frontend (
blazenote-frontend): A React web application for the user interface - Backend (
blazenote-backend): Serverless API functions for data management
Why two repositories? Separating frontend and backend allows for:
- Independent deployment and scaling
- Clear separation of concerns
- Different development workflows
- Better team collaboration
Step 1: Fork the Repositories
What is forking? Forking creates a personal copy of someone else's repository in your GitHub account, allowing you to make changes without affecting the original.
Fork the Frontend Repository
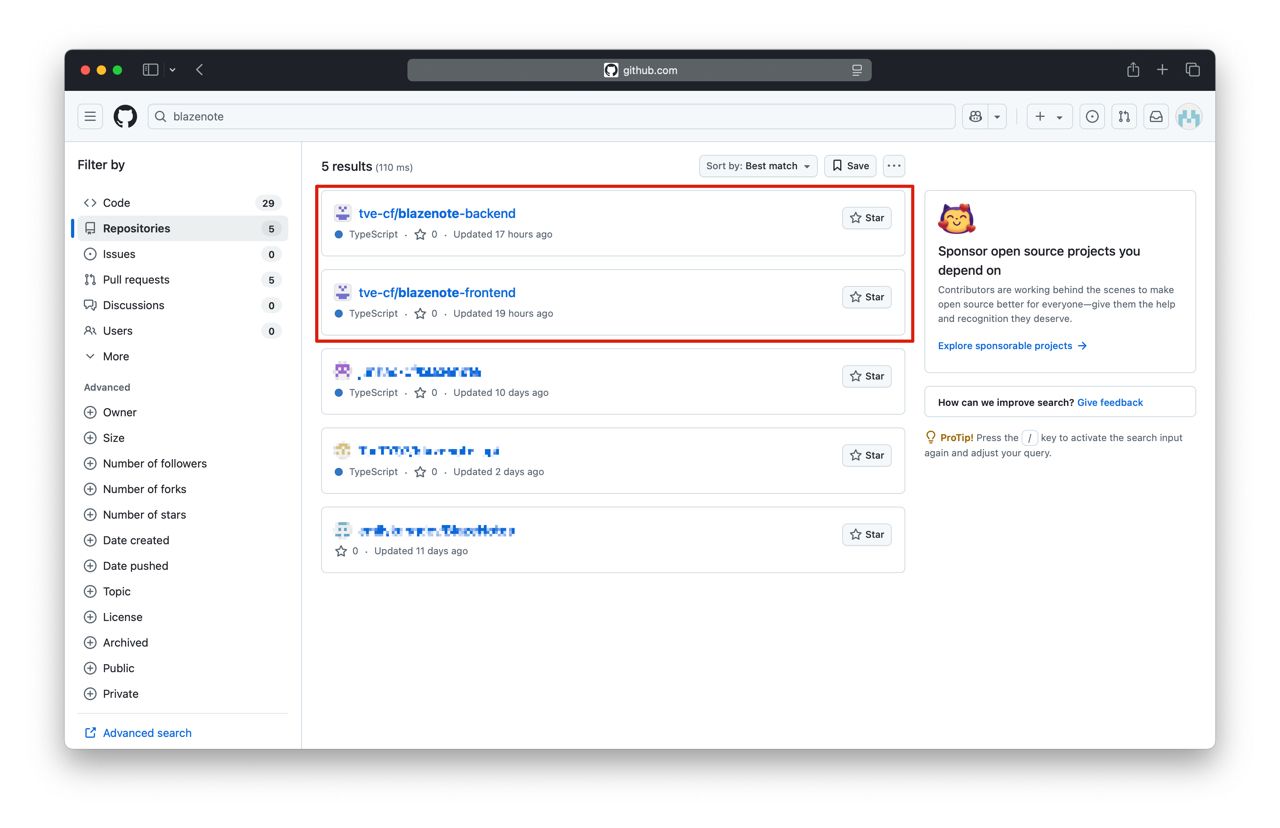
Navigate to the first repository:
- Open your web browser
- Go to: https://github.com/tve-cf/blazenote-frontend
Fork the blazenote repository:
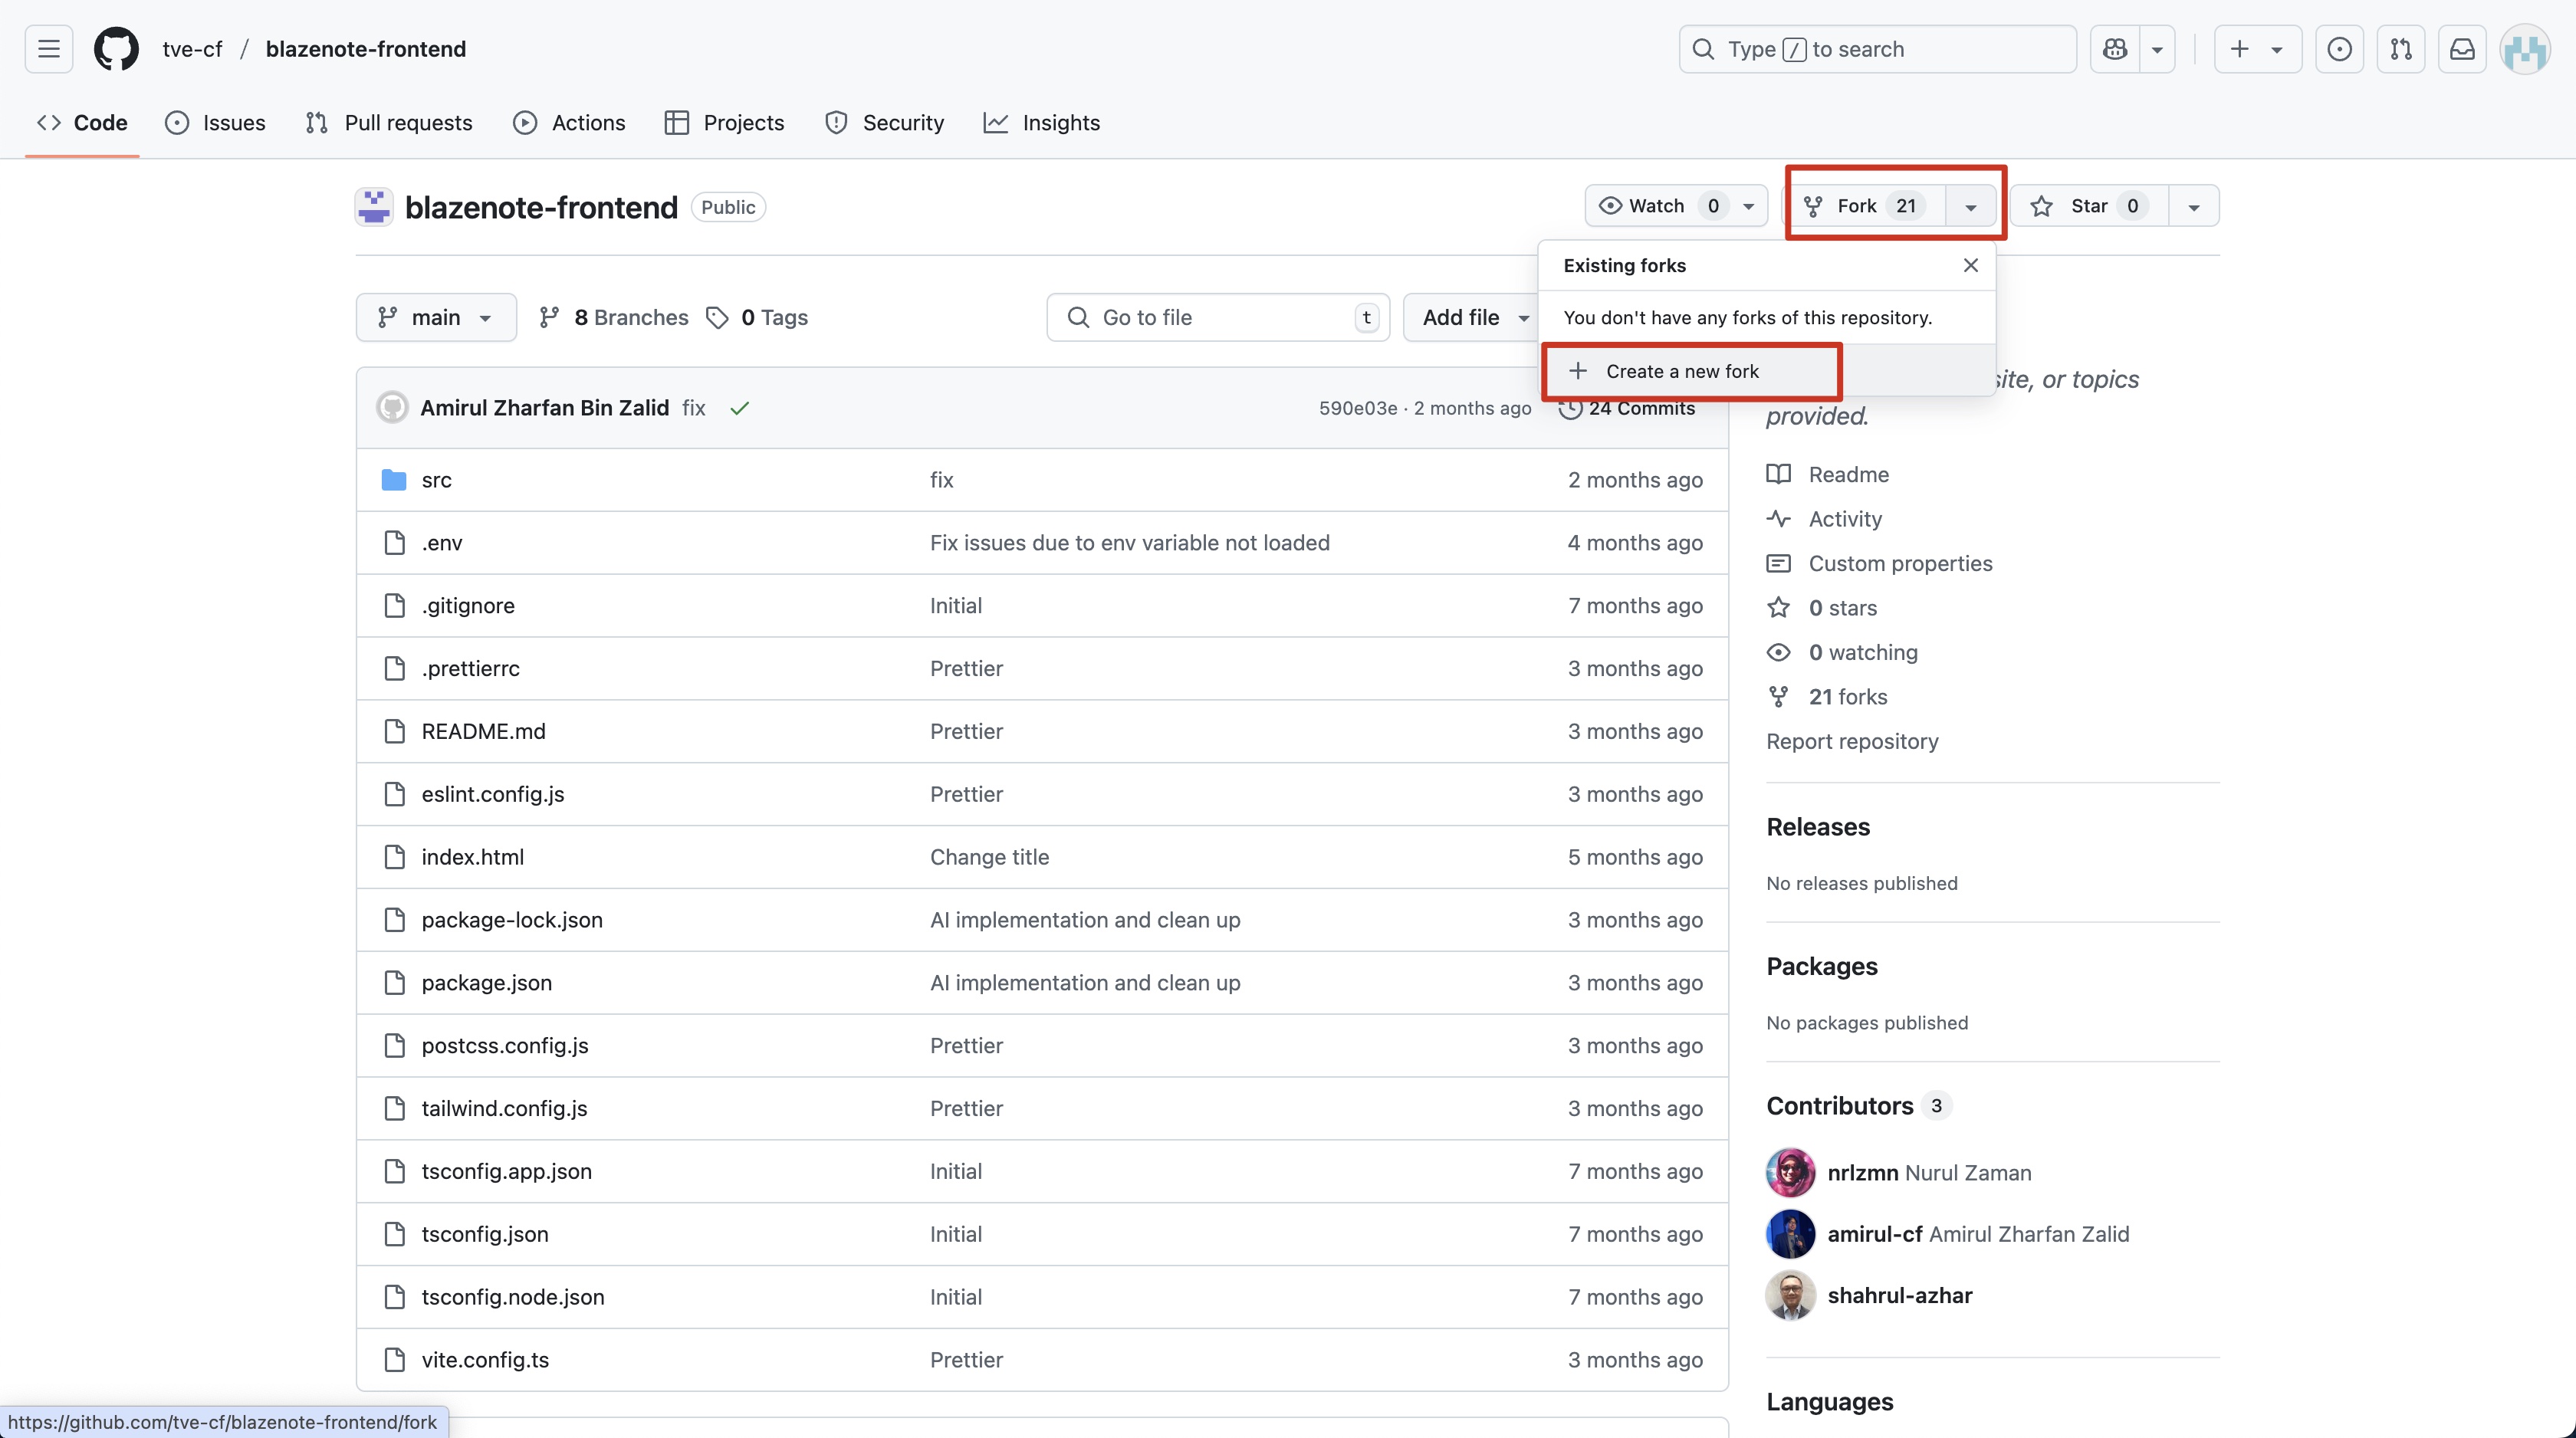
- Look for the "Fork" button in the top-right corner of the page
- Click the "Fork" button
- You'll see a "Create a new fork" page
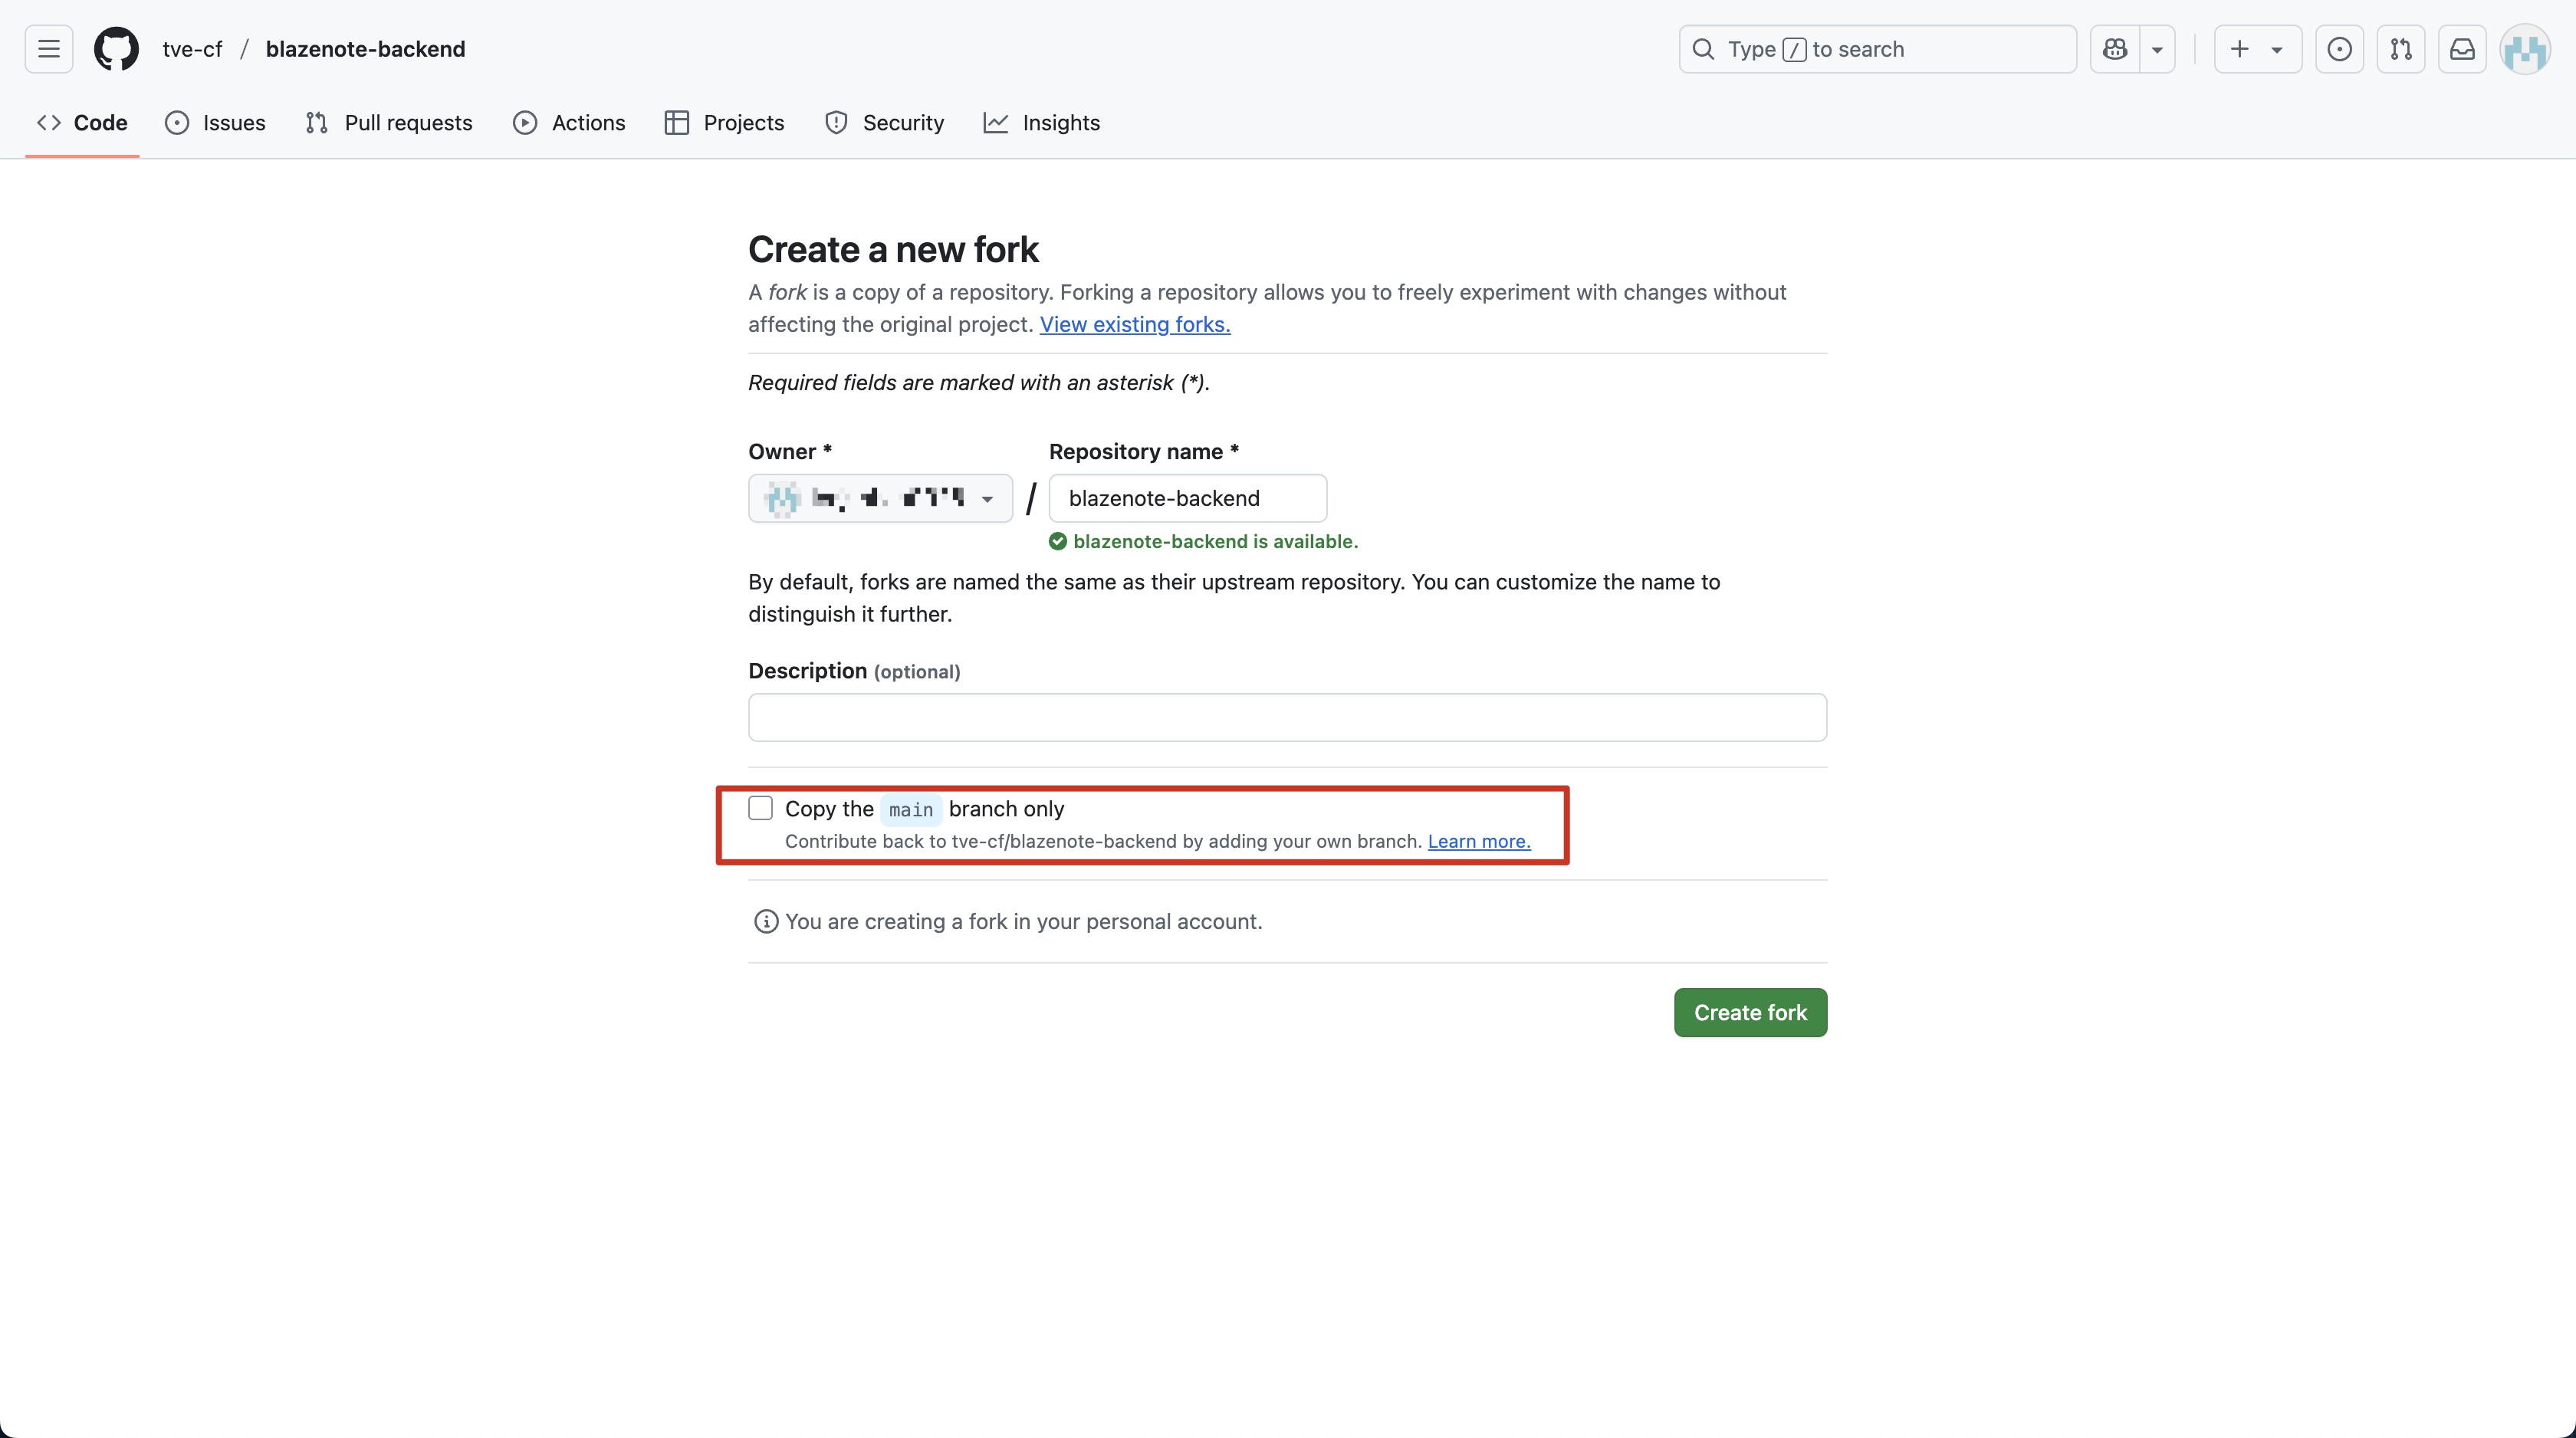
Configure the fork:
- Owner: Select your GitHub username (should be selected by default)
- Repository name: Keep as "blazenote-frontend" (don't change this)
- Description: Optional, you can leave this blank
- ❗ CRITICAL: Uncheck "Copy the main branch only"
- This ensures you get all branches, including the "starter" branch we need
- Click "Create fork"
- Wait for GitHub to complete the forking process (usually takes 10-30 seconds)

Fork the Backend Repository
Repeat for the second repository:
- Go to: https://github.com/tve-cf/blazenote-backend
- Follow the exact same forking process
- Again, uncheck "Copy the main branch only"
- Keep the repository name as "blazenote-backend"
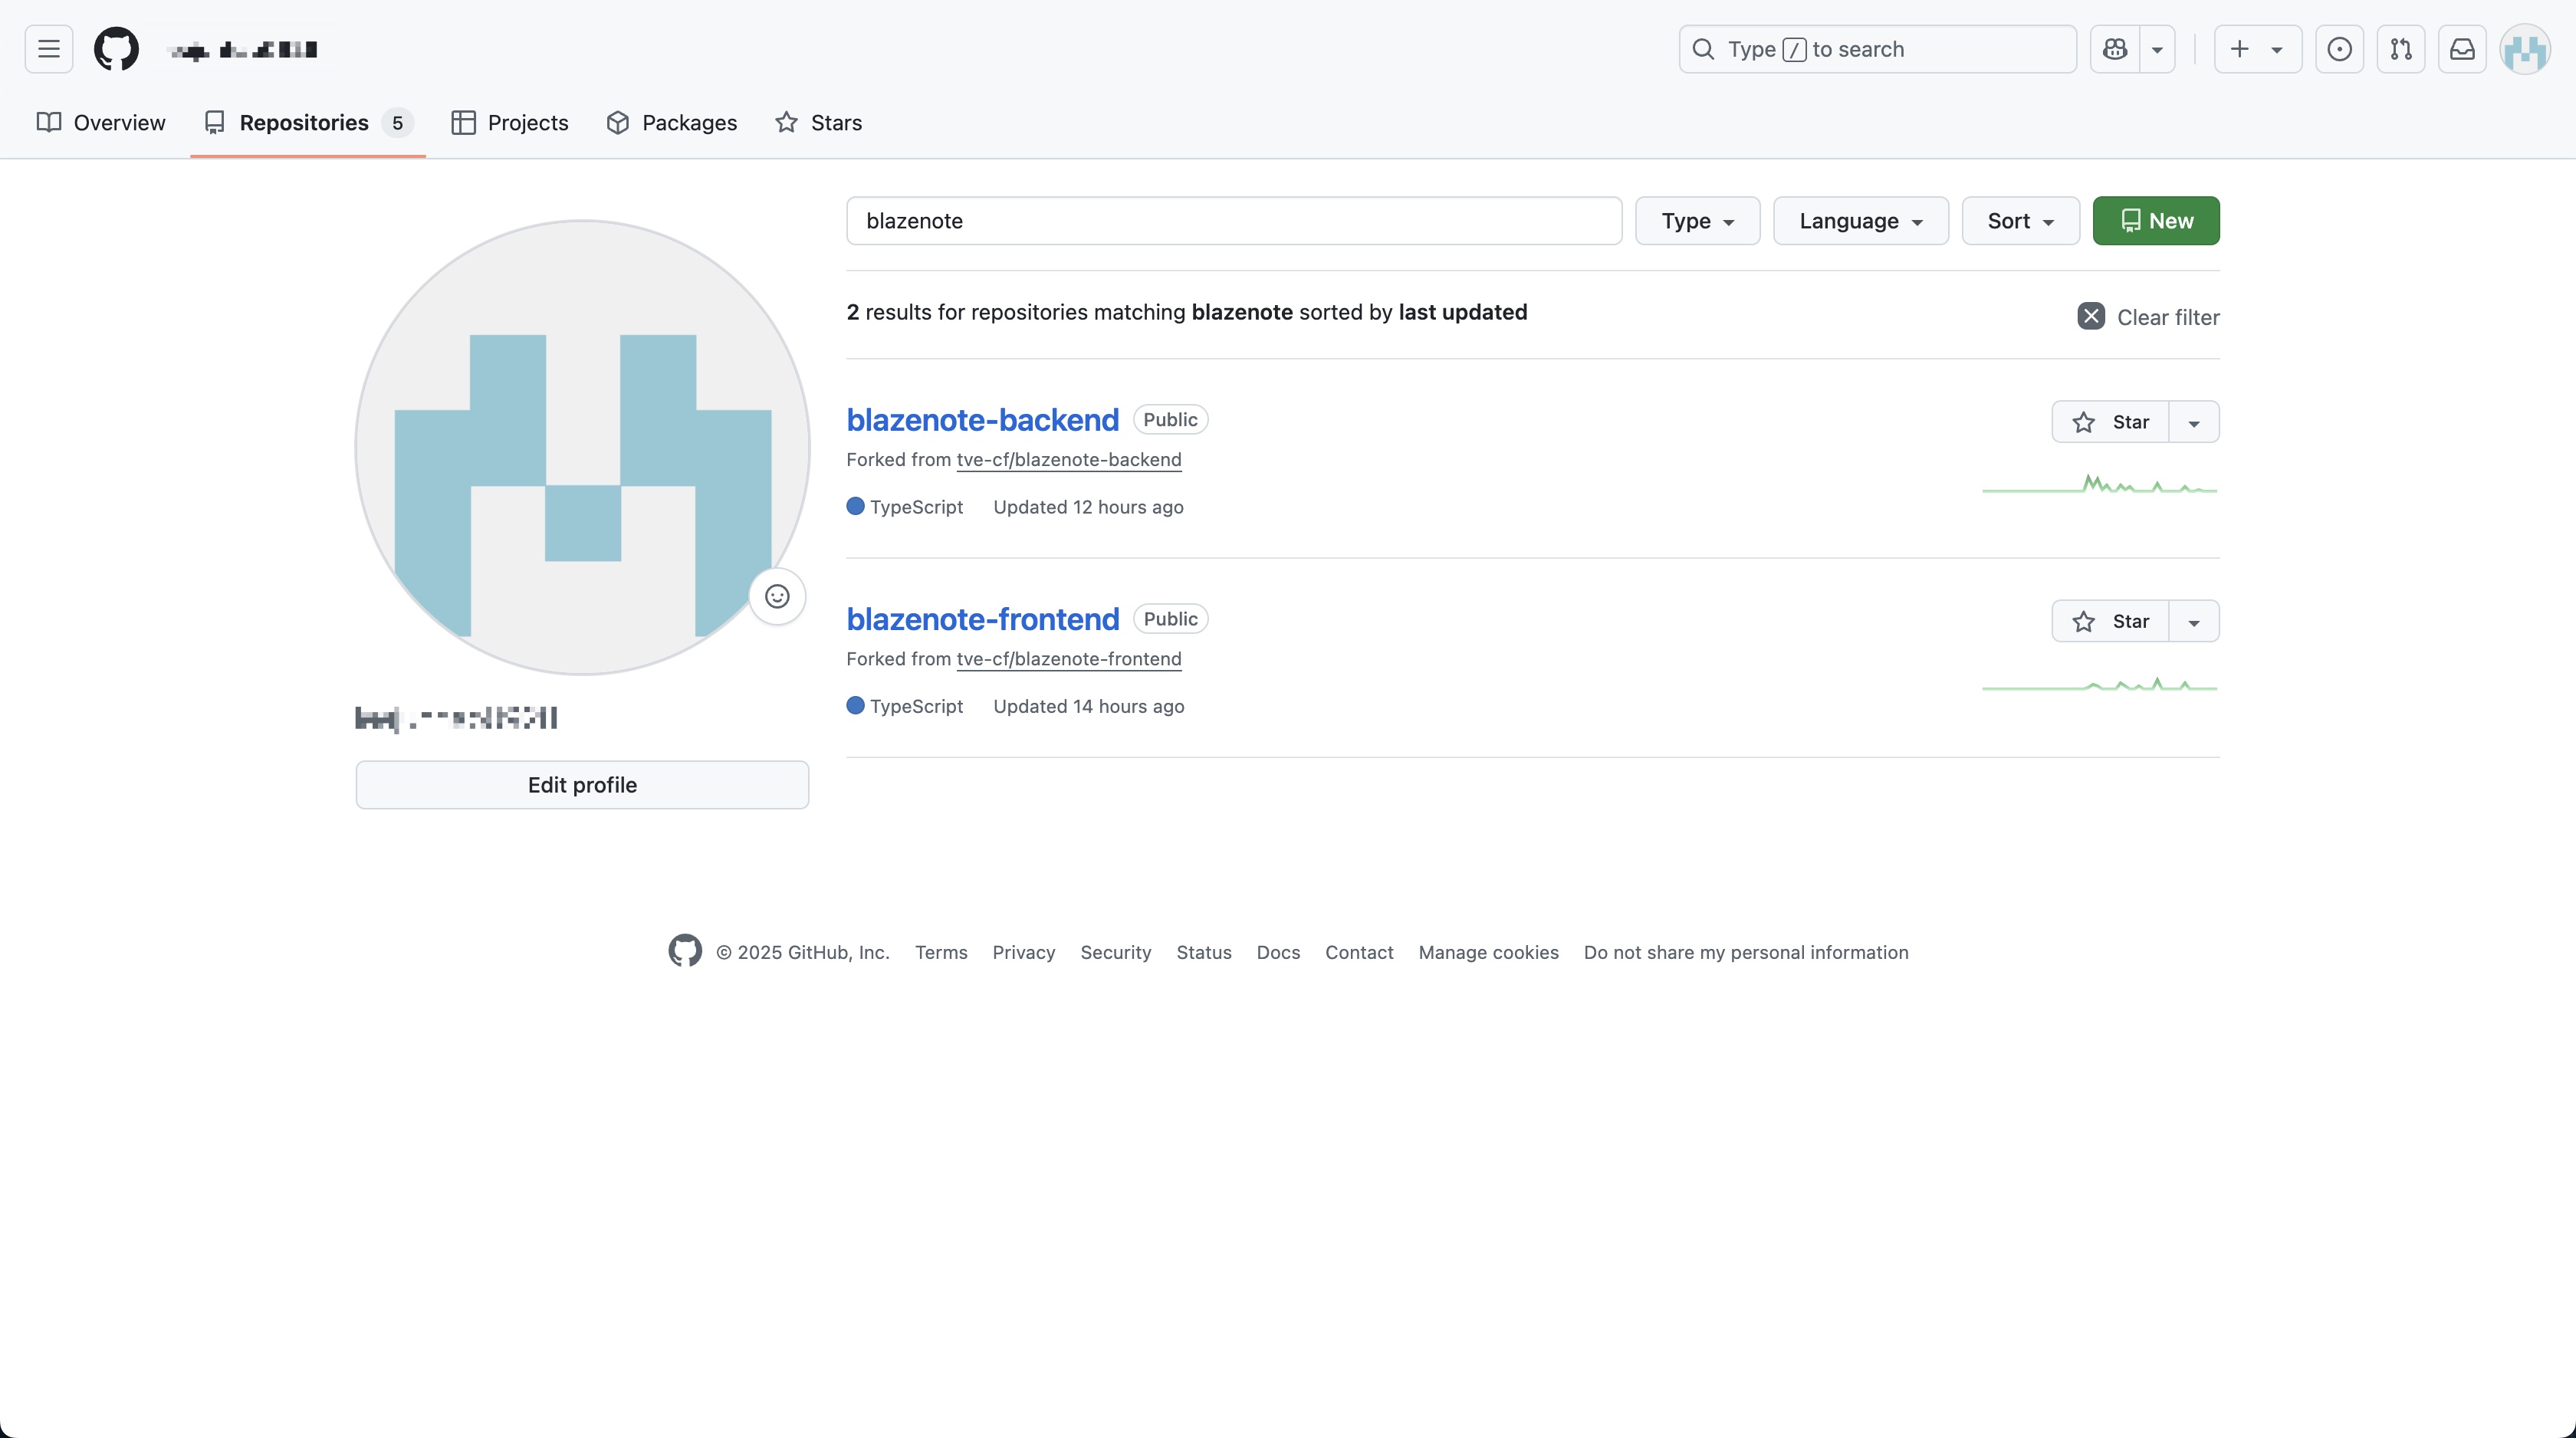
Verify Fork Success
After forking both repositories, verify they exist in your account:
- Go to your GitHub profile:
https://github.com/[YOUR-USERNAME] - Click on the "Repositories" tab
- You should see both:
blazenote-frontendblazenote-backend
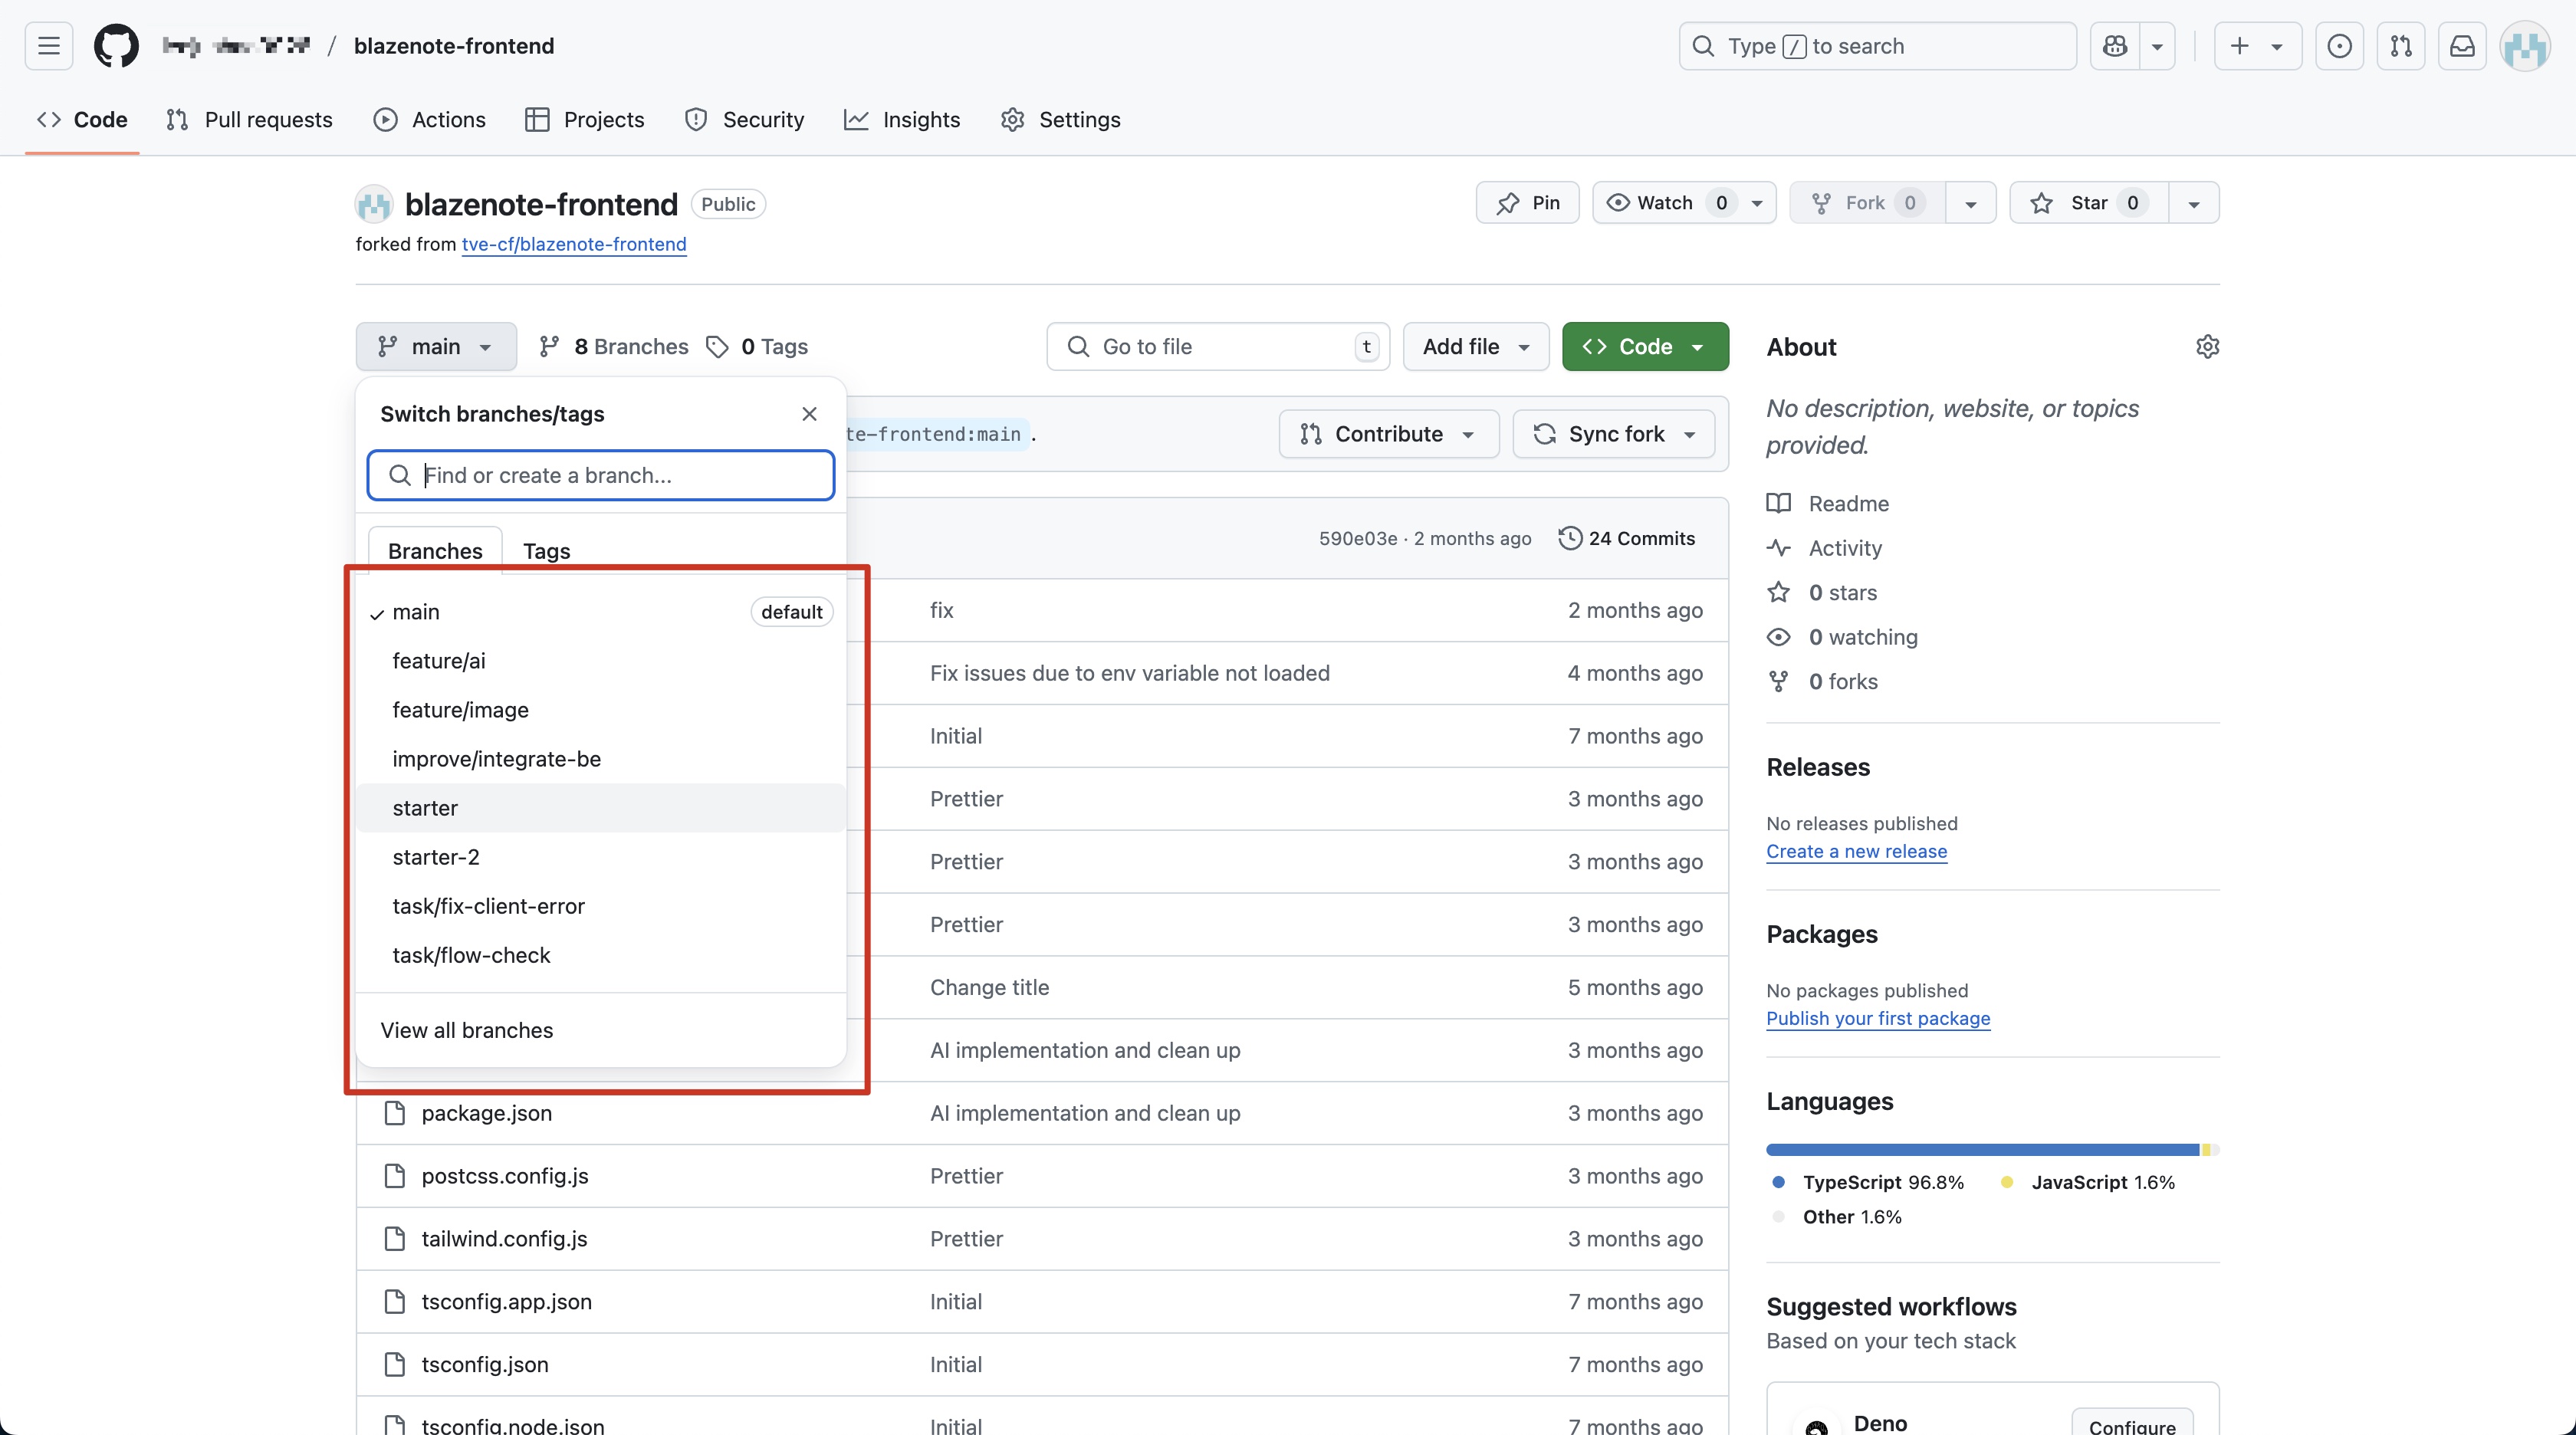
Verify branches exist:
- Click on the
blazenote-frontendrepository - Look for the branch dropdown (usually says "main")
- Click it to see all branches
- Confirm you see both:
mainandstarter - Repeat verification for
blazenote-backend
Step 2: Clone Repositories to Your Local Machine
What is cloning? Cloning downloads a copy of your GitHub repository to your local computer where you can edit the code.
Choose Your Workspace Directory
First, decide where you want to store your projects. We recommend creating a dedicated folder:
# Navigate to your home directory
cd ~

# Create a projects folder (if it doesn't exist)
mkdir -p projects

# Navigate into the projects folder
cd projects
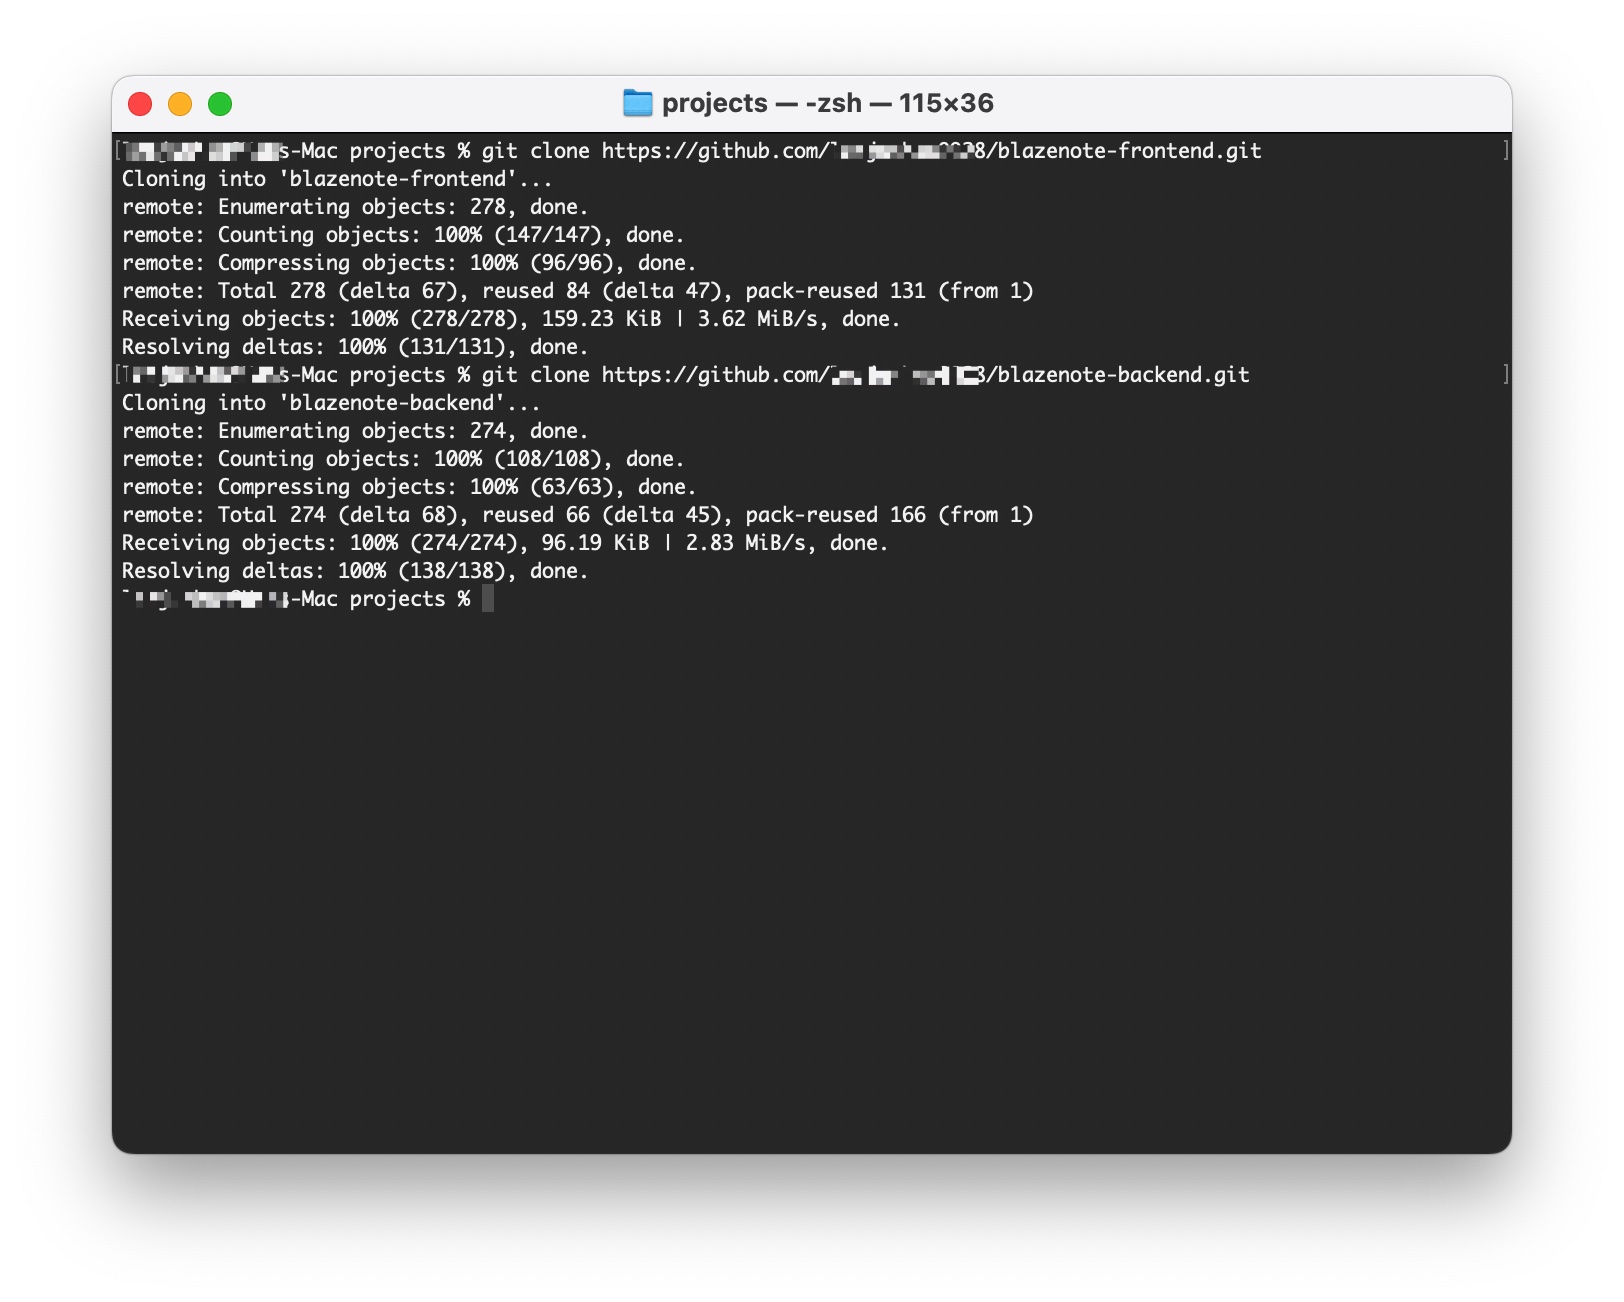
Clone the Frontend Repository
git clone https://github.com/[YOUR-USERNAME]/blazenote-frontend.git
⚠️ Replace [YOUR-USERNAME] with your actual GitHub username!
Example: If your username is "johndoe", the command would be:
git clone https://github.com/johndoe/blazenote-frontend.git
Clone the Backend Repository
git clone https://github.com/[YOUR-USERNAME]/blazenote-backend.git
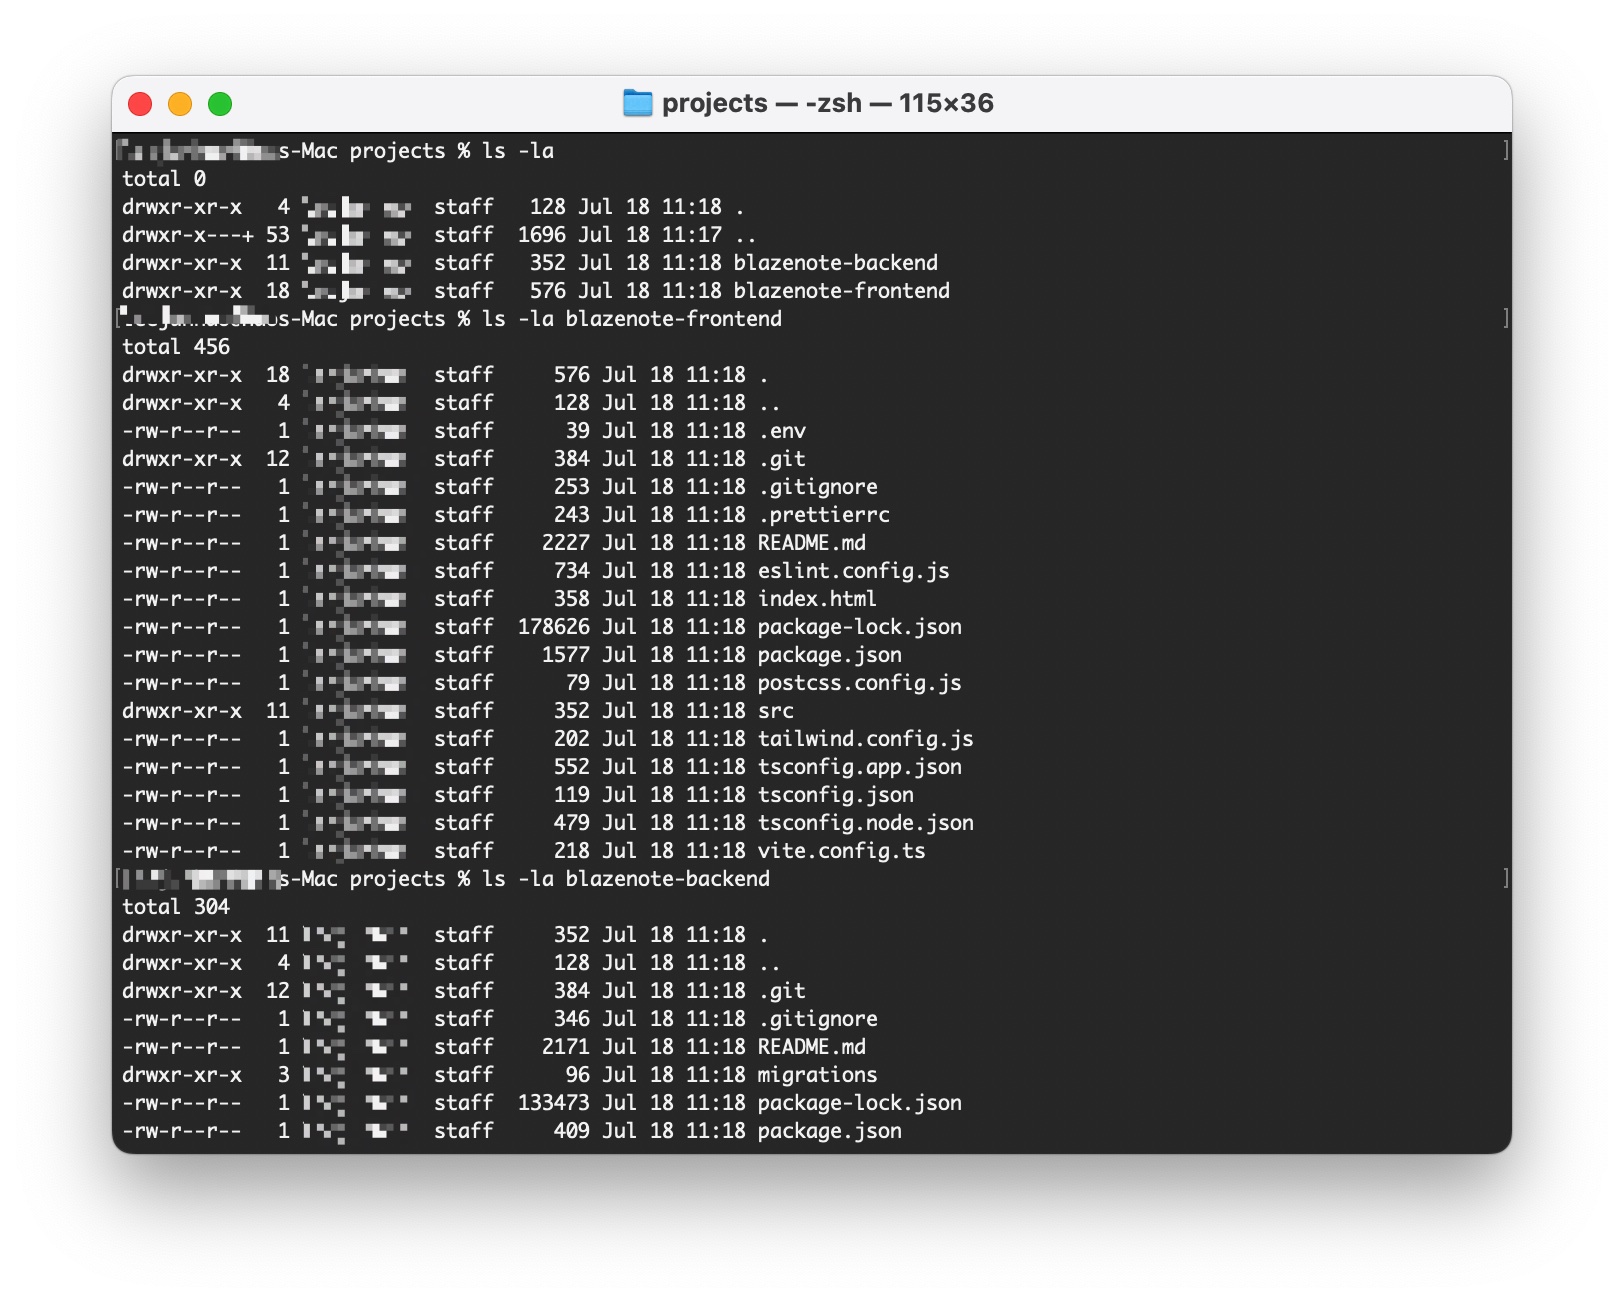
Verify Cloning Success
ls -la
You should see two directories:
blazenote-frontend/blazenote-backend/
Check repository contents:
# Check frontend structure
ls -la blazenote-frontend/

# Check backend structure
ls -la blazenote-backend/
Step 3: Switch to Working Branches
Why switch branches? The main branch contains the complete, finished application. The starter branch contains the basic setup where we'll begin building.
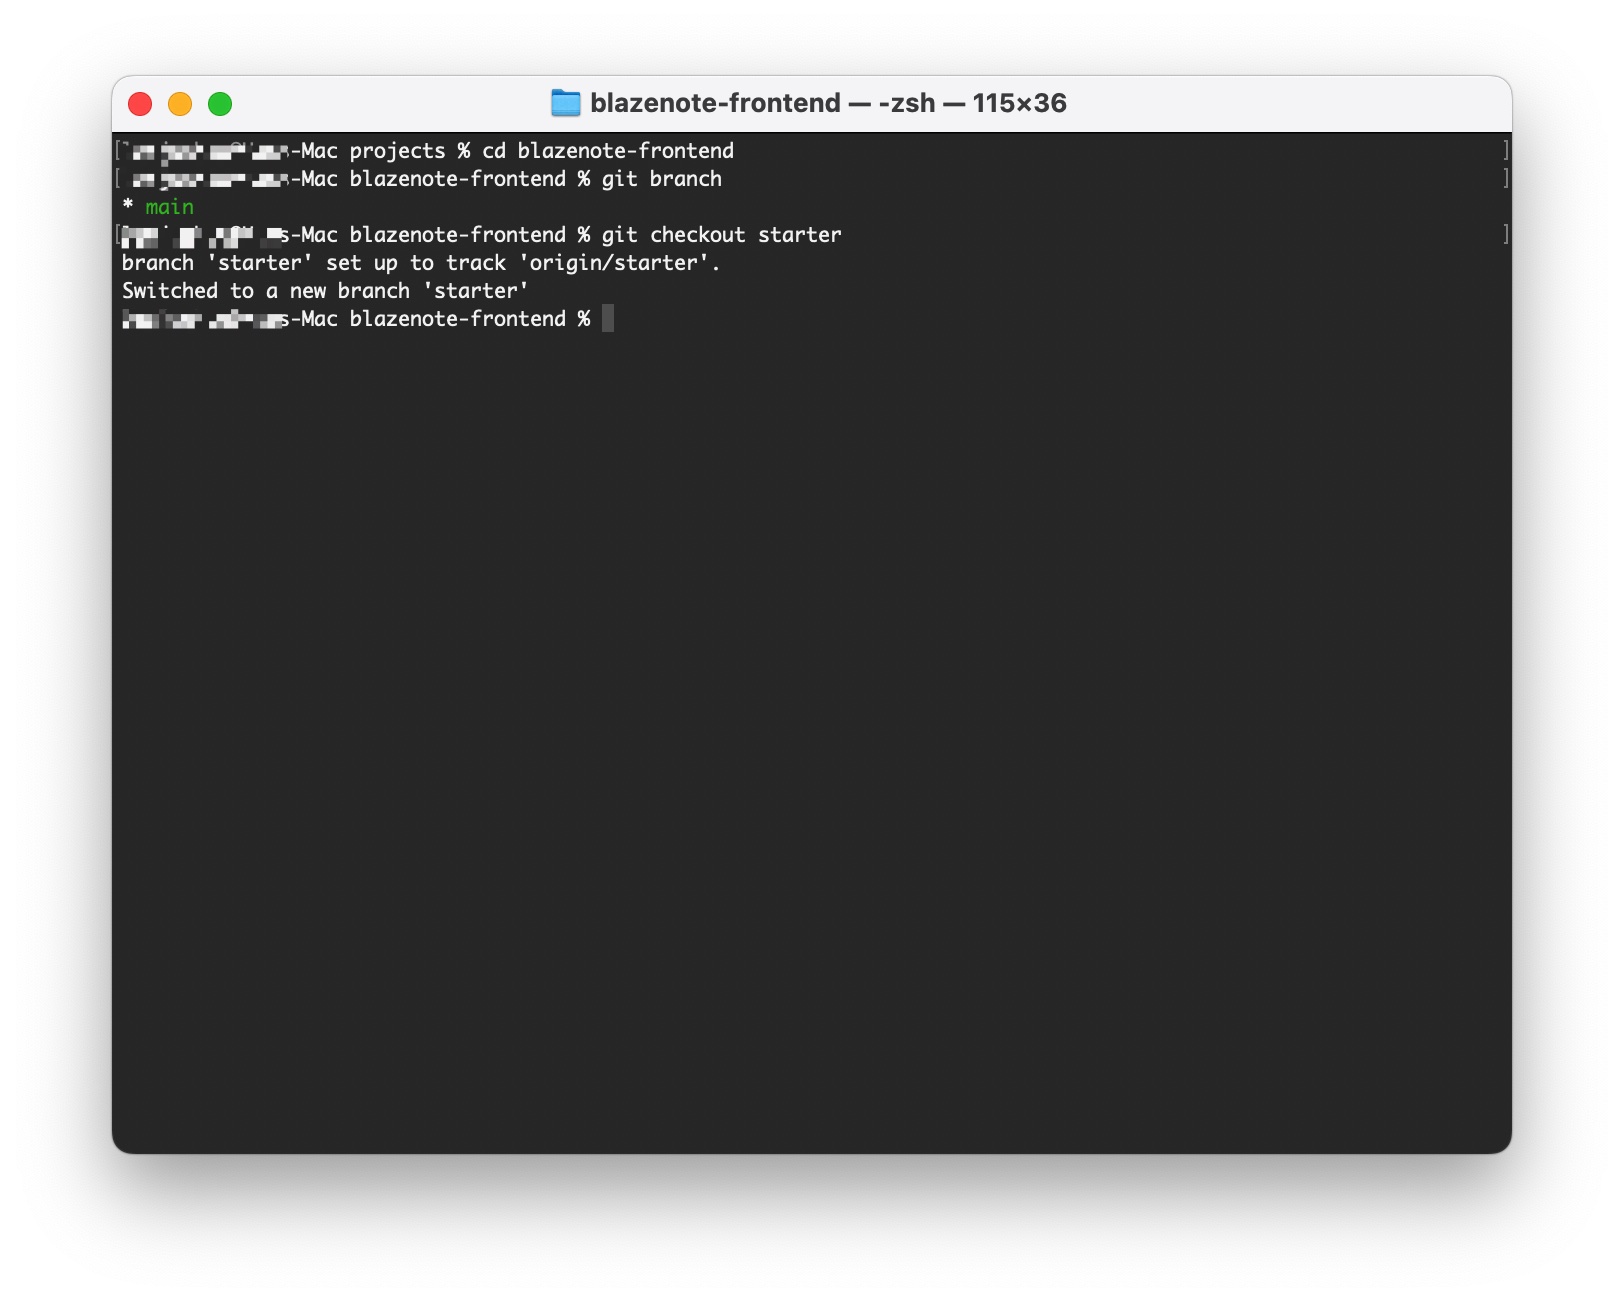
Switch Frontend Branch
Navigate to the frontend project:
cd blazenote-frontend
Check current branch:
git branch
You should see you're on the main branch (indicated by an asterisk *).
Switch to starter branch:
git checkout starter
Verify the switch:
git branch
Now you should see an asterisk * next to starter.
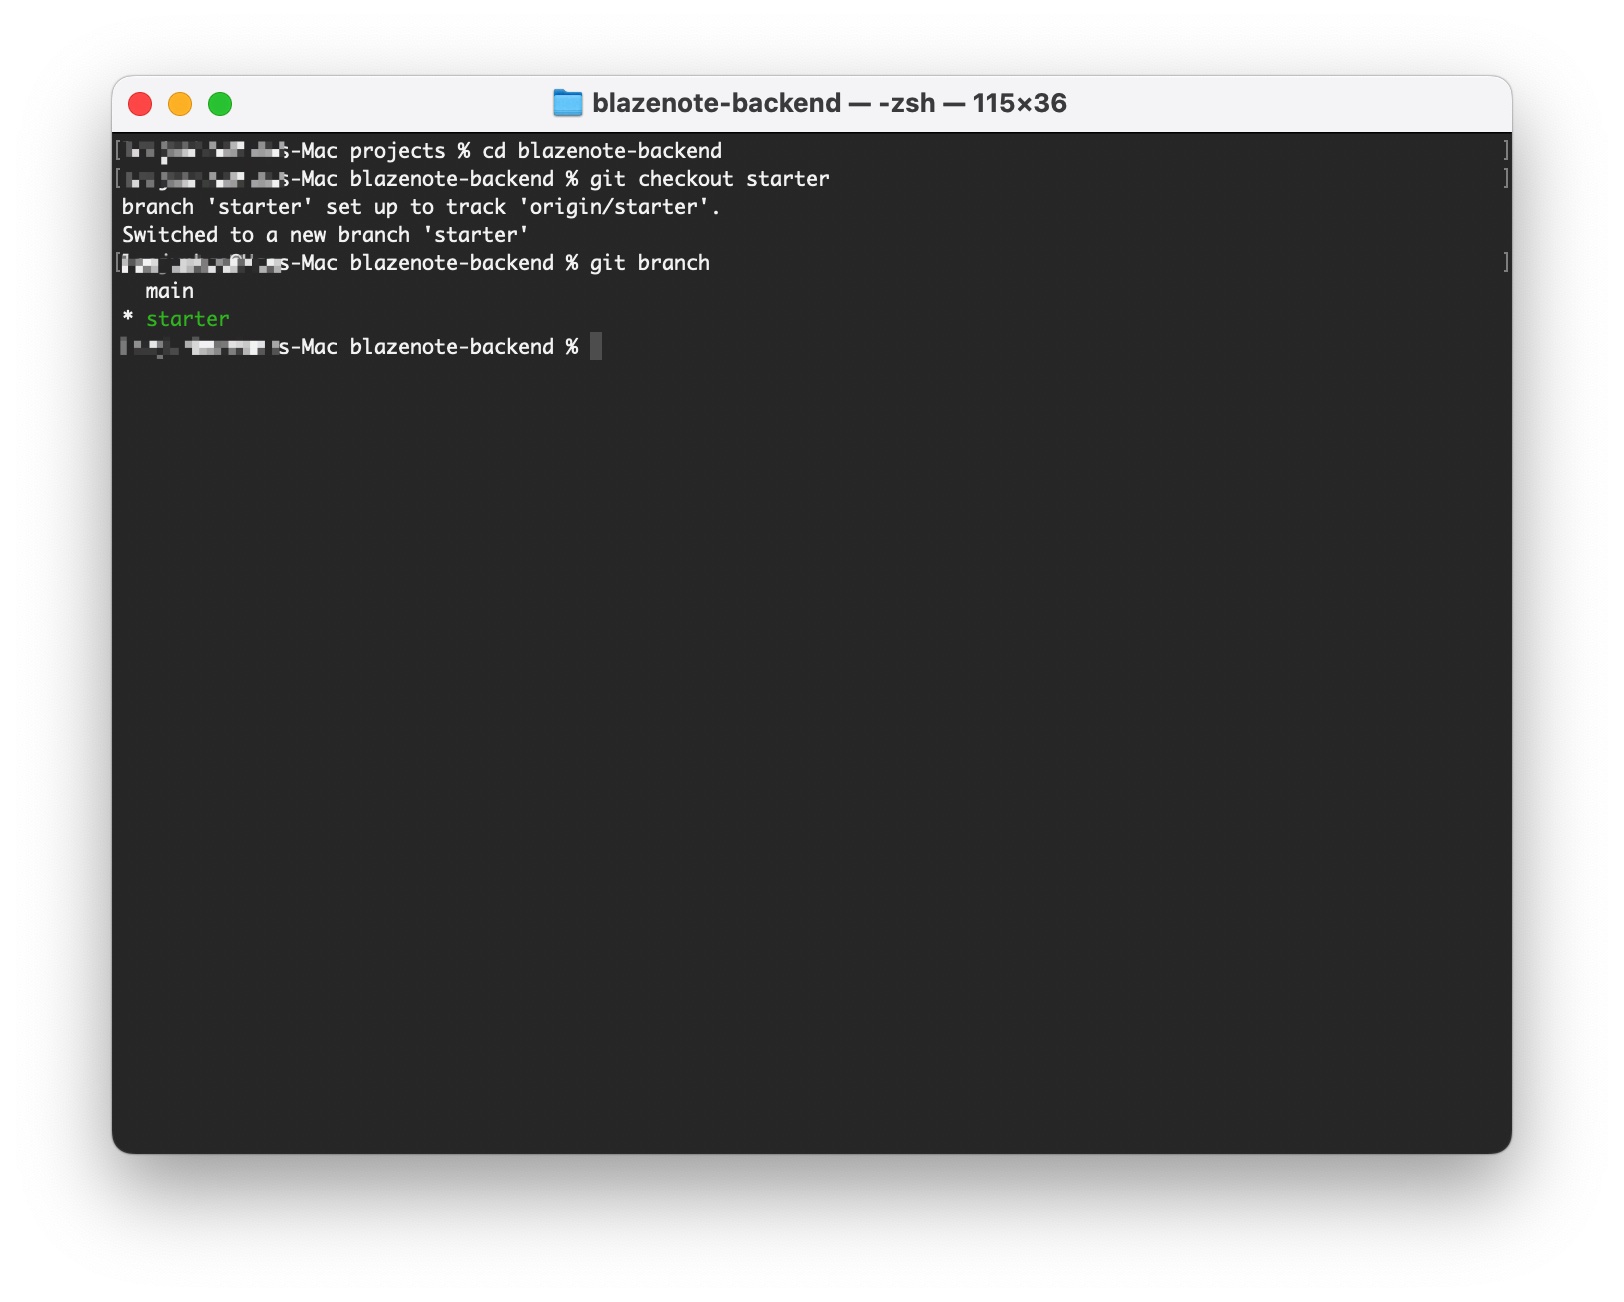
Switch Backend Branch
Navigate to the backend project:
cd ../blazenote-backend
Switch to starter branch:
git checkout starter
Verify backend branch switch:
git branch
You should see * starter indicating you're on the correct branch.
Step 4: Understanding Branch Management
Branch Purposes
mainbranch: Complete, production-ready application (reference only)starterbranch: Basic setup with minimal functionality (your starting point)- Feature branches: Where you'll work on specific features (you'll create these)
Branch Protection
- The
mainbranch is protected - you cannot push directly to it - All changes must go through Pull Requests
- This simulates real-world development workflows
Working with Branches
As you progress through the workshop:
- Work on the
starterbranch or create feature branches fromstarter - Make your changes in your working branches
- Test your changes locally
- Push branches to your fork
- Create Pull Requests if needed
Step 5: Repository Verification
Let's verify everything is set up correctly:
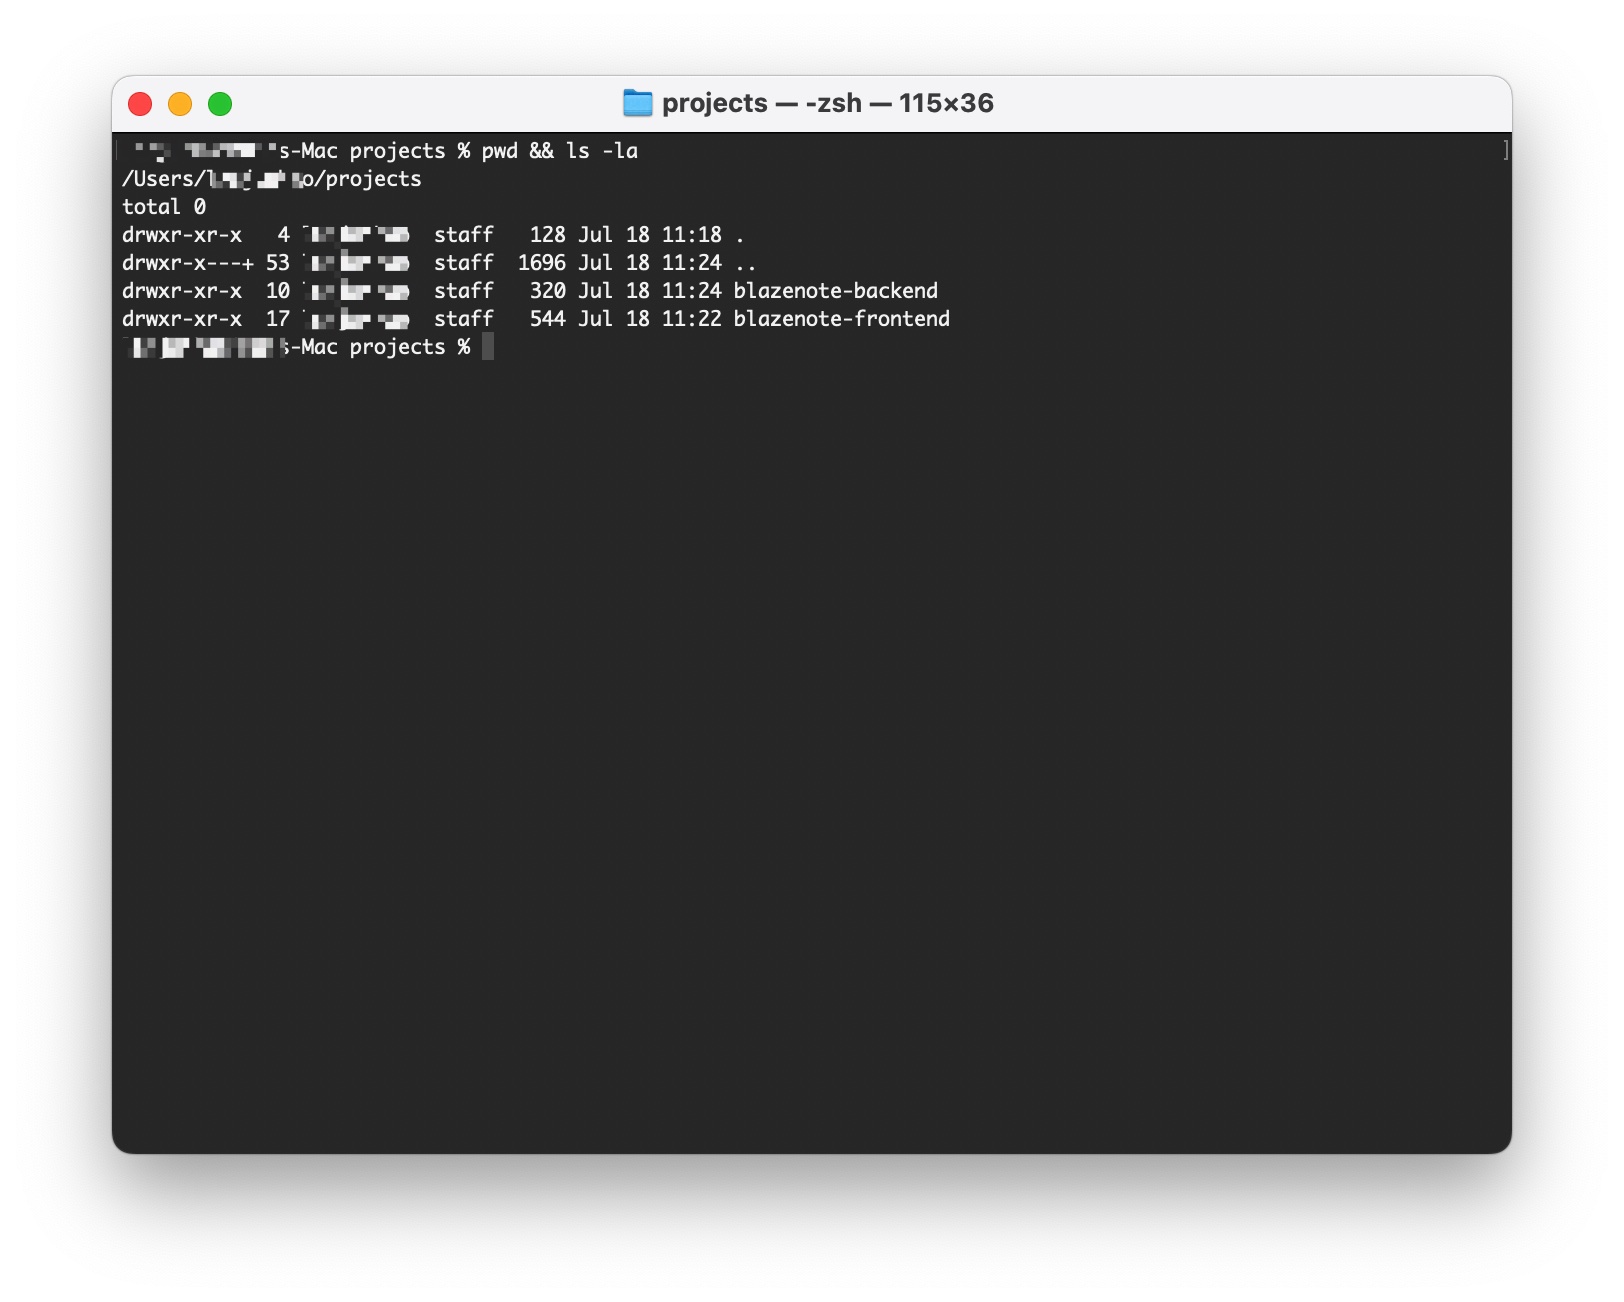
Check Repository Structure
# Verify you're in the right location
pwd
# Should show something like: /Users/[username]/projects

# List projects
ls -la
# Should show: blazenote/ and blazenote-backend/
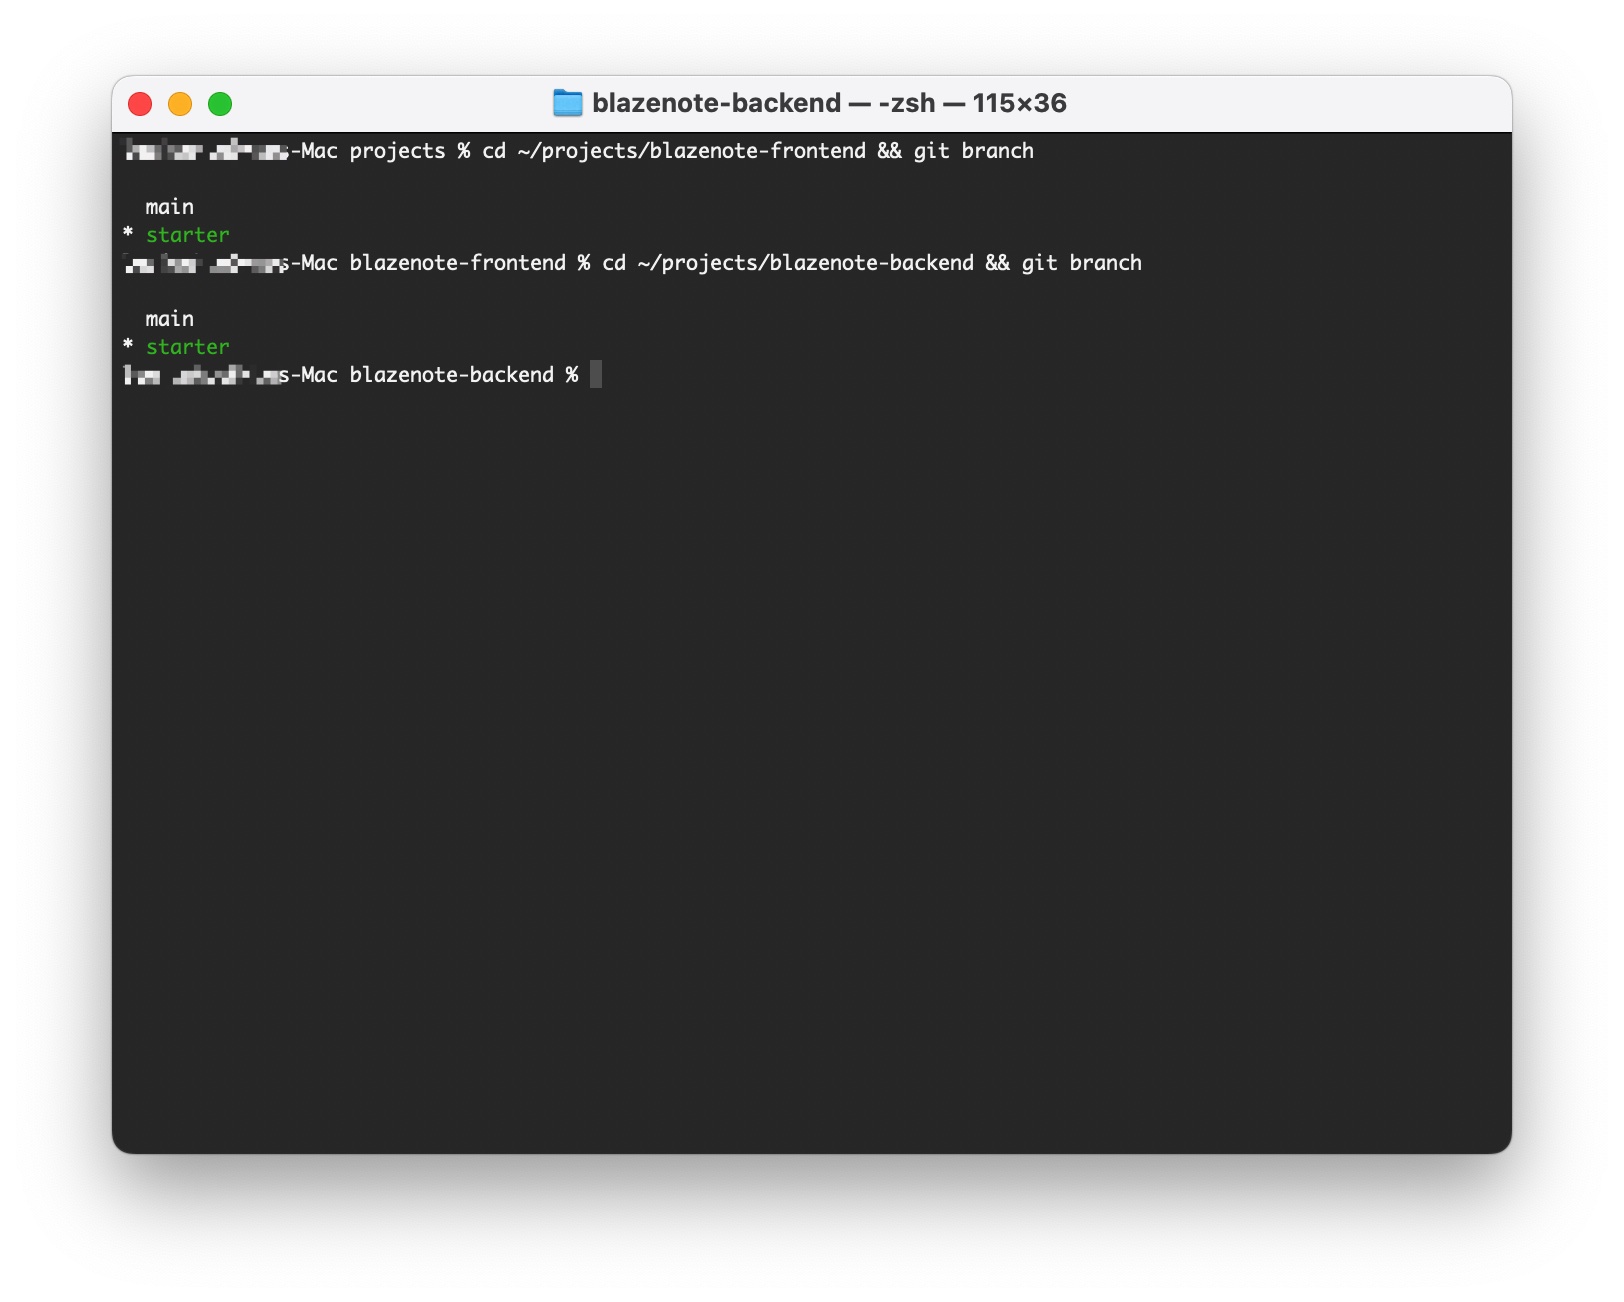
Check Branches
# Check frontend branch
cd ~/projects/blazenote-frontend && git branch
# Should show: * starter

# Check backend branch
cd ~/projects/blazenote-backend && git branch
# Should show: * starter
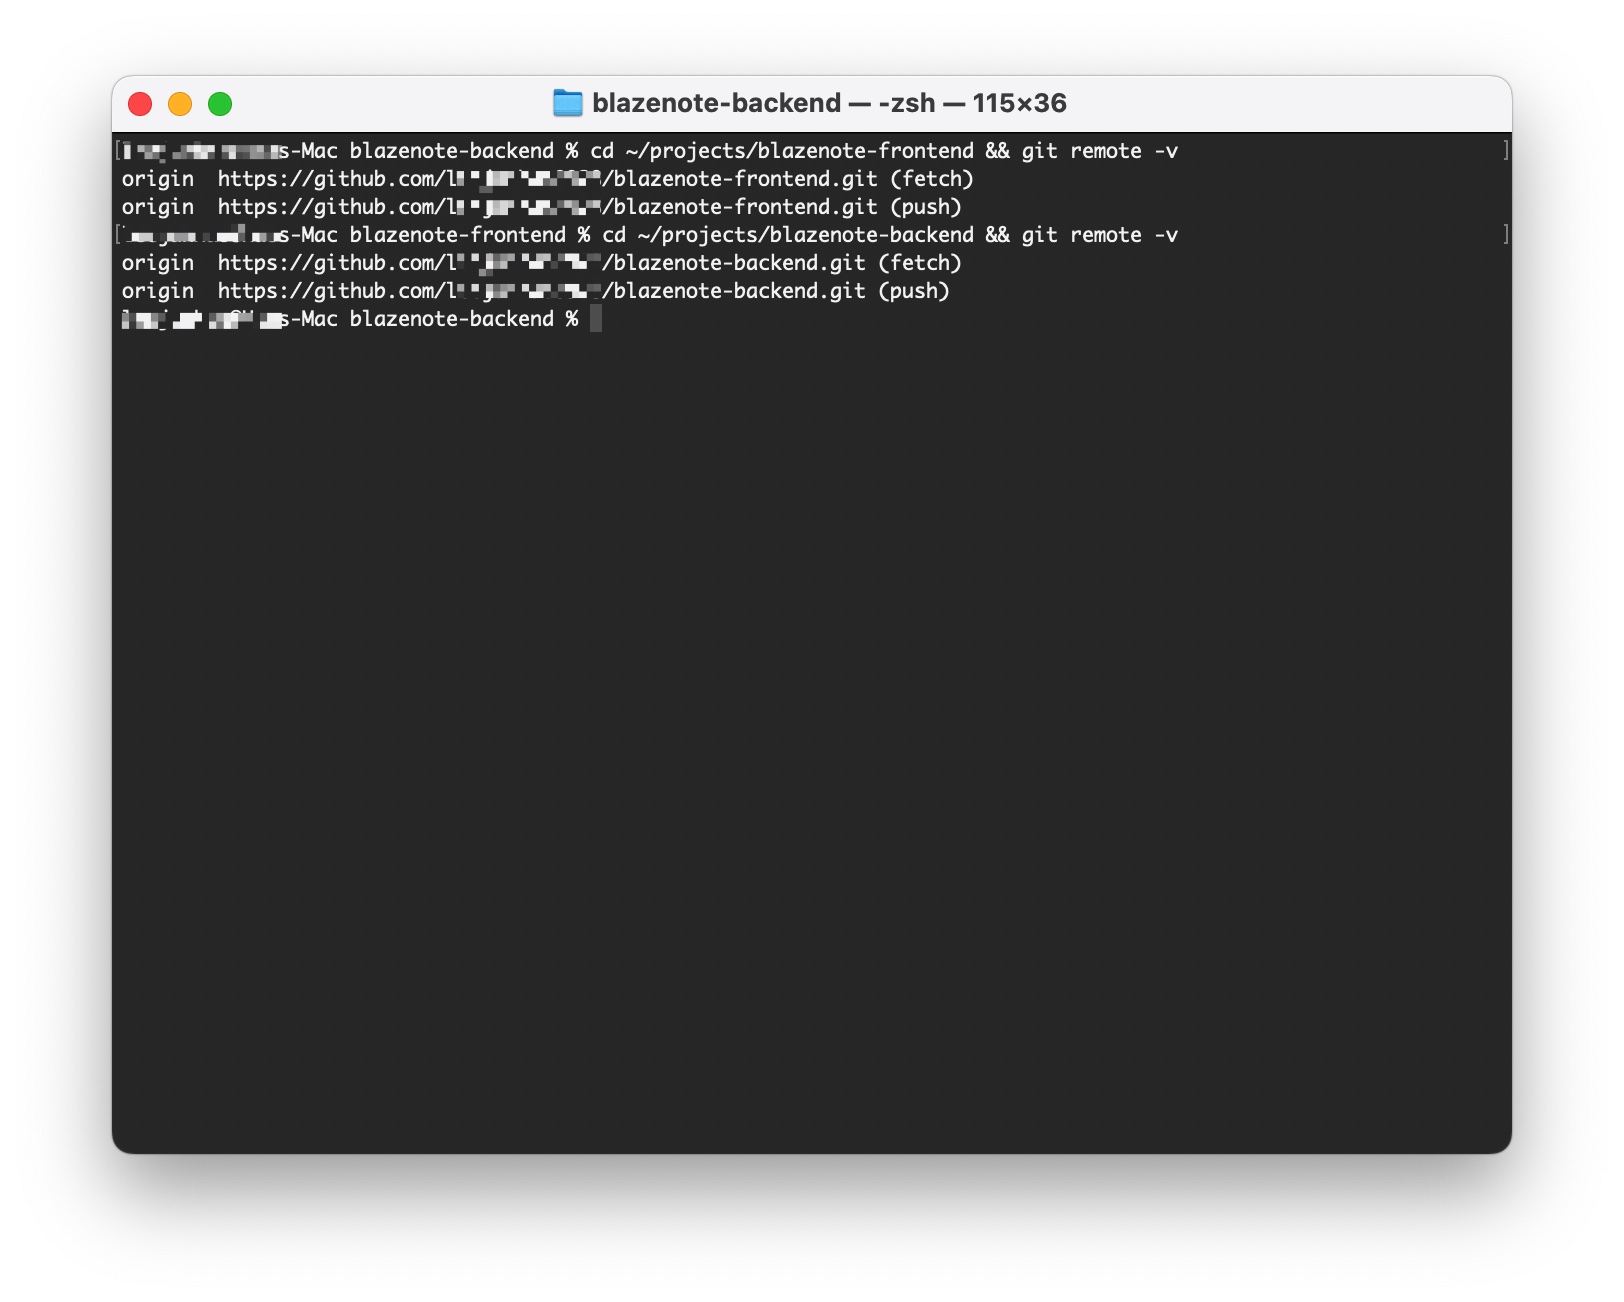
Check Remote Origins
# Check frontend remote
cd ~/projects/blazenote-frontend
git remote -v
# Should show your GitHub fork URLs

# Check backend remote
cd ~/projects/blazenote-backend
git remote -v
# Should show your GitHub fork URLs
Repository Setup Checklist
Before proceeding, verify all items below:
Repository Forking
-
blazenote-frontendrepository forked to your account -
blazenote-backendrepository forked to your account - Both repositories contain
mainandstarterbranches - Both repositories visible in your GitHub account
Local Cloning
- Both repositories cloned to local machine
- Repositories located in organized directory structure
- Can navigate to both project directories
Branch Management
- Currently on
starterbranch in both projects - Can see branch status with
git branch - Understand the purpose of different branches
Remote Configuration
- Git remotes properly configured
- Can see remote URLs with
git remote -v - SSH or HTTPS authentication working
What's Next?
Perfect! Your repositories are now set up and ready for development.
Next Step: Environment Configuration - Install project dependencies and configure your development environment.
Common Git Commands
Here are some useful Git commands you'll use throughout the workshop:
# Check current branch
git branch

# Switch branches
git checkout [branch-name]

# Check repository status
git status

# View commit history
git log --oneline

# Check remote repositories
git remote -v

# Pull latest changes
git pull origin starter
Need Help?
Repository Issues:
- Ensure you used your correct GitHub username in clone URLs
- Verify repositories were successfully forked
- Check internet connection for cloning
Branch Issues:
- Use
git branch -ato see all available branches - Ensure you unchecked "Copy the main branch only" during forking
Permission Issues:
- Set up SSH keys for easier authentication
- Use personal access tokens if needed
- Check the Troubleshooting Guide
Great job! Your code repositories are ready for development! 🎯