Frontend Deployment
Overview
In this module, you'll deploy the BlazeNote frontend application using Cloudflare Pages. As outlined in our Getting Started guide, the frontend serves as the user interface layer of our serverless architecture:
Frontend Architecture Components:
- Framework: React 18 with TypeScript for type-safe development
- Styling: Tailwind CSS for modern, responsive design with utility-first approach
- Build Tool: Vite for fast development and optimized production builds
- Rich Text Editor: TipTap (ProseMirror-based) for advanced note editing capabilities
- State Management: React Context API for global state management
- Deployment: Cloudflare Pages with automatic Git-based deployments
This deployment establishes your note-taking application's user interface, providing a modern, responsive web app that integrates seamlessly with your Cloudflare Workers backend. The frontend includes features like rich text editing, voice transcription, AI-powered text processing, and file upload capabilities.
Deployment Methods
This module covers two deployment approaches:
- Git-based Deployment (Recommended): Automated deployment through Cloudflare Pages
- CLI Deployment: Manual deployment using Wrangler CLI
Both methods will result in your frontend being available at a global CDN URL: https://blazenote-frontend.<your-pages-domain>.pages.dev
Steps
1. Install Dependencies and Test Locally
Before deploying to production, let's ensure your frontend works correctly in your local development environment.
Navigate to Frontend Project
First, ensure you have the frontend repository set up:
If you're not sure how to open your terminal, refer to our Prerequisites Tools guide for detailed instructions on your operating system.
# Clone your forked repository
git clone https://github.com/YOUR_USERNAME/blazenote-frontend.git
cd blazenote-frontend

# Switch to the starter branch (workshop environment)
git checkout starter

# Or if working from ~/projects directory
cd ~/projects/blazenote-frontend
Install Dependencies
npm install
What this installs:
- React 18: Modern React framework with concurrent features
- TypeScript: Type-safe JavaScript development
- Vite: Fast build tool optimized for modern web development
- TipTap: Rich text editor with ProseMirror foundation
- Tailwind CSS: Utility-first CSS framework
- Lucide React: Modern icon library (following your preference [[memory:2780798]])
- ESLint & Prettier: Code quality and formatting tools
Expected output:
added 1337 packages, and audited 1338 packages in 45s

245 packages are looking for funding
  run `npm fund` for details

found 0 vulnerabilities
Verify Installation
Check that essential files exist:
ls -la
Required files you should see:
node_modules/directory (dependencies)package-lock.jsonfile (dependency lock)vite.config.tsfile (Vite configuration)src/directory (application source code)public/directory (static assets)
Test Development Server
Start the development server:
npm run dev
Expected output:
  VITE v5.0.8  ready in 1230 ms

  ➜  Local:   http://localhost:5173/
  ➜  Network: use --host to expose
  ➜  press h + enter to show help
Verify Application Functionality
Test the frontend in your browser:
- Open http://localhost:5173
- You should see the BlazeNote application interface
- Test creating a new note
- Test the rich text editor functionality
- Verify the interface is responsive
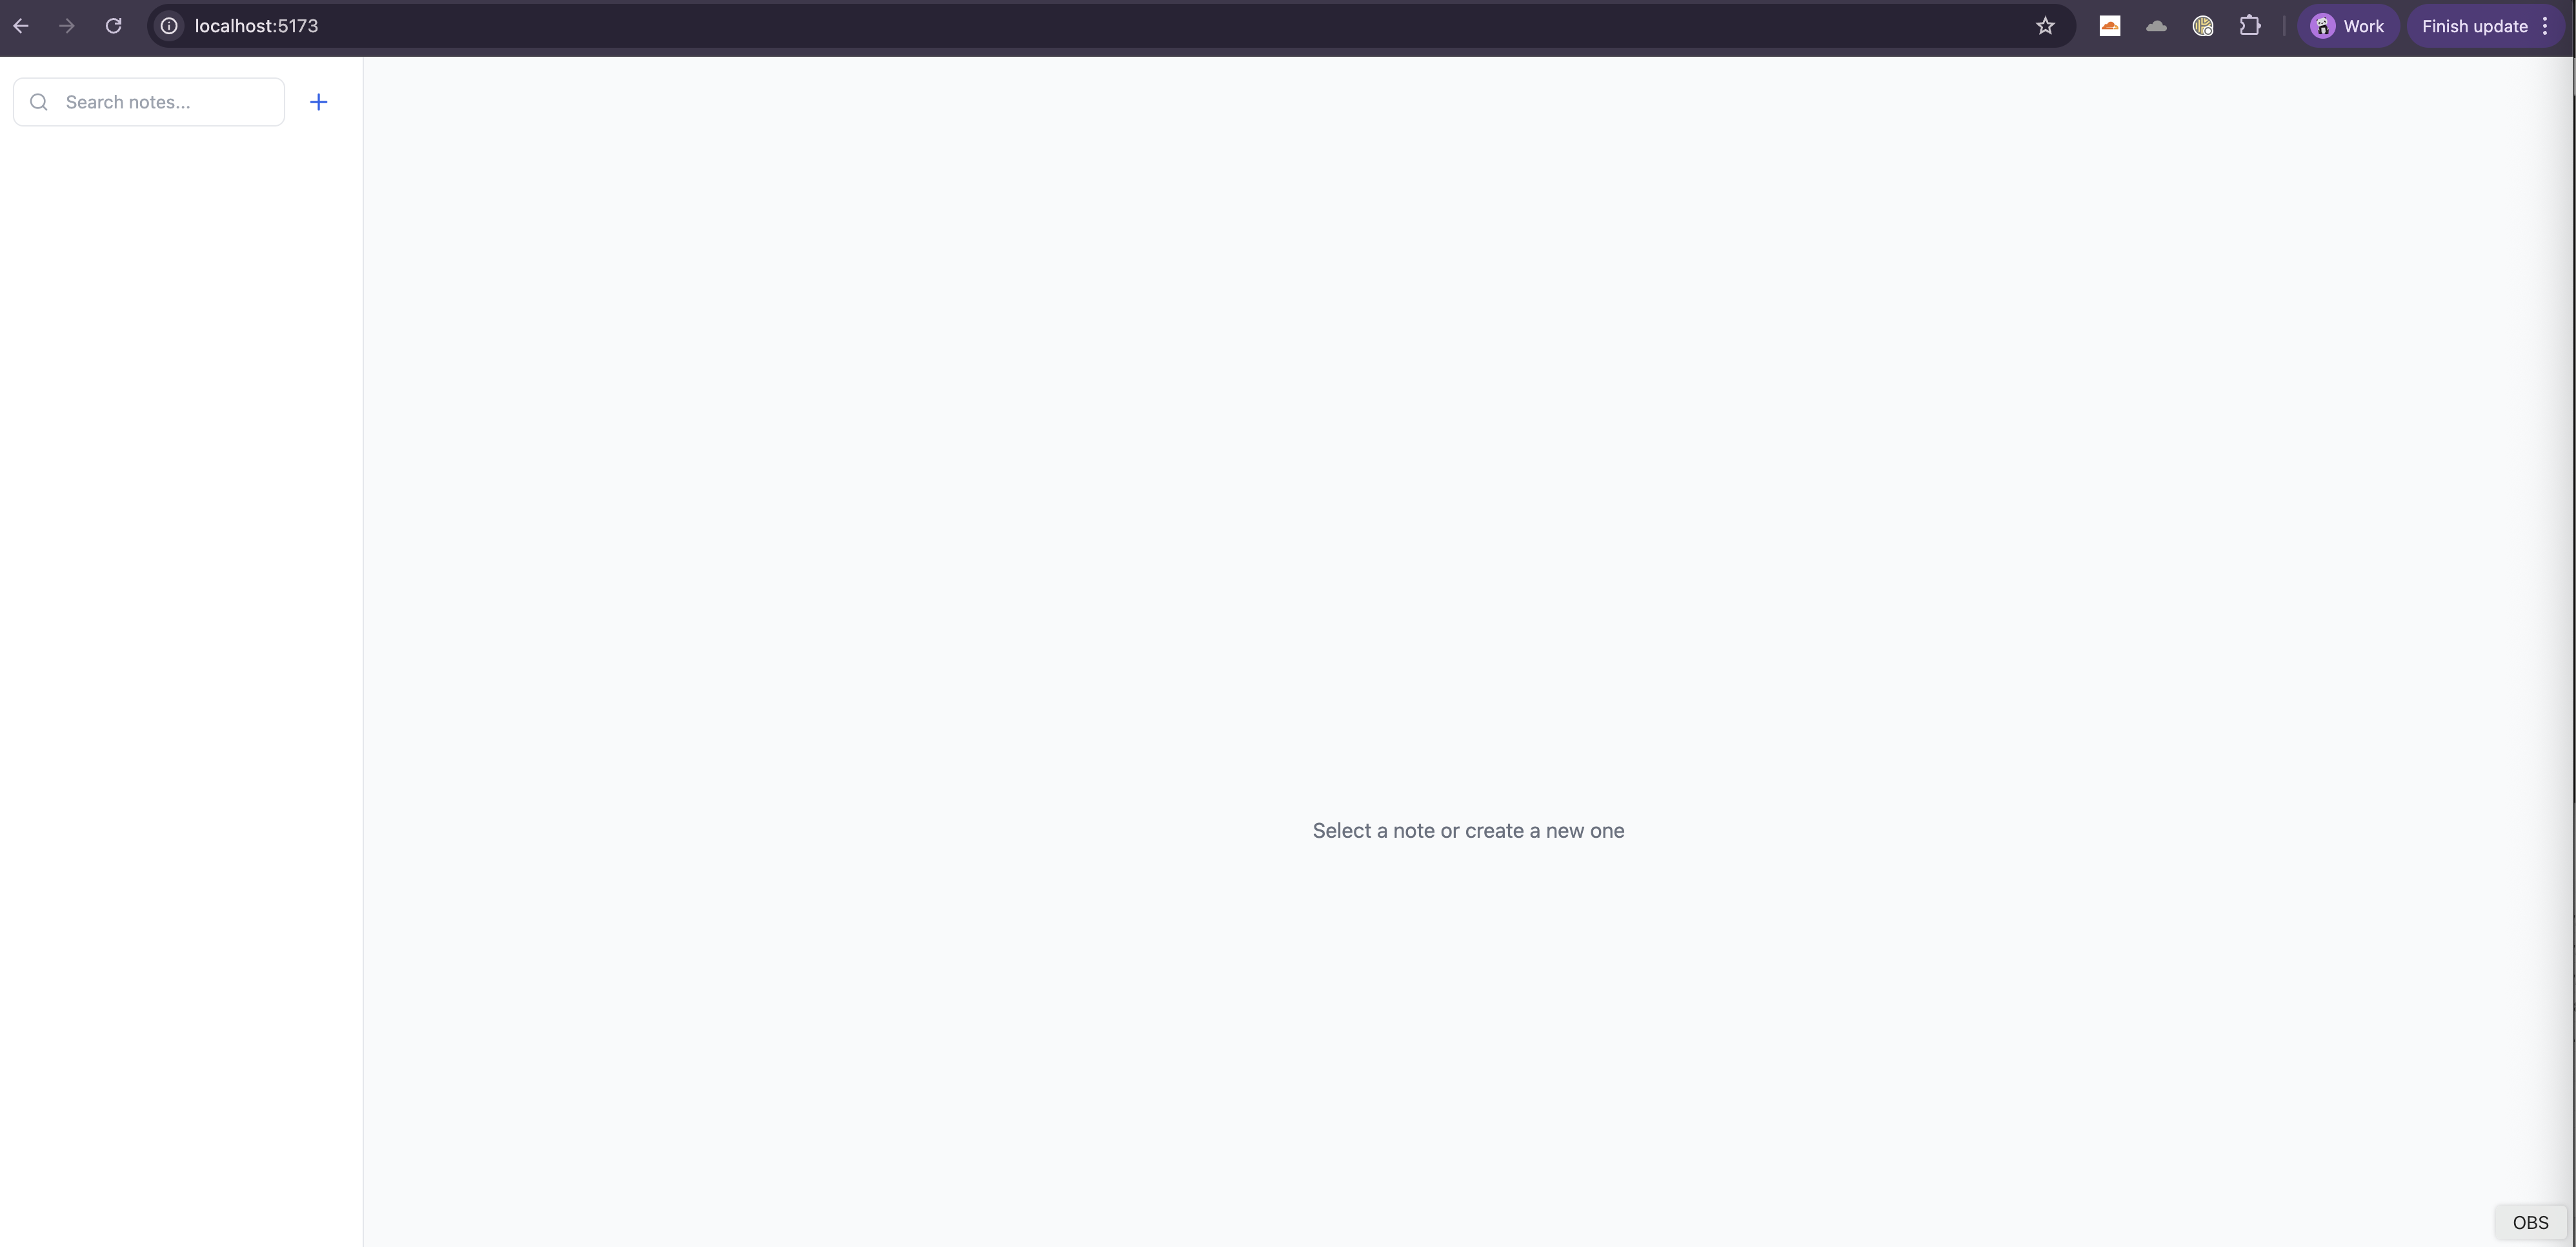
Expected features you should see:
- Clean, modern interface with note list sidebar
- Rich text editor with formatting toolbar
- Search functionality in the note list
- Responsive design that works on mobile
Stop the development server:
Press Ctrl + C in the terminal
2. Deploy Using Git-based Deployment (Recommended)
This method automatically deploys your frontend whenever you push changes to your repository, providing continuous deployment capabilities.
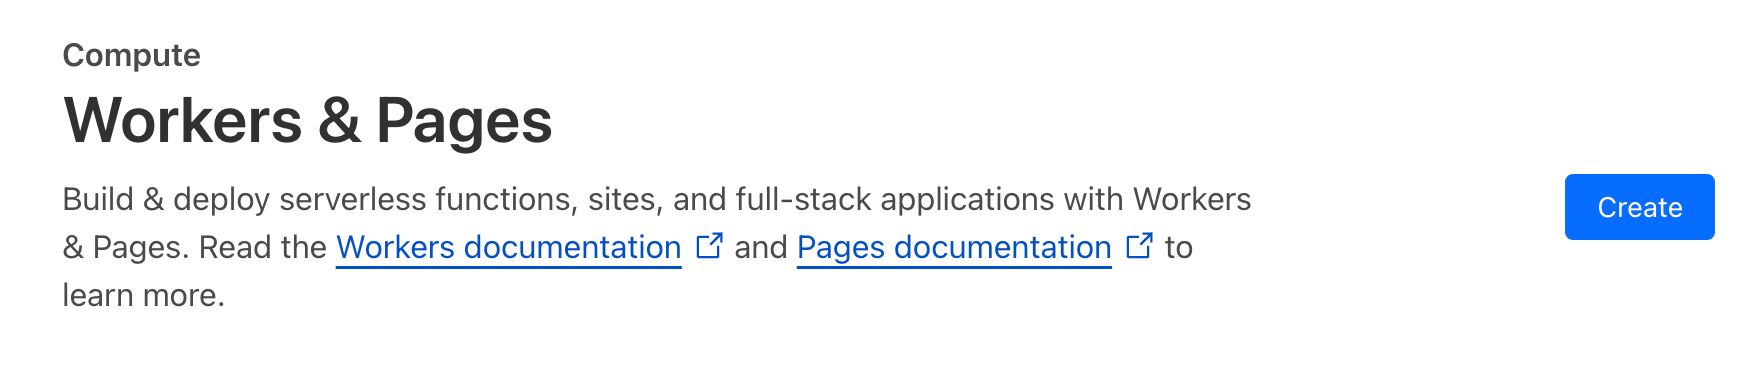
Access Cloudflare Dashboard
- Navigate to Cloudflare Dashboard → Compute (Workers) → Workers & Pages
- Click Create
Connect Repository
- Go to Pages tab → click Get Started on Import an existing Git repository
- Select your GitHub account → Select a repository:
- Choose
blazenote-frontendrepository - Connect your GitHub account
- Select the repository
- Choose
Configure Build Settings
Use the following configuration carefully:
Project Settings:
- Project name:
blazenote-frontend - Production branch:
starter
Build Configuration:
- Framework preset: None (Vite will handle the build)
- Build command:
npm install && npm run build - Build output directory:
dist
Environment Variables (Important):
- Leave empty for now - we'll configure these after deployment
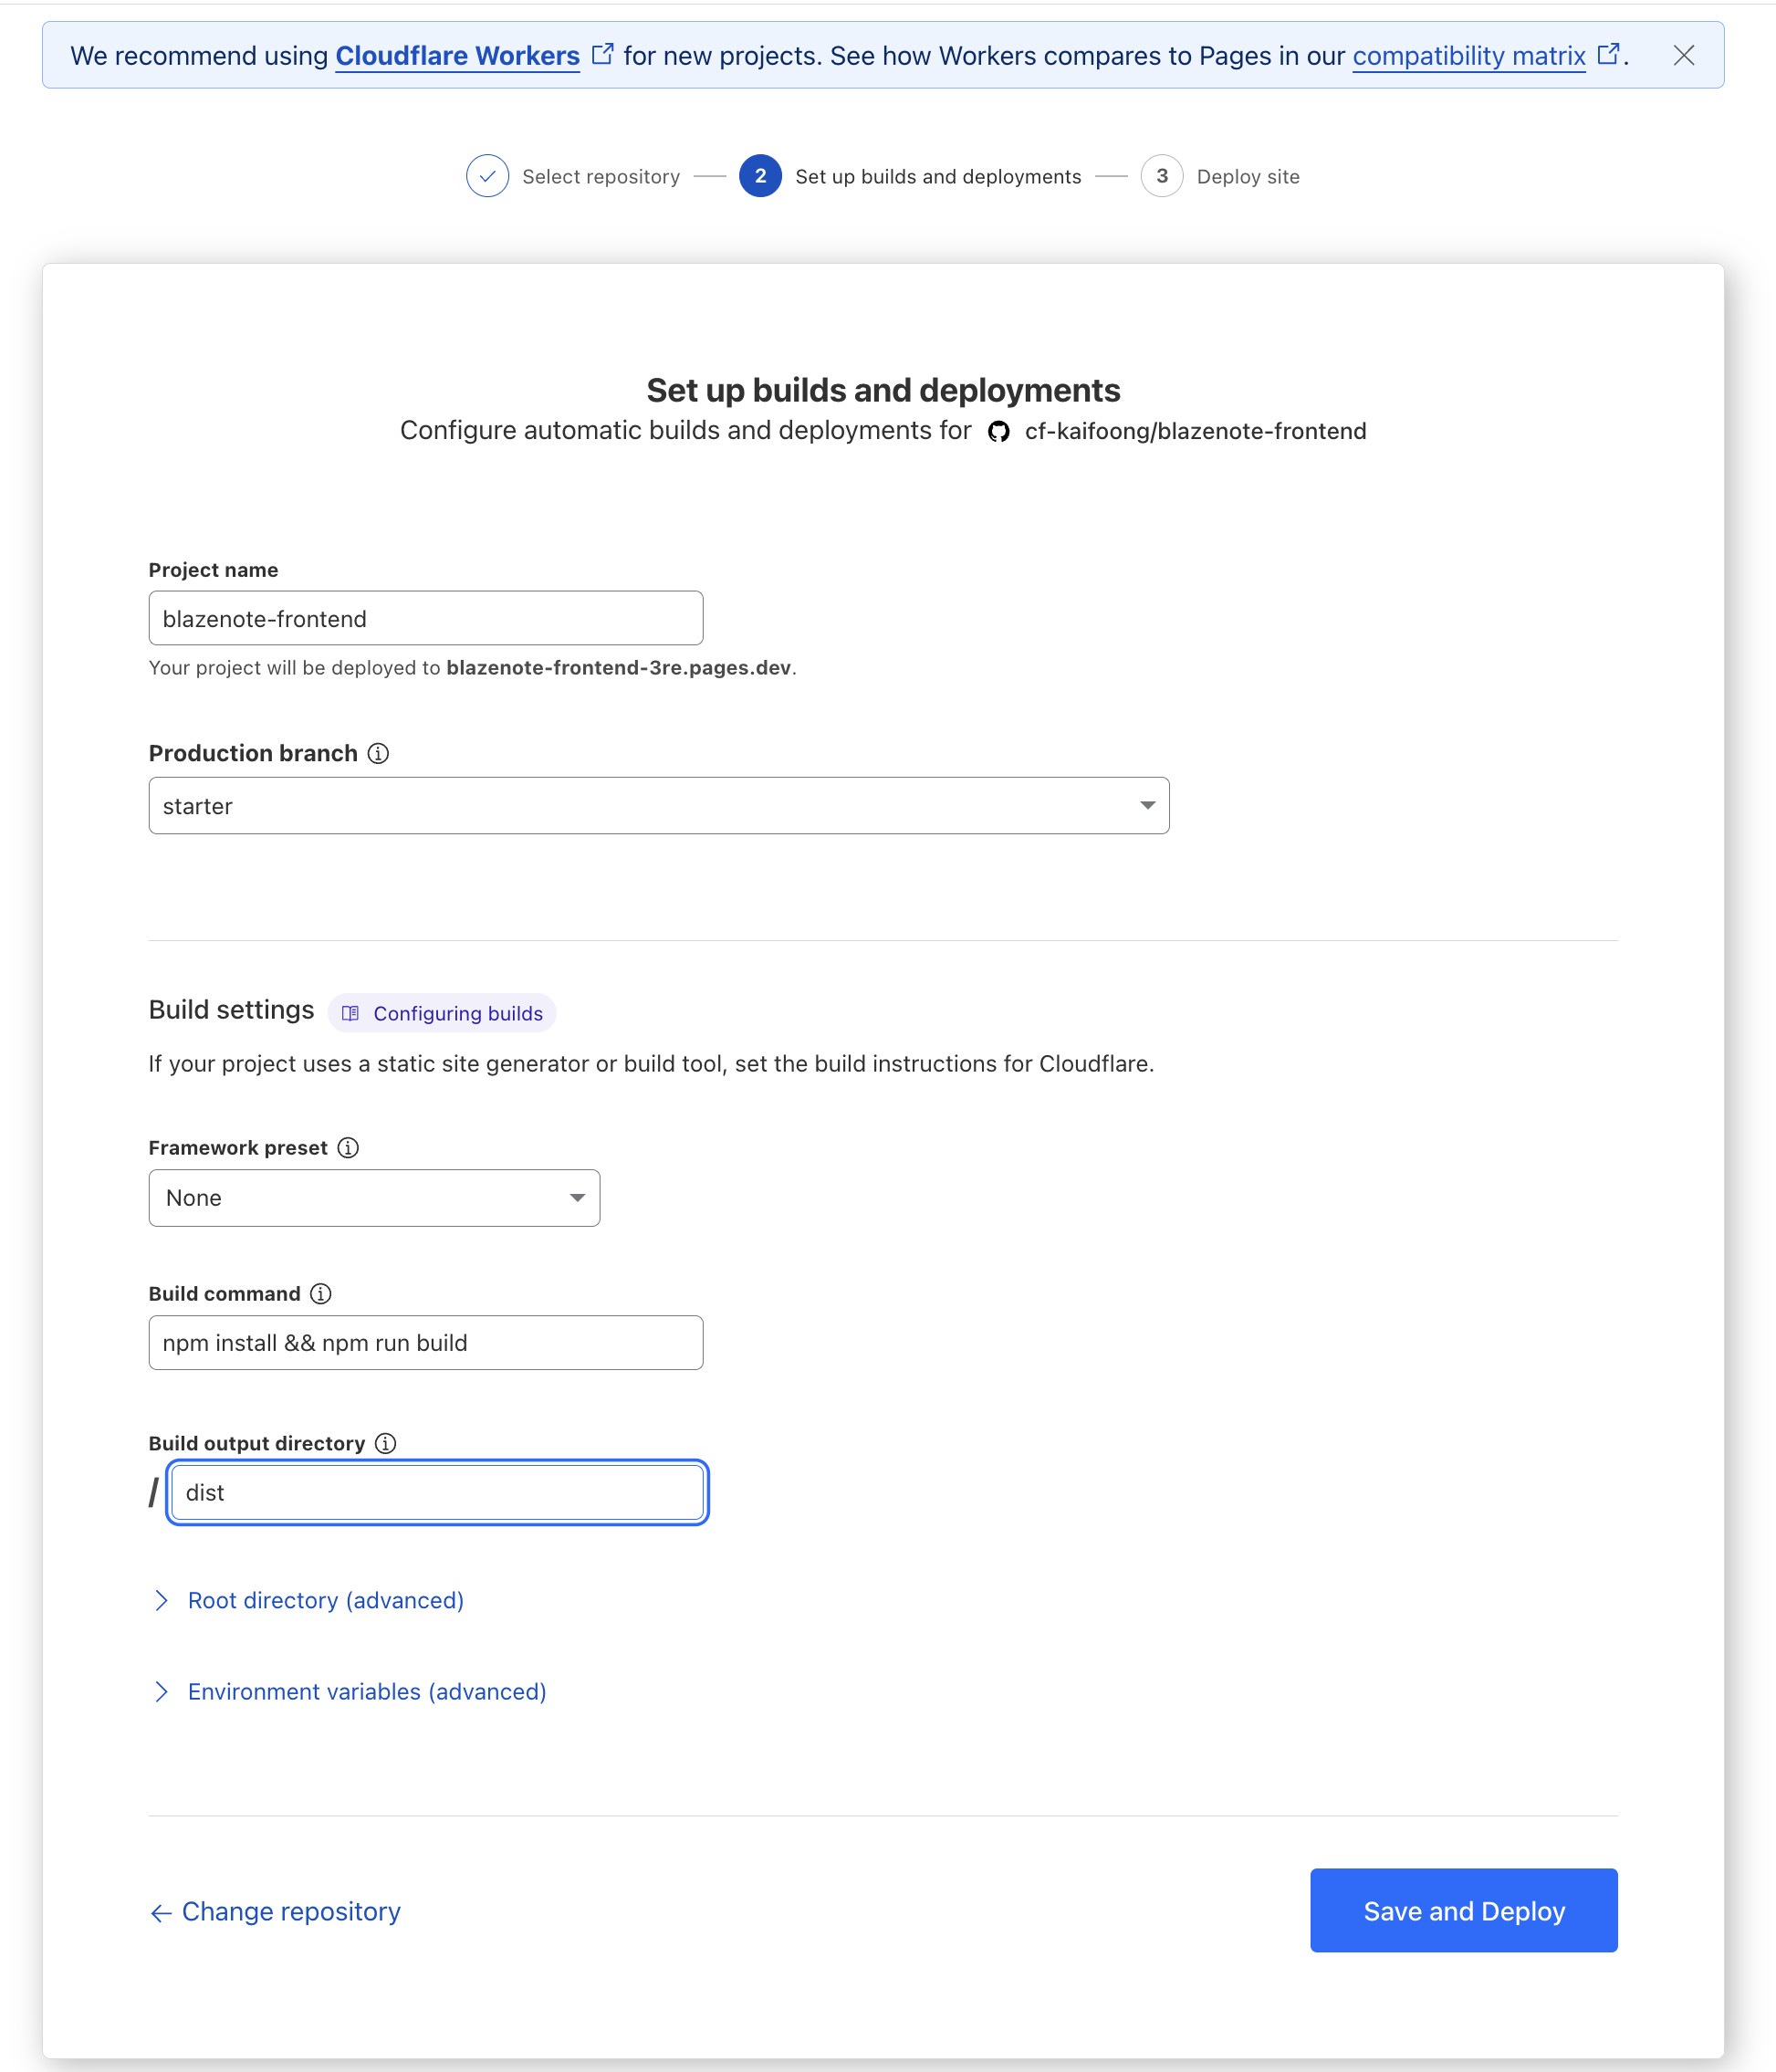
Deploy and Verify
- Click Save and Deploy
- Wait for the build process to complete (2-5 minutes)
- Monitor the build logs for any errors
- Your frontend will be available at:
https://blazenote-frontend.<your-pages-domain>.pages.dev
3. Alternative: CLI Deployment
If you prefer manual deployment or need immediate deployment control, use the Wrangler CLI method.
Prerequisites
Ensure Wrangler is authenticated:
wrangler login
On first-time login, a browser window will open prompting you to authorize access. Please grant permission to allow Wrangler to connect to your Cloudflare account.
Build and Deploy
# Navigate to your frontend project
cd ~/projects/blazenote-frontend

# Generate production build
npm run build

# Deploy to Cloudflare Pages
wrangler pages deploy ./dist --project-name blazenote-frontend
Expected output:
✨ Successfully deployed to https://blazenote-frontend.<your-pages-domain>.pages.dev
4. Environment Configuration
If you haven't done your backend, you may now proceed to backend-deployment
Critical Step: Configure environment variables to connect your frontend to the backend.
Access Environment Variables
- Go to Cloudflare Dashboard → Workers & Pages
- Select your
blazenote-frontendproject - Click Settings tab
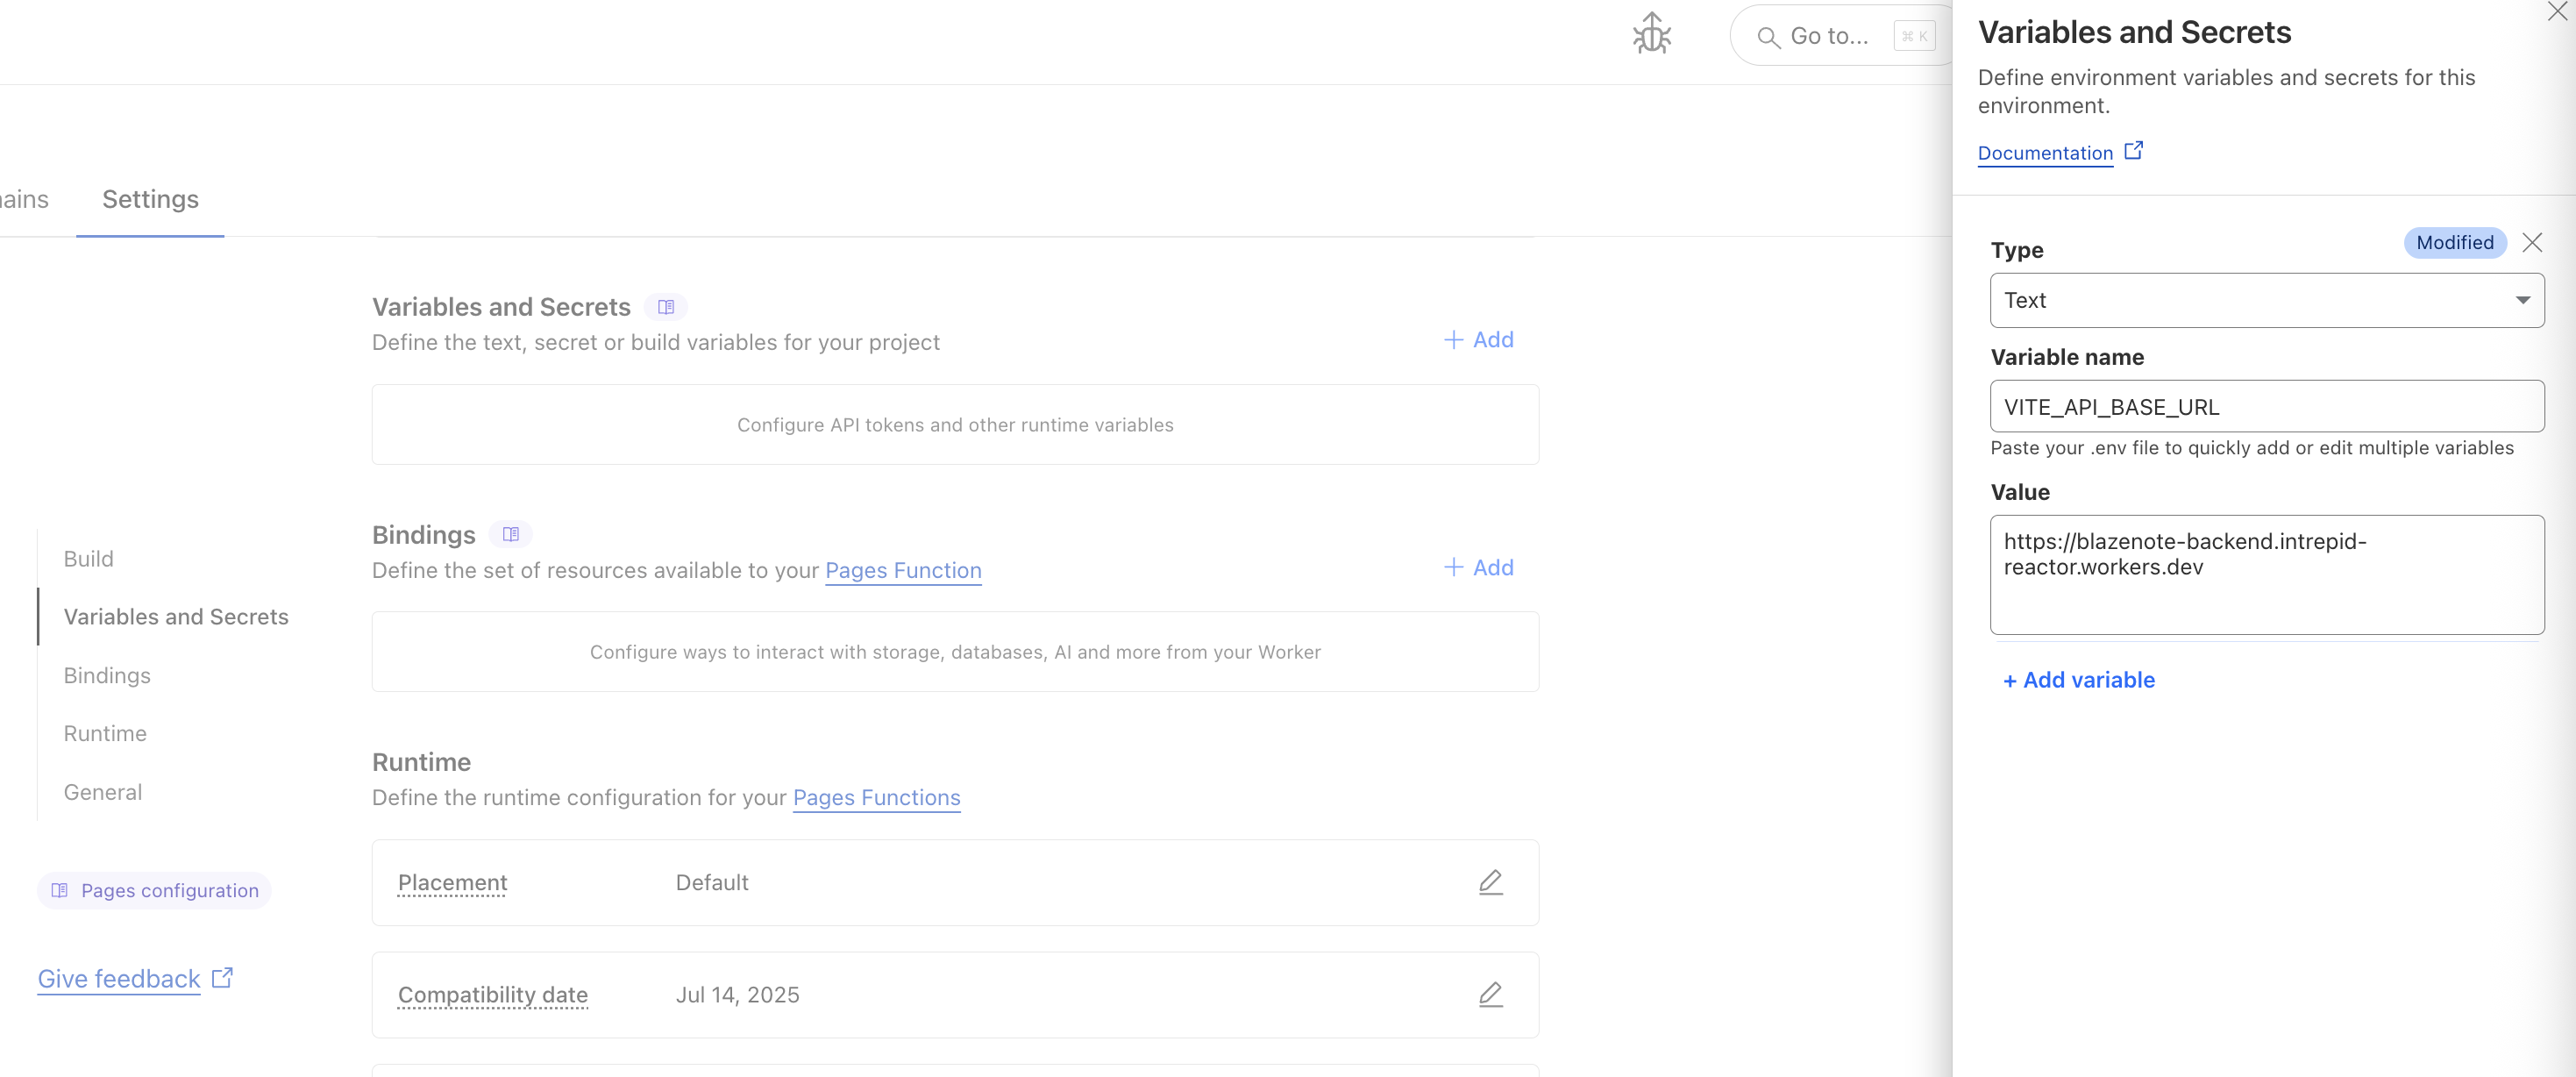
- Navigate to Environment variables
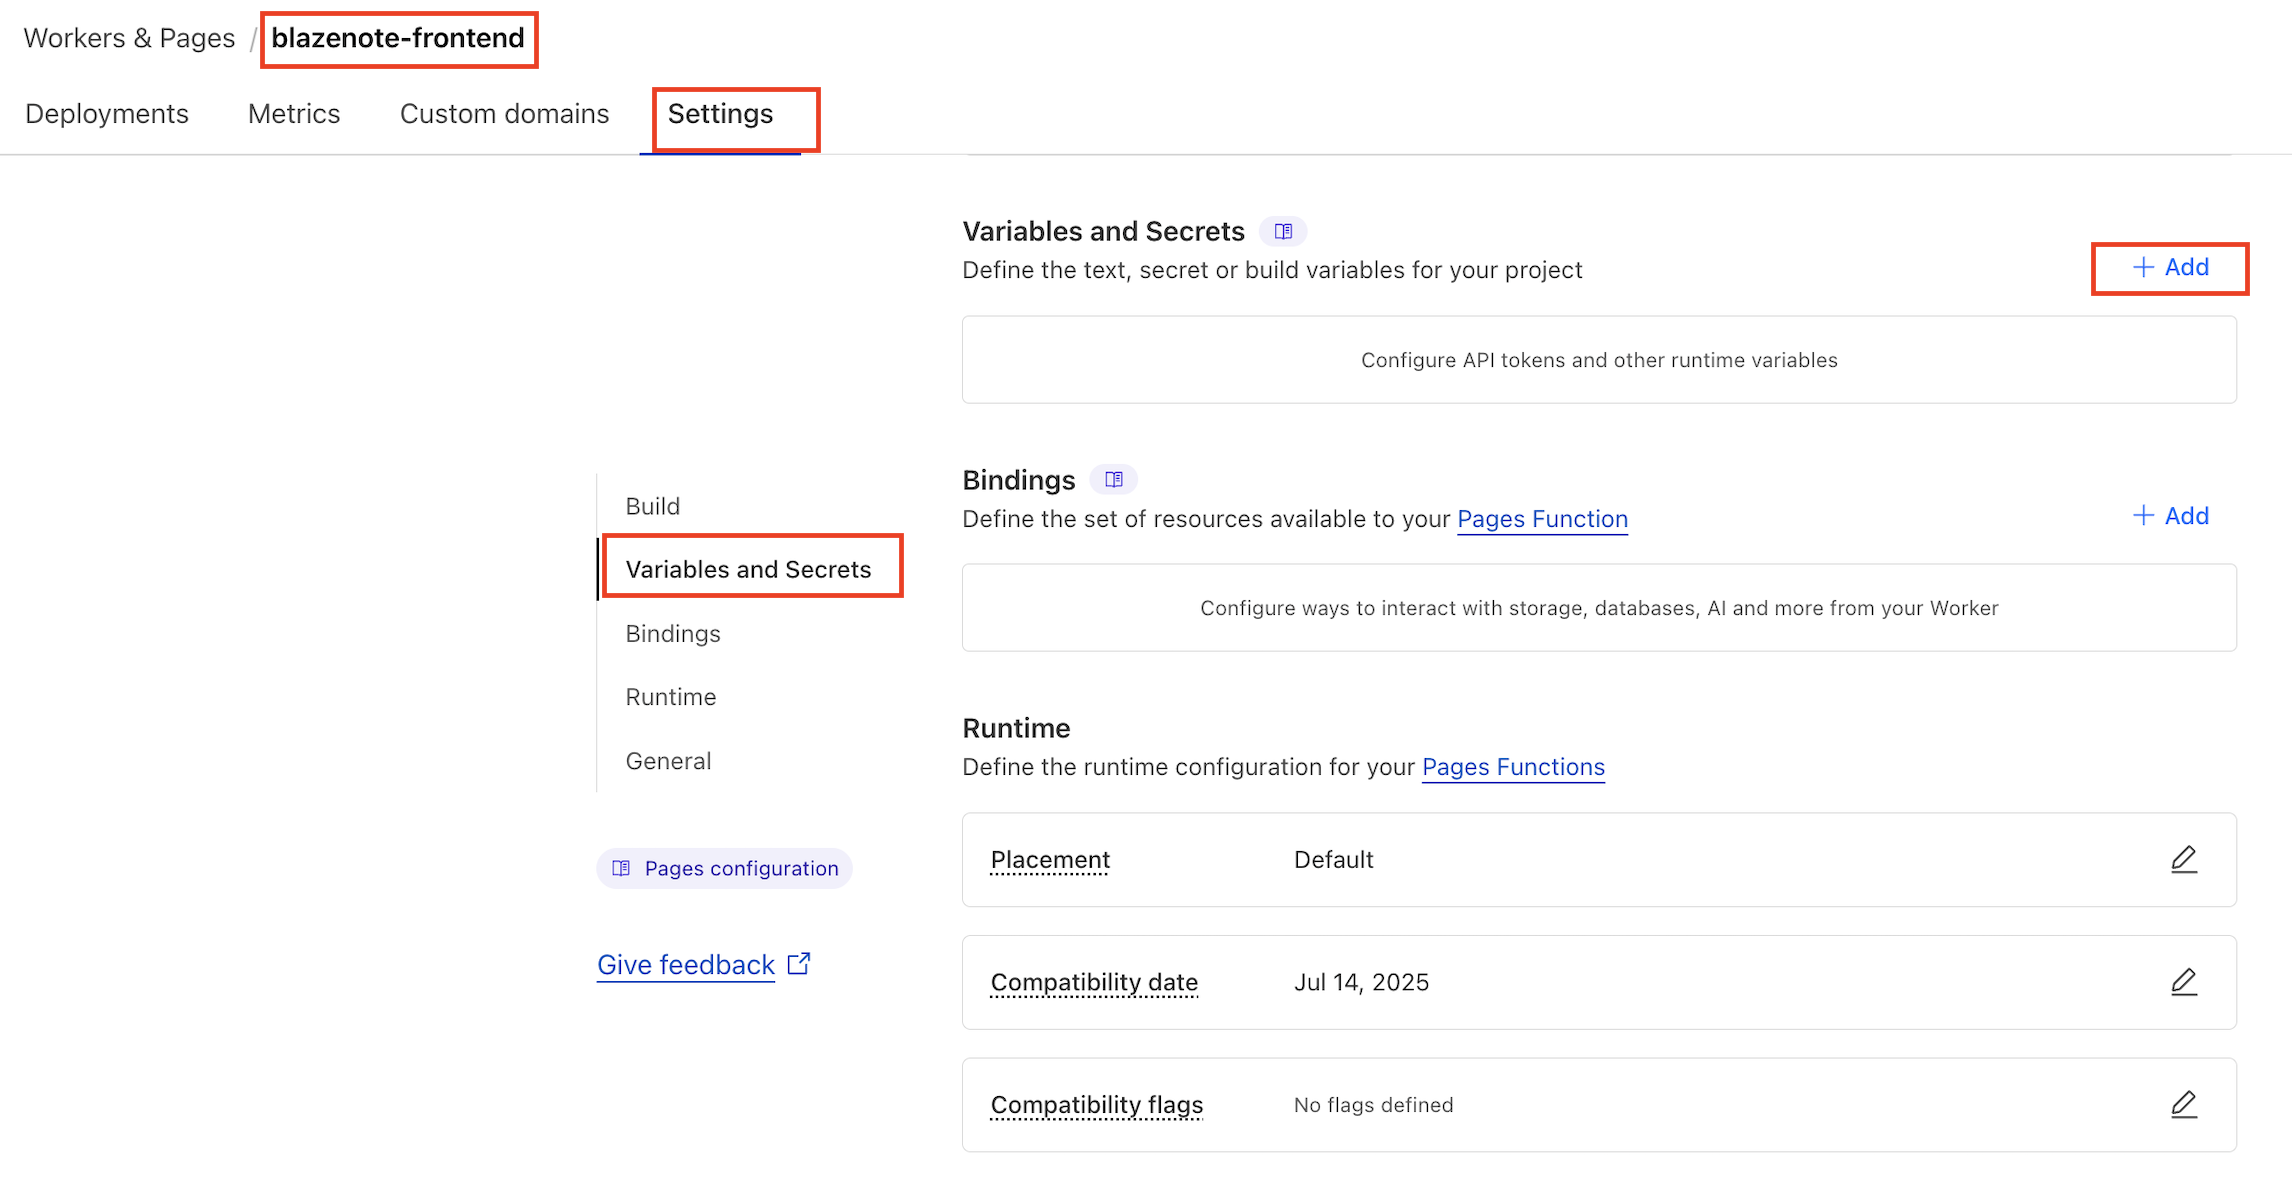
Add Backend URL Variable
Create the following environment variable:
Variable Name: VITE_API_BASE_URL
Value: Your backend URL from the previous module
VITE_API_BASE_URL=https://blazenote-backend.<your-subdomain>.workers.dev
How to find your backend URL:
- From the Backend Deployment module completion
- Check your Cloudflare Workers dashboard
- Should look like:
https://blazenote-backend.<your-subdomain>.workers.dev
Redeploy After Variable Changes
You MUST redeploy after adding environment variables. The build process needs to include these variables.
To redeploy:
- Go to Deployments tab
- Find your latest deployment
- Click View details
- Click Retry deployment
5. Access and Test Your Deployment
Get Your Frontend URL
For Git-based deployment:
- Dashboard: Workers & Pages →
blazenote-frontend→ Deployments tab - URL format:
https://blazenote-frontend.<your-pages-domain>.pages.dev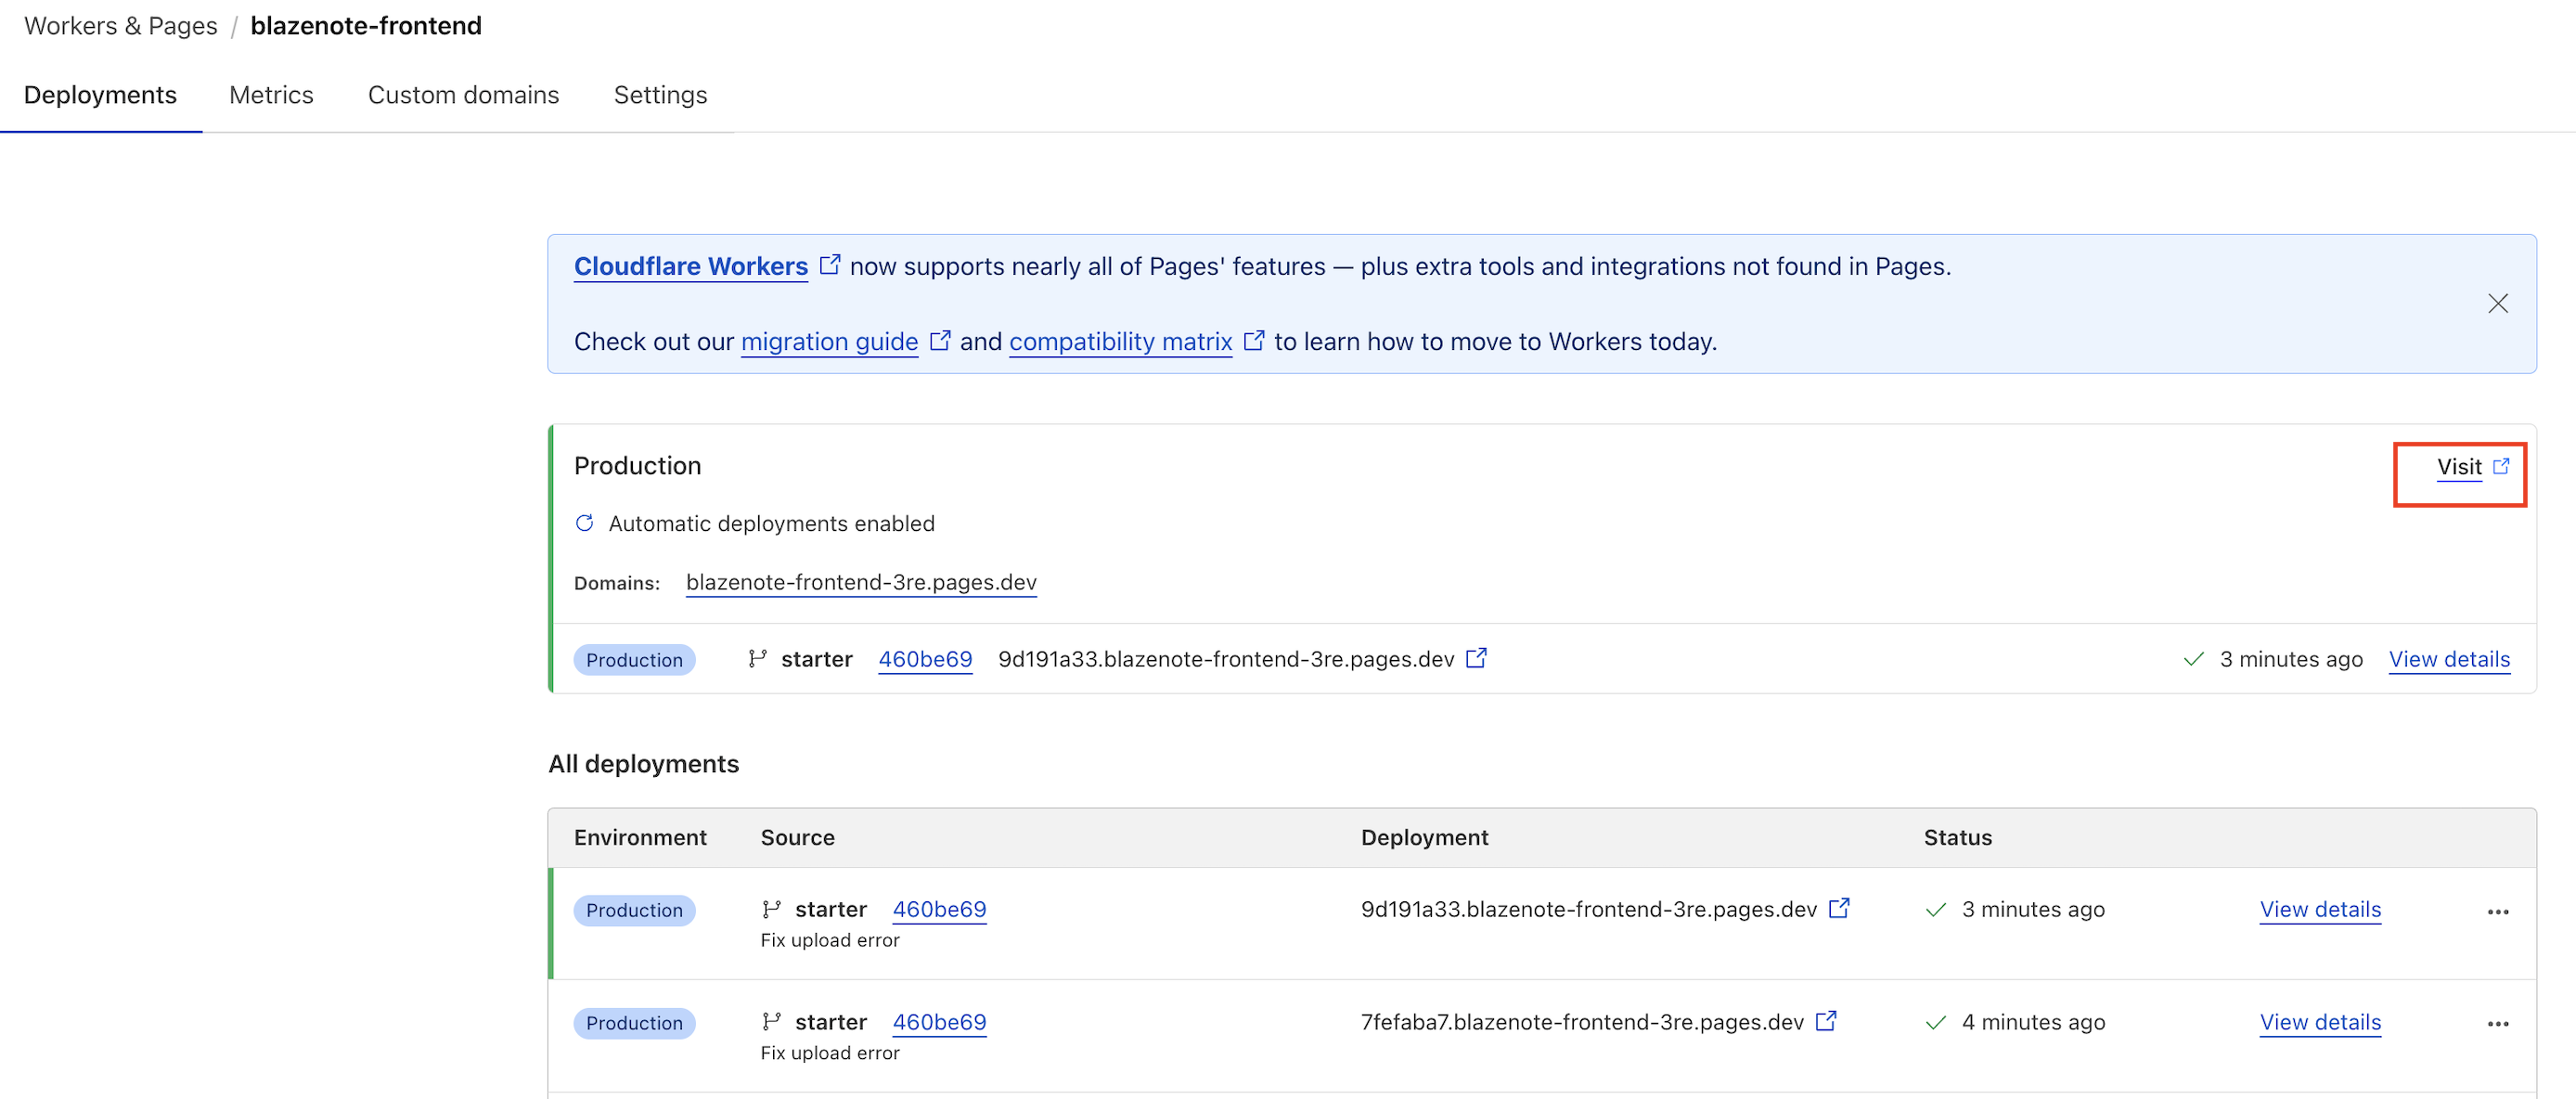
For CLI deployment:
- URL is provided in the command output
- Also available in the dashboard
Test Your Live Frontend
Basic functionality test:
# Test if your frontend is accessible
curl -I https://blazenote-frontend.<your-pages-domain>.pages.dev
Expected response:
HTTP/2 200
content-type: text/html
Verify Full Application
Now you can go back to backend-deployment to add CORS configuration
Test in browser:
- Open your frontend URL
- Try creating a new note
- Test the rich text editor
- Verify backend connectivity (if backend is already deployed)
Expected behavior:
- Application loads without errors
- Interface is responsive
- Note creation works
- Rich text editor functions properly
DNS propagation may take approximately 15–30 minutes. If you can't access your deployment immediately, proceed with the next module and return to test later.
6. Update Backend CORS Settings
Important: Your frontend won't be able to communicate with the backend until CORS is properly configured.
Update Backend CORS Configuration
In your blazenote-backend project, edit src/index.ts:
// Update the allowedOrigins set to include your frontend domain
const allowedOrigins = new Set([
  "http://localhost:5173",                           // Local development
  "https://blazenote-frontend.<your-pages-domain>.pages.dev",  // Your deployed frontend
]);
Redeploy Backend
After updating CORS settings:
cd ~/projects/blazenote-backend
npm run deploy
Frontend Project Structure
Understanding your frontend project architecture helps with debugging and future development:
cd ~/projects/blazenote-frontend
tree -I 'node_modules' -L 3
Project structure:
blazenote-frontend/
├── public/                    # Static assets
├── src/                      # Application source code
│   ├── App.tsx              # Main application component
│   ├── main.tsx             # Application entry point
│   ├── index.css            # Global styles and TipTap customizations
│   ├── components/          # React components
│   │   ├── NoteEditor.tsx   # Main note editing interface
│   │   ├── NoteList.tsx     # Note list sidebar
│   │   ├── editor/          # Rich text editor components
│   │   └── ui/              # Reusable UI components
│   ├── contexts/            # React context for state management
│   │   └── NotesContext.tsx # Global notes state
│   ├── hooks/               # Custom React hooks
│   │   ├── useSpeechRecognition.ts  # Voice transcription
│   │   └── useTiptapExtensions.ts   # Editor configuration
│   ├── types/               # TypeScript type definitions
│   │   └── index.ts         # Application types
│   └── utils/               # Utility functions
│       └── textUtils.ts     # Text processing utilities
├── package.json             # Dependencies and scripts
├── vite.config.ts           # Vite build configuration
├── tailwind.config.js       # Tailwind CSS configuration
└── tsconfig.json            # TypeScript configuration
Available Scripts
Development and build commands:
# Development
npm run dev              # Start development server at localhost:5173
npm run preview          # Preview production build locally

# Production
npm run build            # Build for production (outputs to dist/)
npm run lint             # Check code quality with ESLint
npm run prettier         # Format code with Prettier
Additional useful commands:
# Build analysis
npm run build && ls -la dist/  # Check build output size
npm run preview                # Test production build locally

# Code quality
npm run lint             # Find linting issues
npm run prettier         # Auto-format code
Environment Variables
Local Development
Create a .env.local file in your frontend directory:
cd ~/projects/blazenote-frontend
touch .env.local
Add the following content:
# Development API endpoint
VITE_API_BASE_URL=http://localhost:8787

# Optional: Enable development features
VITE_DEV_MODE=true
Production Environment
Environment variables for production are configured in the Cloudflare Pages dashboard as shown in step 4 above.
Required production variables:
VITE_API_BASE_URL: Your backend Worker URL
Optional production variables:
VITE_DEV_MODE: Set tofalsefor productionVITE_ENABLE_ANALYTICS: Enable analytics tracking
Automatic Deployment Pipeline
Git-based Deployment Triggers
Your frontend will automatically deploy when:
- Push to main branch: Production deployment
- Pull request creation: Preview deployment
- Push to other branches: Preview deployment (if configured)
Preview Deployments
Cloudflare Pages automatically creates preview deployments for:
- Pull requests
- Non-production branches
- Each commit gets a unique preview URL
Preview URL format:
https://<commit-hash>.blazenote-frontend.pages.dev
Build Process
Each deployment follows this process:
- Clone repository: Fresh copy of your code
- Install dependencies:
npm install - Build application:
npm run build - Deploy to CDN: Global distribution
- Invalidate cache: Ensure fresh content
Validation Checklist
Local Development
- Frontend dependencies installed successfully (
npm install) - Development server starts without errors (
npm run dev) - Frontend accessible at
http://localhost:5173 - Note creation and editing work properly
- Rich text editor loads and functions correctly
- Search functionality works
- Responsive design displays correctly
- No console errors in browser developer tools
Build Process
- Production build completes successfully (
npm run build) - Build output exists in
dist/directory - Build size is reasonable (< 5MB total)
- No TypeScript compilation errors
- No linting errors (
npm run lint)
Deployment
- Git repository connected to Cloudflare Pages
- Build settings configured correctly
- Environment variables set properly
- Deployment completes successfully
- Frontend URL is accessible
- All assets load correctly (CSS, JS, images)
- Application functions in production environment
Integration
- Backend URL configured in environment variables
- CORS settings updated on backend
- Frontend can communicate with backend
- Note CRUD operations work end-to-end
- File upload functionality works (if backend supports it)
Troubleshooting Guide
Common Build Issues
"Module not found" errors
# Clear node_modules and reinstall
rm -rf node_modules package-lock.json
npm install
Vite build fails
# Check for TypeScript errors
npm run build 2>&1 | grep -i error

# Fix common issues
npm run lint --fix
npm run prettier
Environment variables not working
- Ensure variables start with
VITE_ - Check variable names are exact matches
- Verify variables are set in Cloudflare Pages dashboard
- Redeploy after adding variables
Common Deployment Issues
"Build failed" in Cloudflare Pages
- Check build logs in Cloudflare dashboard
- Verify build command is correct:
npm install && npm run build - Ensure build output directory is
dist - Check for Node.js version compatibility
"Site not accessible" after deployment
- Wait 15-30 minutes for DNS propagation
- Check if deployment actually completed
- Verify custom domain settings if using one
- Check Cloudflare status page for outages
Frontend loads but can't connect to backend
- Verify
VITE_API_BASE_URLis correctly set - Check backend CORS configuration includes frontend domain
- Verify backend is deployed and accessible
- Check browser developer tools for CORS errors
Features not working in production
- Check browser console for JavaScript errors
- Verify environment variables are set
- Test locally with
npm run preview - Check if assets are loading correctly
Common Integration Issues
CORS errors (most common)
Access to fetch at 'https://blazenote-backend...' from origin 'https://blazenote-frontend...' has been blocked by CORS policy
Solution:
- Update backend
src/index.tswith your frontend domain - Redeploy backend
- Test again
API calls failing
- Check network tab in browser developer tools
- Verify backend URL is correct
- Test backend endpoints directly with curl
- Check backend logs for errors
Next Steps
🎉 Congratulations! Your frontend is now deployed and running on Cloudflare Pages.
What you've accomplished:
- React frontend deployed to Cloudflare's global CDN
- Modern development workflow with Vite and TypeScript
- Automatic deployment pipeline established
- Environment variables configured for backend integration
- Rich text editing capabilities with TipTap editor
Next up:
- Backend Integration: Ensure CORS is properly configured
- Database Setup: Initialize your D1 database with required schemas
- File Storage: Test file upload functionality
- AI Features: Verify AI-powered text processing works
- Custom Domain: (Optional) Set up custom domain for your application
Your frontend is now ready to provide:
- Modern UI: Clean, responsive interface built with React and Tailwind
- Rich Text Editing: Advanced note editing with formatting, lists, and media
- Voice Transcription: Speech-to-text functionality for hands-free note-taking
- AI Integration: Text summarization, paraphrasing, and translation
- File Management: Upload and manage note attachments
- Real-time Updates: Instant synchronization with backend API
Testing your complete application: Once both frontend and backend are deployed, test the full workflow:
- Create a new note
- Add rich text content
- Upload an image or file
- Use AI features to process text
- Test voice transcription
- Verify data persistence