Database Setup
In this section, you'll create your first Cloudflare D1 database, configure it for your application, and set up the database schema using migrations. By the end of this guide, you'll have a fully configured database ready to store your notes.

Understanding D1 Database Architecture
What is a D1 Database? D1 is Cloudflare's serverless SQL database built on SQLite. It provides:
- Global distribution across Cloudflare's edge network
- Zero-configuration scaling
- SQL compatibility with SQLite syntax
- Built-in backup and replication
Why Use Migrations? Database migrations are version-controlled scripts that:
- Track changes to your database schema over time
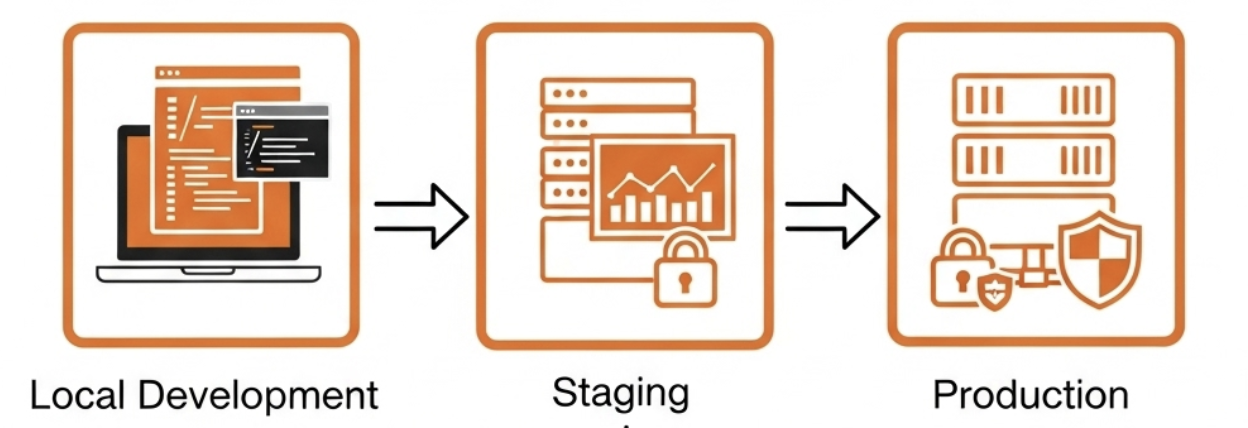
- Ensure consistent database structure across environments
- Allow safe rollbacks if needed
- Enable collaborative database development
Prerequisites
Before starting, ensure you have:
- Cloudflare account set up and verified
- Wrangler CLI installed and authenticated
-
blazenote-backendrepository cloned locally - Currently in the
starterbranch of your backend repository
Verify Your Setup
# Navigate to your backend project
cd ~/projects/blazenote-backend
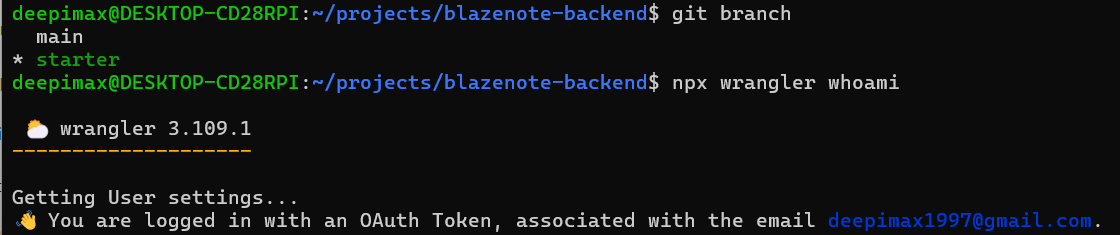
# Verify you're on the starter branch
git branch
# Should show: * starter
# Check Wrangler authentication
wrangler whoami
# Should show your Cloudflare email
Step 1: Create Your D1 Database
Navigate to Your Project
# Ensure you're in the backend project directory
cd ~/projects/blazenote-backend

# Verify you're in the correct location
pwd
# Should show: .../blazenote-backend
Create the Database
Run the database creation command:
wrangler d1 create blazenote
What this command does:
- Creates a new D1 database named "blazenote" in your Cloudflare account
- Generates a unique database ID for your database
- Sets up the database in Cloudflare's global network
Expected output:
⛅️ wrangler 3.109.2
--------------------

Successfully created DB 'blazenote' in region WNAM
Created your new D1 database.

[[d1_databases]]
binding = "DB"
database_name = "blazenote"
database_id = "a1b2c3d4-e5f6-7890-1234-567890abcdef"
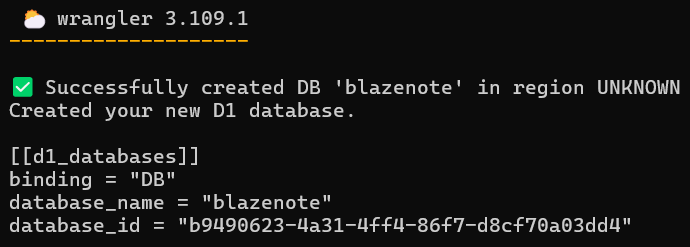
⚠️ Important: Save the database_id value! You'll need it in the next step.
Verify Database Creation
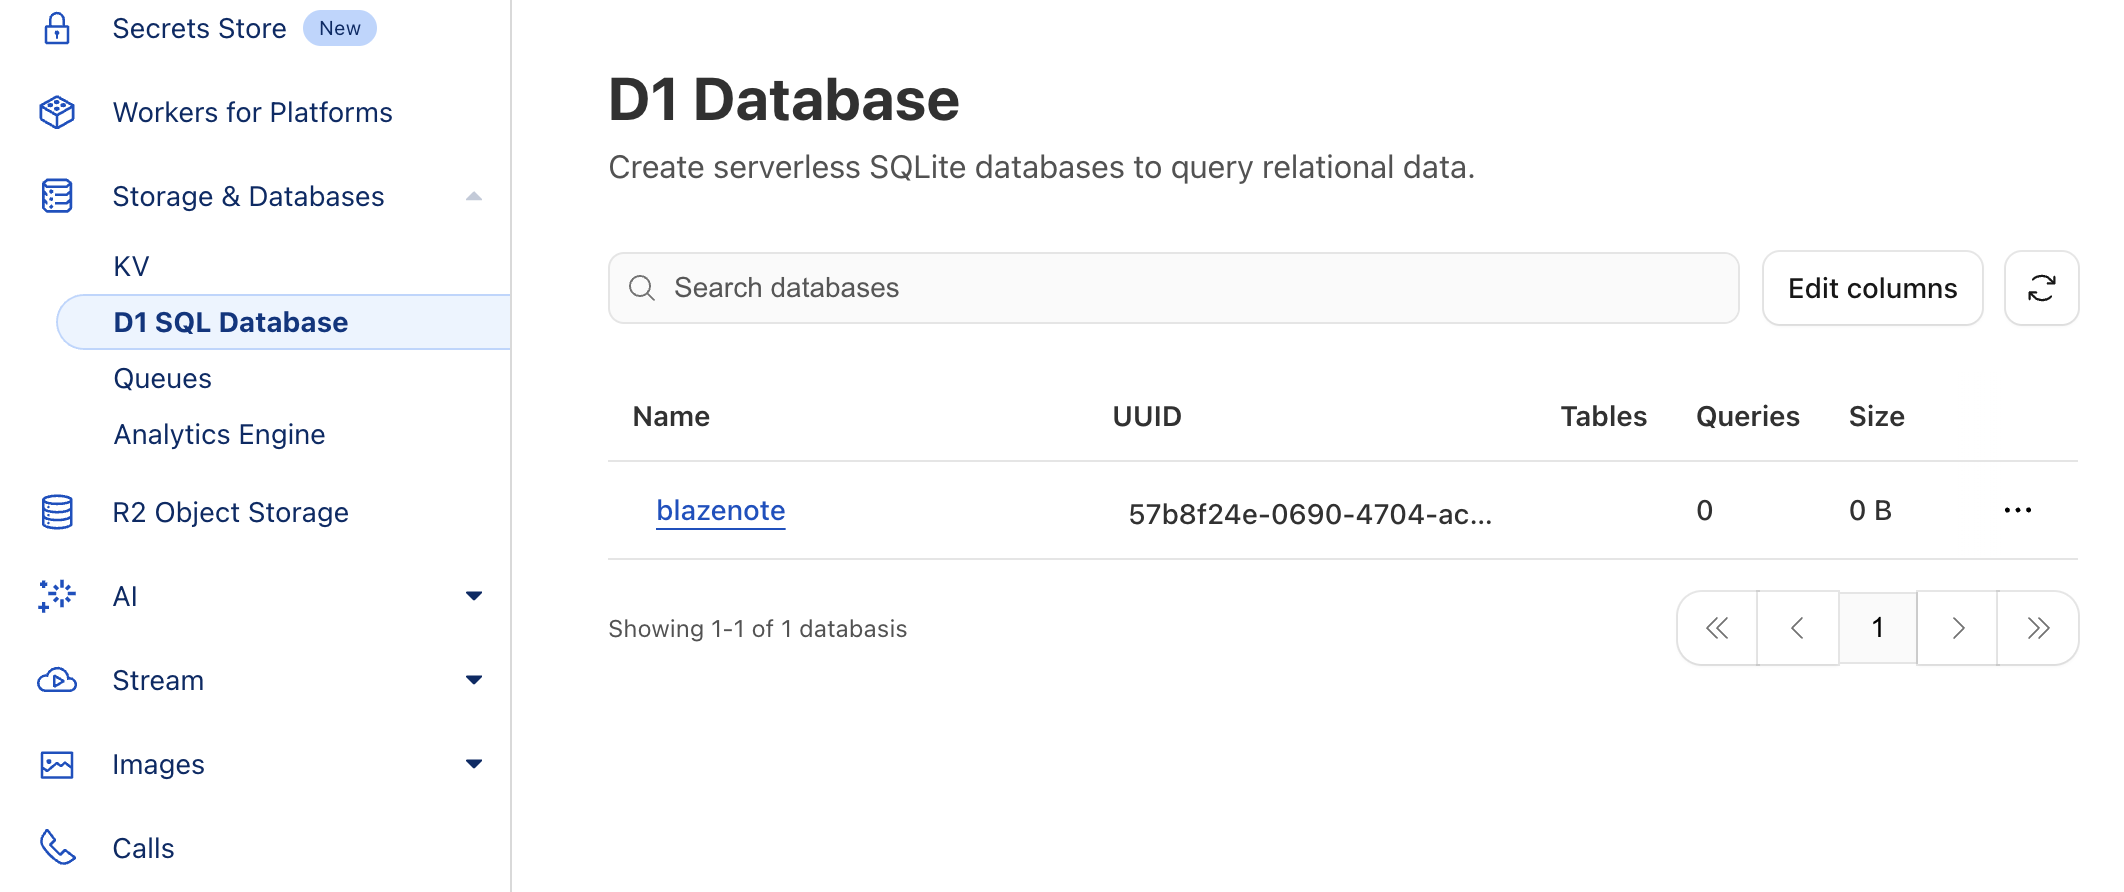
Check your Cloudflare dashboard:
- Go to Cloudflare Dashboard
- Navigate to Workers & Pages in the left sidebar
- Click on the D1 SQL Database tab
- You should see your new "blazenote" database listed
Step 2: Configure Wrangler for D1 Access
Understand Wrangler Configuration
What is wrangler.toml? This file configures how your Worker connects to Cloudflare services, including your D1 database.
Update wrangler.toml
Open the configuration file:
# Open wrangler.toml in your code editor
code wrangler.toml
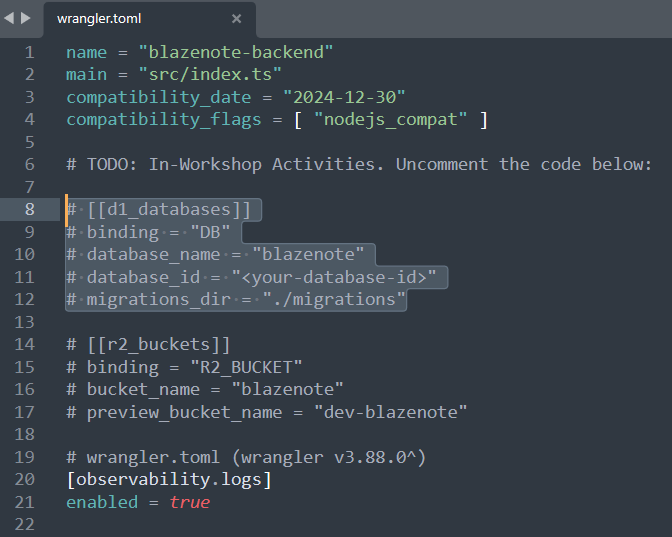
Find the commented D1 configuration section:
# [[d1_databases]]
# binding = "DB"
# database_name = "blazenote"
# database_id = "<your-database-id>"
# migrations_dir = "./migrations"
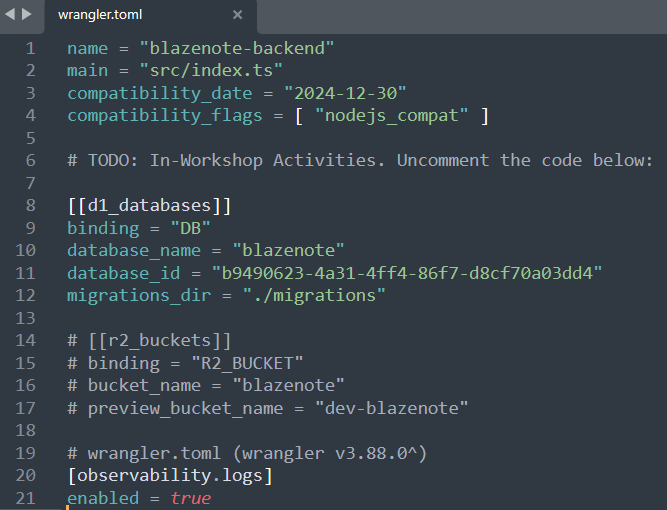
Uncomment and update the section:
[[d1_databases]]
binding = "DB"
database_name = "blazenote"
database_id = "a1b2c3d4-e5f6-7890-1234-567890abcdef"
migrations_dir = "./migrations"
⚠️ Replace the database_id: Use the actual database_id from your Step 1 output, not the example above!
Configuration explained:
binding = "DB": The variable name you'll use in your code to access the databasedatabase_name = "blazenote": The name of your databasedatabase_id: The unique identifier for your specific databasemigrations_dir: Where Wrangler will look for migration files
Save Your Changes
# Save the file (Ctrl+S or Cmd+S)
# Then verify the changes
cat wrangler.toml | grep -A 5 "d1_databases"

Step 3: Create Database Migrations
Understanding Migrations
What are migrations? Migrations are SQL scripts that define your database structure:
- Create tables
- Add or modify columns
- Create indexes
- Set up relationships between tables
Create Your First Migration
Generate a migration file:
wrangler d1 migrations create blazenote initial
Expected output:
Successfully created Migration '0001_initial.sql'!

The migration is available for editing here
/blazenote-backend/migrations/0001_initial.sql

Verify Migration Directory
# Check that the migrations directory was created
ls -la migrations/
# Should show: 0001_initial.sql

Design Your Database Schema
Open the migration file:
code migrations/0001_initial.sql
Replace the content with our complete schema:
-- Migration number: 0001 	 2025-01-26T03:52:41.446Z

-- UUID7 Generation View
-- This creates a view that generates UUID7 identifiers for our records
DROP VIEW IF EXISTS uuid7;
CREATE VIEW uuid7 AS
WITH unixtime AS (
	SELECT CAST((STRFTIME('%s') * 1000) + ((STRFTIME('%f') * 1000) % 1000) AS INTEGER) AS time
)
SELECT FORMAT('%08x-%04x-%04x-%04x-%012x',
       (select time from unixtime) >> 16,
       (select time from unixtime) & 0xffff,
       ABS(RANDOM()) % 0x0fff + 0x7000,
       ABS(RANDOM()) % 0x3fff + 0x8000,
       ABS(RANDOM()) >> 16) AS next;

-- Notes Table
-- Stores the main note data with title and description
CREATE TABLE note (
    id TEXT PRIMARY KEY,                      -- UUID as a string
    title TEXT NOT NULL,                      -- Title of the note
    description TEXT,                         -- Description of the note (can be NULL)
    created_at INTEGER DEFAULT (strftime('%s', 'now')),  -- Unix epoch timestamp for creation
    updated_at INTEGER DEFAULT (strftime('%s', 'now'))   -- Unix epoch timestamp for last update
);

-- Update Trigger for Notes
-- Automatically updates the updated_at field when a note is modified
CREATE TRIGGER update_note_before_update
AFTER UPDATE ON note
FOR EACH ROW
BEGIN
    UPDATE note SET updated_at = strftime('%s', 'now') WHERE id = OLD.id;
END;

-- Auto-ID Trigger for Notes
-- Automatically generates UUID7 for new notes if no ID is provided
DROP TRIGGER IF EXISTS trigger_after_insert_on_note;
CREATE TRIGGER trigger_after_insert_on_note
    AFTER INSERT ON note WHEN NEW.id IS NULL
BEGIN
	UPDATE note SET id = (SELECT next FROM uuid7) WHERE ROWID = NEW.ROWID;
END;

-- Files Table
-- Stores file attachments associated with notes
CREATE TABLE file (
    id TEXT PRIMARY KEY,                                 -- UUID as a string
    note_id INTEGER,                                     -- Reference to note id
    name TEXT NOT NULL,                                  -- File name
    created_at INTEGER DEFAULT (strftime('%s', 'now')), -- Unix epoch timestamp for creation
    updated_at INTEGER DEFAULT (strftime('%s', 'now')), -- Unix epoch timestamp for last update
    FOREIGN KEY (note_id) REFERENCES note(id)          -- Foreign key relationship
);

-- Update Trigger for Files
-- Automatically updates the updated_at field when a file record is modified
CREATE TRIGGER update_file_before_update
AFTER UPDATE ON file
FOR EACH ROW
BEGIN
    UPDATE file SET updated_at = strftime('%s', 'now') WHERE id = OLD.id;
END;

-- Auto-ID Trigger for Files
-- Automatically generates UUID7 for new files if no ID is provided
DROP TRIGGER IF EXISTS trigger_after_insert_on_file;
CREATE TRIGGER trigger_after_insert_on_file
    AFTER INSERT ON file WHEN NEW.id IS NULL
BEGIN
	UPDATE file SET id = (SELECT next FROM uuid7) WHERE ROWID = NEW.ROWID;
END;

Understanding the Schema
Tables Created:
-
notetable: Stores your notesid: Unique identifier (UUID7)title: Note title (required)description: Note content (optional)created_at,updated_at: Timestamps
-
filetable: Stores file attachments (for future use)id: Unique identifier (UUID7)note_id: Links to the parent notename: File namecreated_at,updated_at: Timestamps
Special Features:
- UUID7 Generation: Automatic unique ID creation
- Automatic Timestamps: Created and updated times are managed automatically
- Foreign Key Relationships: Files are properly linked to notes

Step 4: Apply Database Migrations
Apply to Local Development Database
Run the migration locally:
wrangler d1 migrations apply blazenote
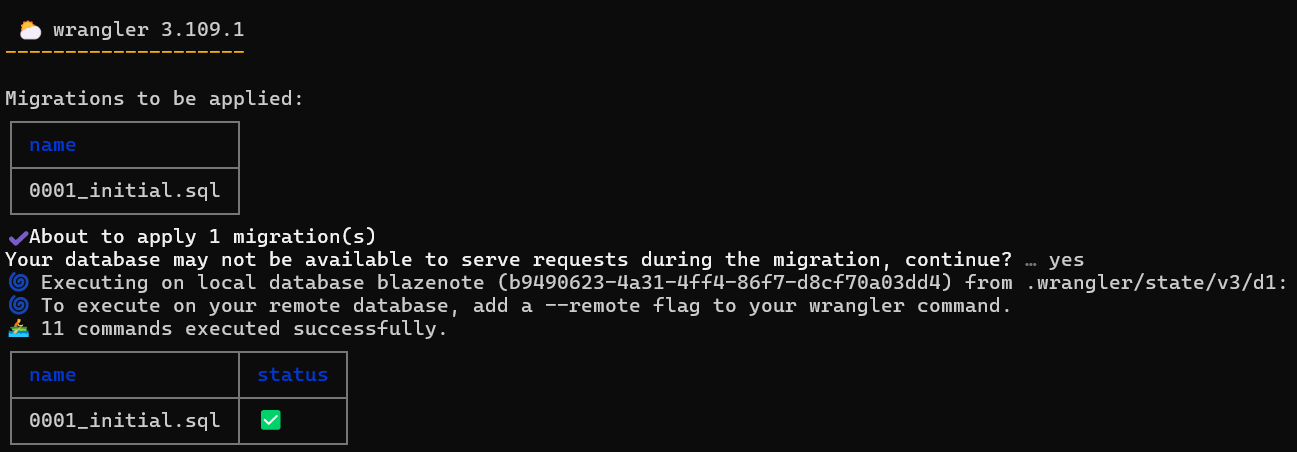
Expected output:
Migrations to be applied:
┌──────────────────┐
│ name             │
├──────────────────┤
│ 0001_initial.sql │
└──────────────────┘

About to apply 1 migration(s)
Your database may not be available to serve requests during the migration, continue? (y/N)
Type y and press Enter to continue.
🚣 Executed 2 commands in 1.7551ms
┌───────────────────┬────────┐
│ name              │ status │
├───────────────────┼────────┤
│ 0001_initial.sql  │     │
└───────────────────┴────────┘
Apply to Remote Production Database
Run the migration on production:
wrangler d1 migrations apply blazenote --remote
Expected output:
Migrations to be applied:
┌──────────────────┐
│ name             │
├──────────────────┤
│ 0001_initial.sql │
└──────────────────┘

About to apply 1 migration(s)
Your database may not be available to serve requests during the migration, continue? (y/N)
Type y and press Enter to continue.
🚣 Executed 2 commands in 1.7551ms
┌───────────────────┬────────┐
│ name              │ status │
├───────────────────┼────────┤
│ 0001_initial.sql  │     │
└───────────────────┴────────┘

Step 5: Verify Database Tables
Query Your Database Structure
Check local database:
wrangler d1 execute blazenote --command "SELECT name FROM sqlite_master WHERE type='table';"
Check remote database:
wrangler d1 execute blazenote --remote --command "SELECT name FROM sqlite_master WHERE type='table';"
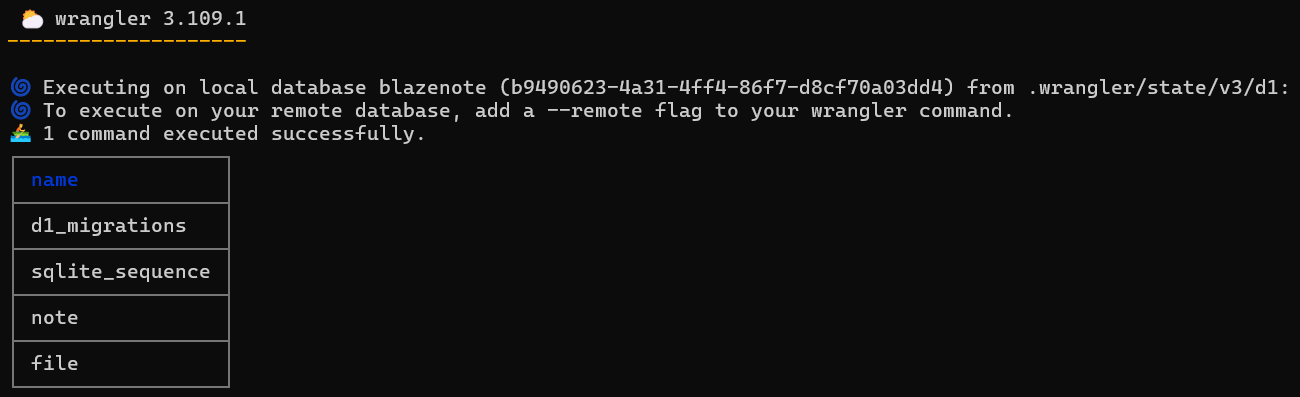
Expected output for both:
┌─────────────────────┐
│ name                │
├─────────────────────┤
│ d1_migrations       │
│ note                │
│ file                │
└─────────────────────┘
Test Database Connectivity
Insert a test note:
wrangler d1 execute blazenote --command "INSERT INTO note (title, description) VALUES ('Test Note', 'This is a test note to verify database connectivity.');"
Query the test note:
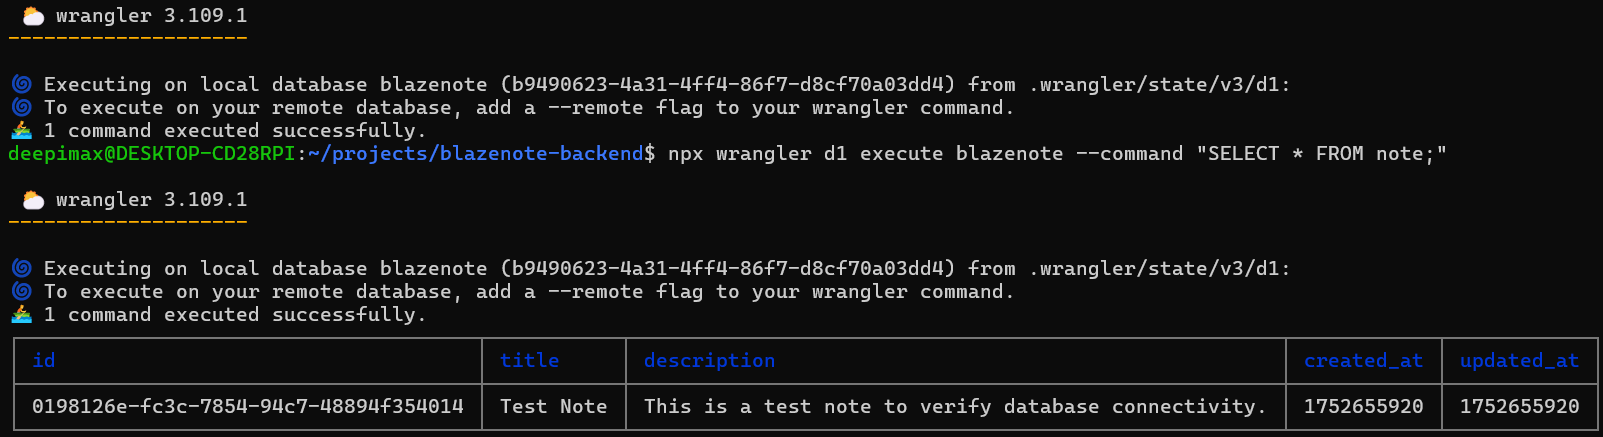
wrangler d1 execute blazenote --command "SELECT * FROM note;"
Expected output:
┌──────────────────────────────────────┬───────────┬──────────────────────────────────────────────────────────┬────────────┬────────────┐
│ id                                   │ title     │ description                                              │ created_at │ updated_at │
├──────────────────────────────────────┼───────────┼──────────────────────────────────────────────────────────┼────────────┼────────────┤
│ 01934d2e-4567-7890-abcd-ef1234567890 │ Test Note │ This is a test note to verify database connectivity.     │ 1737891234 │ 1737891234 │
└──────────────────────────────────────┴───────────┴──────────────────────────────────────────────────────────┴────────────┴────────────┘
Clean Up Test Data
Remove the test note:
wrangler d1 execute blazenote --command "DELETE FROM note WHERE title = 'Test Note';"
Database Setup Checklist
Before proceeding to the next section, verify all items below:
Database Creation
- D1 database "blazenote" created successfully
- Database visible in Cloudflare dashboard
- Database ID recorded and saved
Configuration
-
wrangler.tomlupdated with correct database configuration - Database binding set to "DB"
- Migrations directory configured as "./migrations"
Migrations
- Migration file
0001_initial.sqlcreated - Migration contains complete schema with note and file tables
- Migration applied successfully to local database
- Migration applied successfully to remote database
Verification
- Database tables created (
noteandfile) - Test insertion and query successful
- Both local and remote databases working
- Migration status shows successful application
Troubleshooting Common Issues
Database Creation Fails
Issue: wrangler d1 create command fails
Solutions:
- Verify Wrangler authentication:
wrangler whoami - Check internet connection
- Ensure you're on a paid Cloudflare plan (D1 requires Workers Paid plan)
Migration Application Fails
Issue: Migration doesn't apply successfully Solutions:
- Check SQL syntax in migration file
- Ensure you're in the correct directory
- Verify database ID in
wrangler.tomlmatches creation output
Database Not Found
Issue: "Database not found" error Solutions:
- Double-check database ID in
wrangler.toml - Verify database exists in Cloudflare dashboard
- Ensure you're authenticated to the correct Cloudflare account
Permission Denied
Issue: "Permission denied" or authentication errors Solutions:
- Re-authenticate Wrangler:
wrangler login - Check your Cloudflare account has D1 access
- Verify you're using the correct Cloudflare account
What's Next?
Excellent! Your D1 database is now set up and ready to store data. You have:
Created a D1 database in Cloudflare
Configured Wrangler to connect to your database
Applied database migrations with proper schema
Verified database connectivity and table creation
Next Step: CRUD Implementation - Connect your API endpoints to the database and implement full CRUD functionality.
Your database foundation is solid - now let's make it functional! 🎯