Deployment Configuration
With your CRUD operations implemented and tested locally, it's time to configure your application for production deployment. This section covers CORS configuration, environment variable setup, and deploying your enhanced backend to Cloudflare Workers.
Understanding Production Requirements
What Changes for Production?
When moving from local development to production, several configurations need to be updated:
CORS (Cross-Origin Resource Sharing):
- Your frontend (Pages) and backend (Workers) will have different domains
- Browsers block cross-origin requests by default
- CORS headers tell the browser which origins are allowed
Environment Variables:
- API URLs change from localhost to production domains
- Configuration needs to be environment-specific
- Secrets and sensitive data must be managed securely
Domain Configuration:
- Frontend will use your custom domain
- Backend will use Workers custom domain
- API base URL needs to point to production backend
Prerequisites
Before starting, ensure you have completed:
- Database Setup - D1 database configured
- CRUD Implementation - API endpoints implemented
- Module 1 completed - Frontend and backend deployed with custom domains
Gather Required Information
You'll need these values from previous modules:
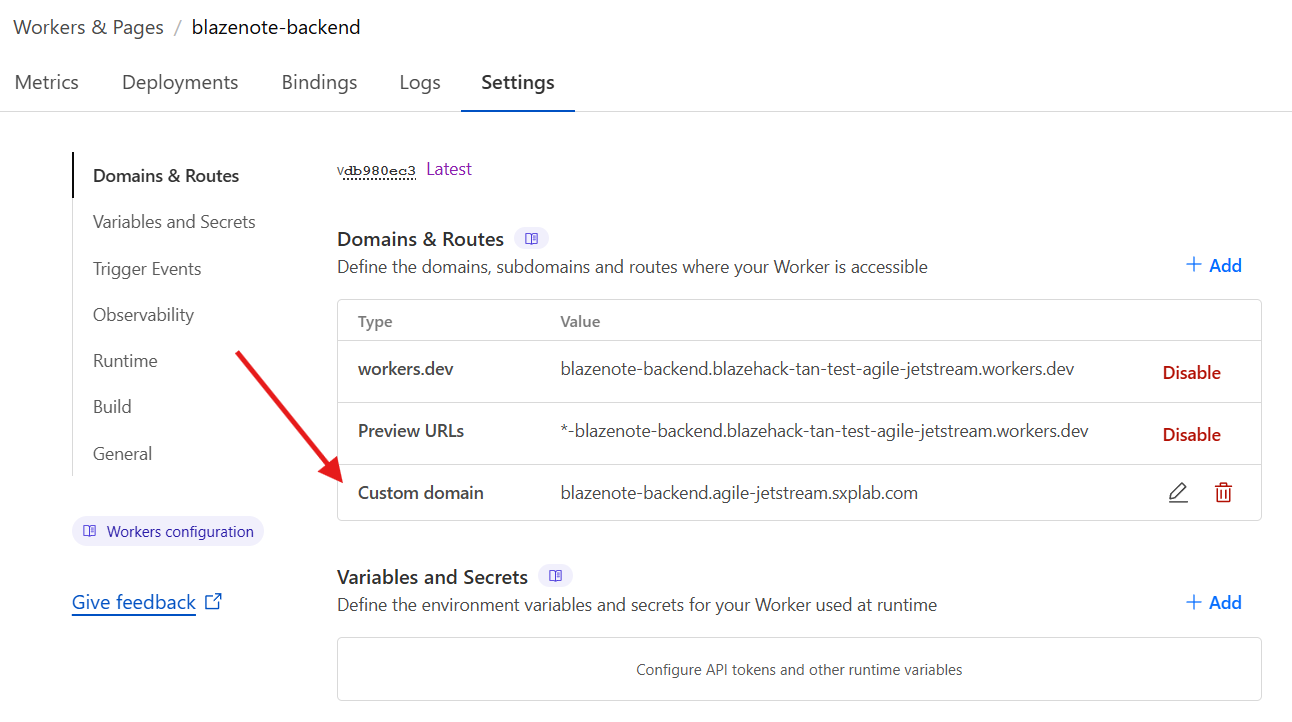
Backend Custom Domain:
- Go to Cloudflare Dashboard
- Navigate to Workers & Pages
- Select your
blazenote-backendproject - Go to Settings → Triggers → Custom Domains
- Copy your backend custom domain (e.g.,
blazenote-backend.<yourdomain>.com)
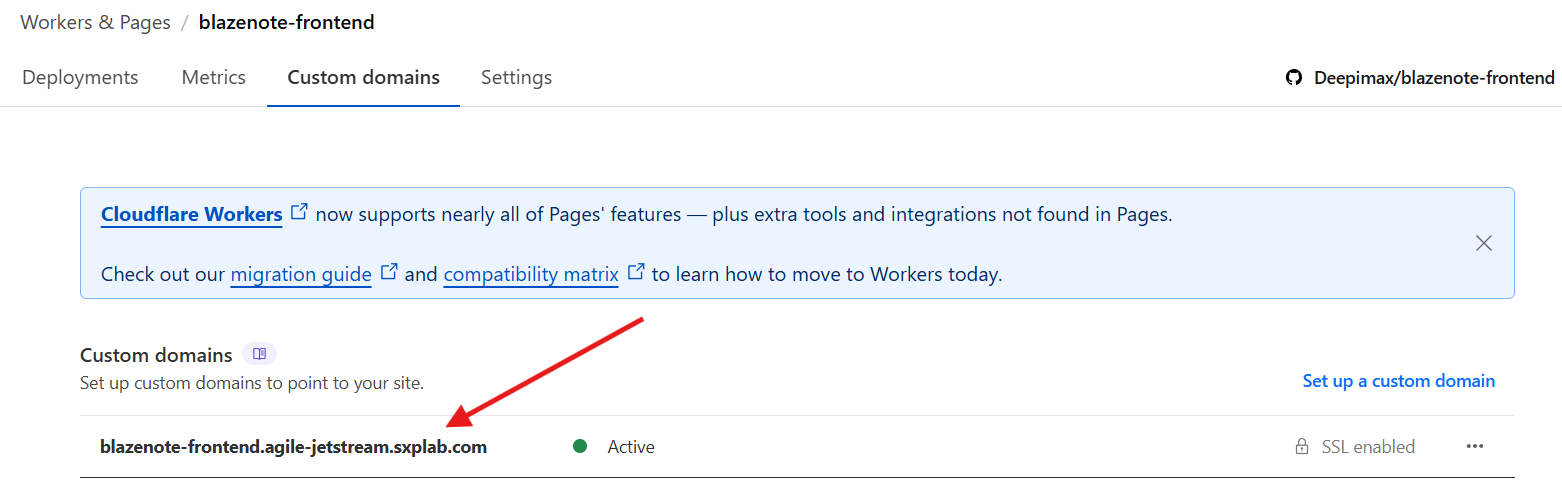
Frontend Custom Domain:
- Go to Workers & Pages
- Select your
blazenote-frontendproject - Go to Settings → Custom Domains
- Copy your frontend custom domain (e.g.,
blazenote-frontend.<yourdomain>.com)
Step 1 (OPTIONAL): Configure CORS for Production
###Only if you have not configure CORS from the previous module/steps###
Details
Understanding CORS
What is CORS? Cross-Origin Resource Sharing allows web applications to make requests to different domains. Without proper CORS configuration, your frontend won't be able to communicate with your backend API.
Locate CORS Configuration
Open the main index file:
# Navigate to your backend project
cd ~/projects/blazenote-backend

# Open the main configuration file
code src/index.ts
Find the CORS middleware section:
const allowedOrigins = new Set([
  "http://localhost:5173",
  "https://<your-domain>.<tld>",
]);
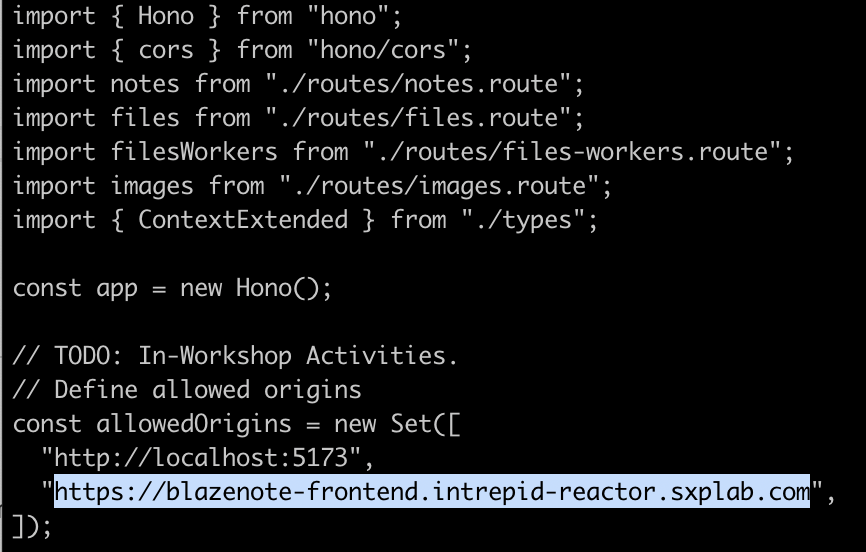
Update Allowed Origins
Replace the placeholder with your actual frontend domain:
// Replace this:
const allowedOrigins = new Set([
  "http://localhost:5173",
  "https://<your-domain>.<tld>",
]);
With your actual domain:
const allowedOrigins = new Set([
  "http://localhost:5173",
  "https://notes.yourname.com", // Replace with your actual frontend domain
]);
⚠️ Important:
- Replace
notes.yourname.comwith your actual frontend custom domain - Keep
http://localhost:5173for local development - Use
https://for production domains (nothttp://)
Example with real domain:
const allowedOrigins = new Set([
  "http://localhost:5173",
  "https://blazenote.johnsmith.dev",
]);
Understanding CORS Headers
What the CORS middleware does:
- Checks if the request origin is in the allowed list
- Adds appropriate CORS headers to responses
- Handles preflight OPTIONS requests
- Blocks requests from unauthorized origins
Headers added:
Access-Control-Allow-Origin: Specifies allowed originsAccess-Control-Allow-Methods: Allowed HTTP methodsAccess-Control-Allow-Headers: Allowed request headers
Save CORS Changes
# Save the file (Ctrl+S or Cmd+S)

# Verify the changes
grep -A 5 "allowedOrigins" src/index.ts
Step 2 (OPTIONAL): Configure Environment Variables
###Only if you have not configure custom domain from the previous module/steps###
Details
Understanding Environment Variables
Why environment variables? They allow you to:
- Use different configurations for different environments
- Store sensitive information securely
- Change settings without code changes
- Configure API endpoints dynamically
Update Frontend Environment Configuration
Navigate to frontend project:
cd ~/projects/blazenote-frontend
Check current configuration:
# Look for environment configuration
grep -r "VITE_API_BASE_URL" .
The environment variable should be in your frontend deployment configuration, not local files.
Configure Production API URL
In Cloudflare Dashboard:
- Go to Cloudflare Dashboard
- Navigate to Workers & Pages
- Select your
blazenote-frontendproject - Go to Settings tab
- Click Variables and Secrets
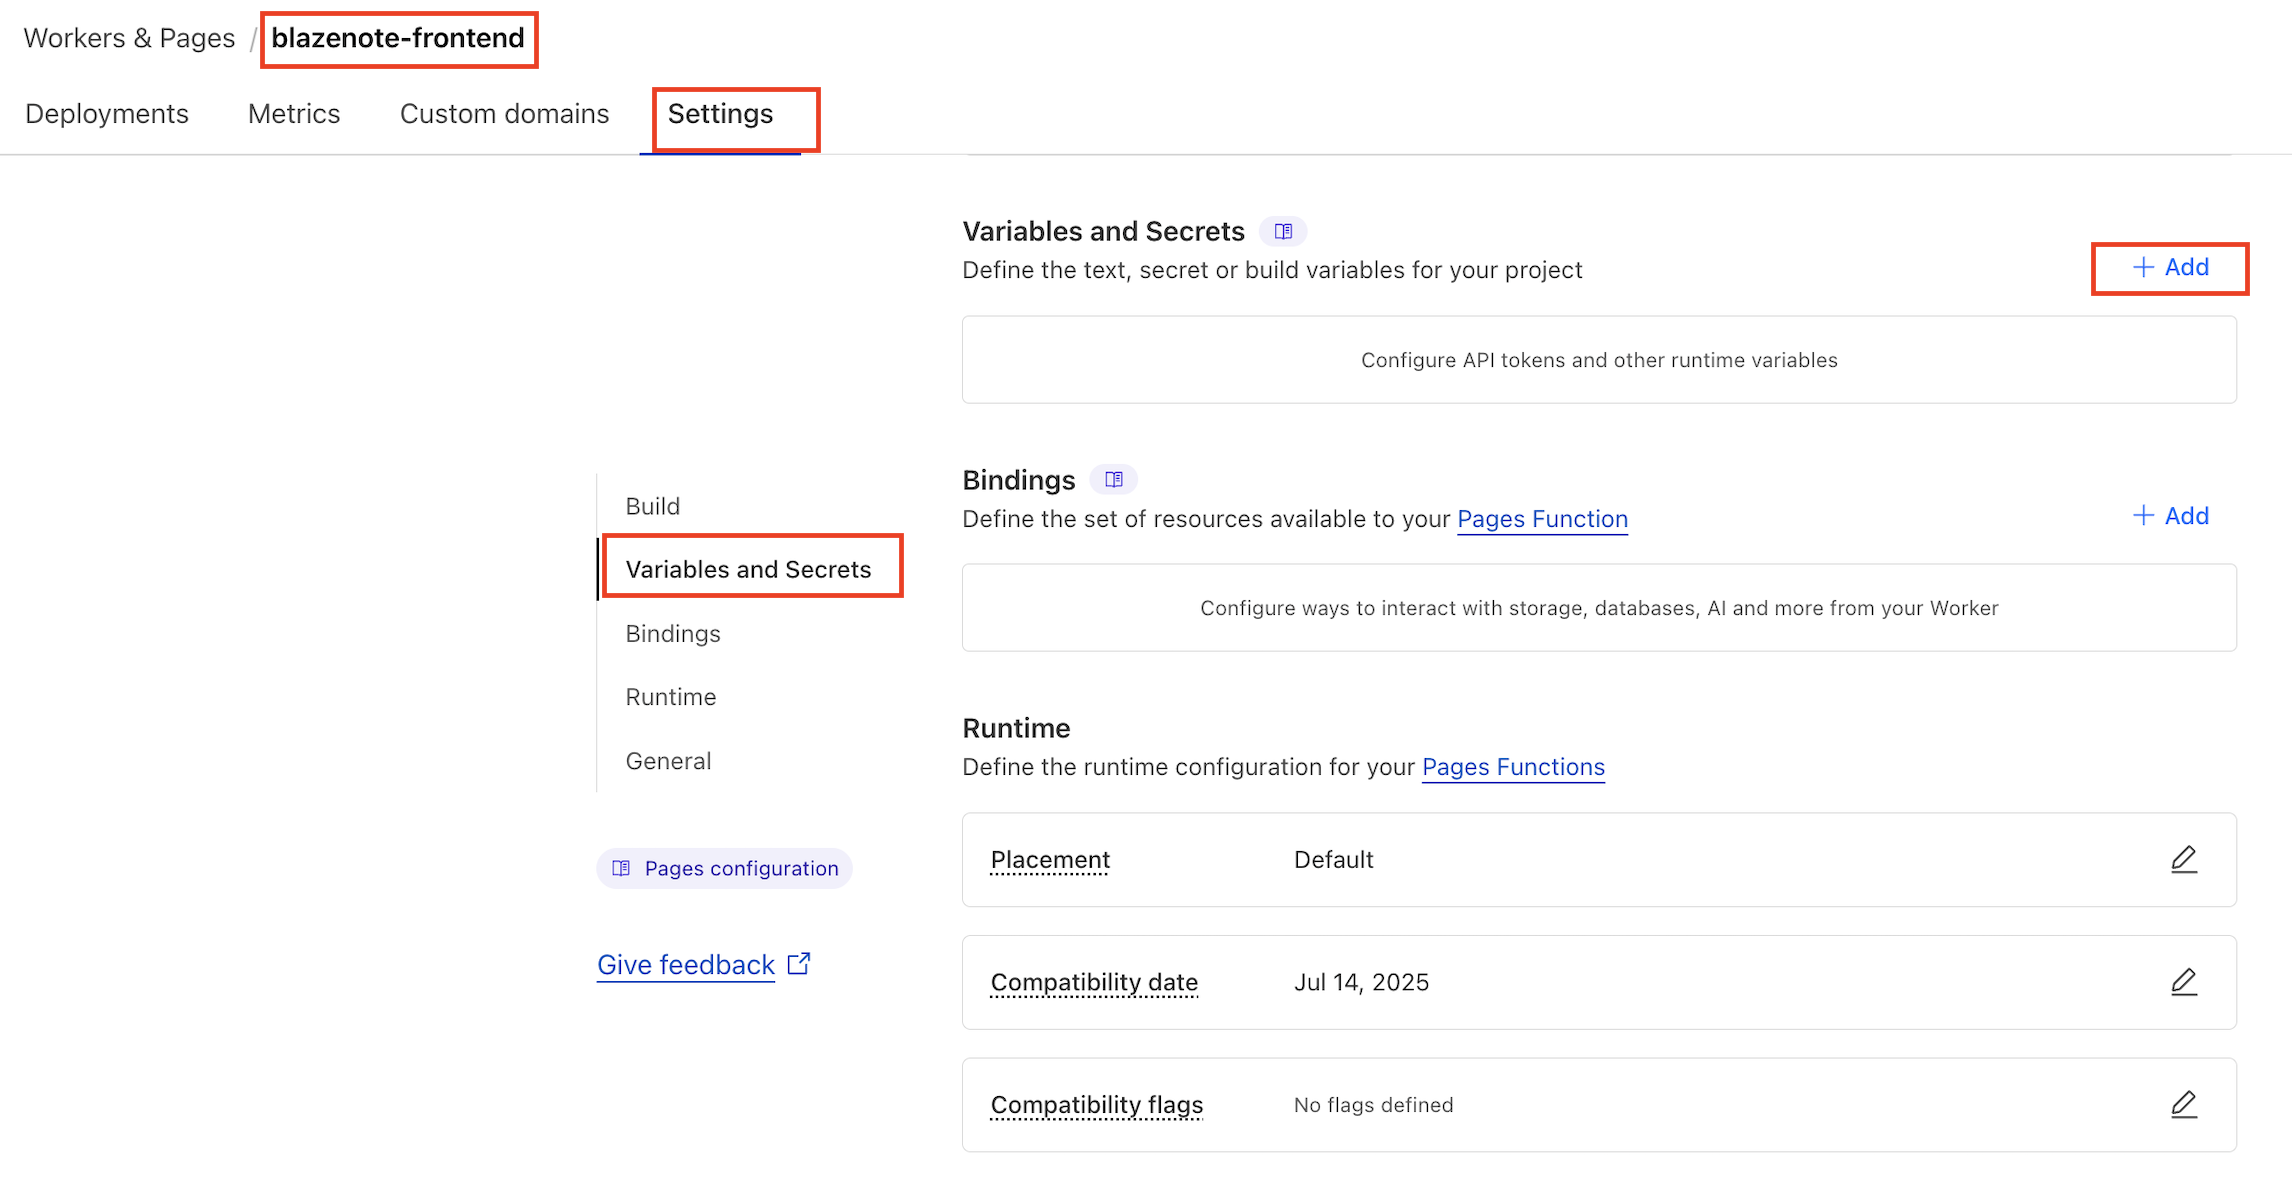
Add/Update the API base URL:
- Look for existing
VITE_API_BASE_URLvariable - If it exists, click Edit
- If it doesn't exist, click Add variable
Set the variable:
- Variable name:
VITE_API_BASE_URL - Value:
https://your-backend-domain.com(your actual backend custom domain) - Environment: Production
Example:
- Variable name:
VITE_API_BASE_URL - Value:
https://blazenote-backend.intrepid-reactor.sxplab.com

Alternative: Update wrangler.toml
If your frontend uses wrangler.toml for variables:
# Navigate to frontend project
cd ~/projects/blazenote-frontend

# Open wrangler configuration
code wrangler.toml
Update the vars section:
[vars]
VITE_API_BASE_URL = "https://api.yourname.com"  # Replace with your backend domain
Step 3: Deploy Backend Changes
Commit Your Changes
Navigate to backend project:
cd ~/projects/blazenote-backend
Check what changed:
git status
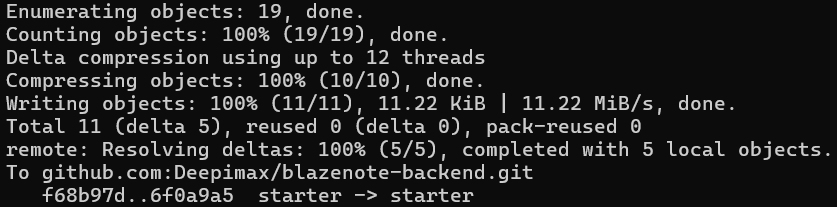
Stage and commit changes:
# Add all changes
git add .

# Commit with descriptive message
git commit -m "Implement CRUD operations with D1 database"

# Push to your repository
git push origin starter
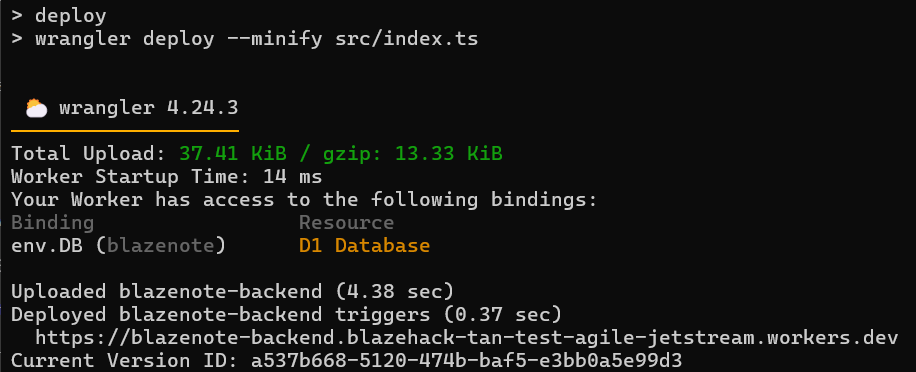
Deploy via Wrangler
Deploy your updated backend:
npm run deploy
Expected output:
⛅️ wrangler 3.109.2
--------------------

Total Upload: 45.67 KiB / gzip: 12.34 KiB
Uploaded blazenote-backend (1.23s)
Published blazenote-backend (3.45s)
  https://blazenote-backend.your-subdomain.workers.dev
Current Deployment ID: abc123def456
Verify Backend Deployment
Test your production API:
# Test the production endpoint (replace with your domain)
curl https://api.yourname.com/notes
Expected response:
[]
Test creating a note:
curl -X POST https://api.yourname.com/notes \
  -H "Content-Type: application/json" \
  -d '{"title": "Production Test", "description": "Testing production API"}'
Expected response:
{ "message": "note created" }

Step 4: Deploy Frontend Changes
Trigger Frontend Redeployment
If you updated environment variables in Cloudflare Dashboard:
- Go to Workers & Pages
- Select your
blazenote-frontendproject - Go to Deployments tab
- Find the latest deployment
- Click View details
- Click Manage deployment
- Click Retry deployment
Alternative: Push code changes (if using wrangler.toml):
cd ~/projects/blazenote-frontend

# If you modified wrangler.toml
git add .
git commit -m "Update API base URL for production"
git push origin starter
Verify Frontend Deployment
Check the deployment status:
- Monitor the deployment in Cloudflare dashboard
- Wait for "Success" status
- Visit your frontend URL to test
Test the complete application:
- Open your frontend URL (e.g.,
https://notes.yourname.com) - Try creating a new note
- Verify the note appears in the list
- Test editing and deleting notes
Step 5: Verify Complete Integration
Test All CRUD Operations
Create a Note:
- Click "New Note" or similar button
- Enter title and description
- Save the note
- Verify it appears in the list
Read Notes:
- Refresh the page
- Verify notes persist (loaded from database)
- Check that note details display correctly
Update a Note:
- Click edit on an existing note
- Modify title or description
- Save changes
- Verify updates are reflected
Delete a Note:
- Delete a note from the interface
- Verify it's removed from the list
- Refresh to confirm deletion persisted
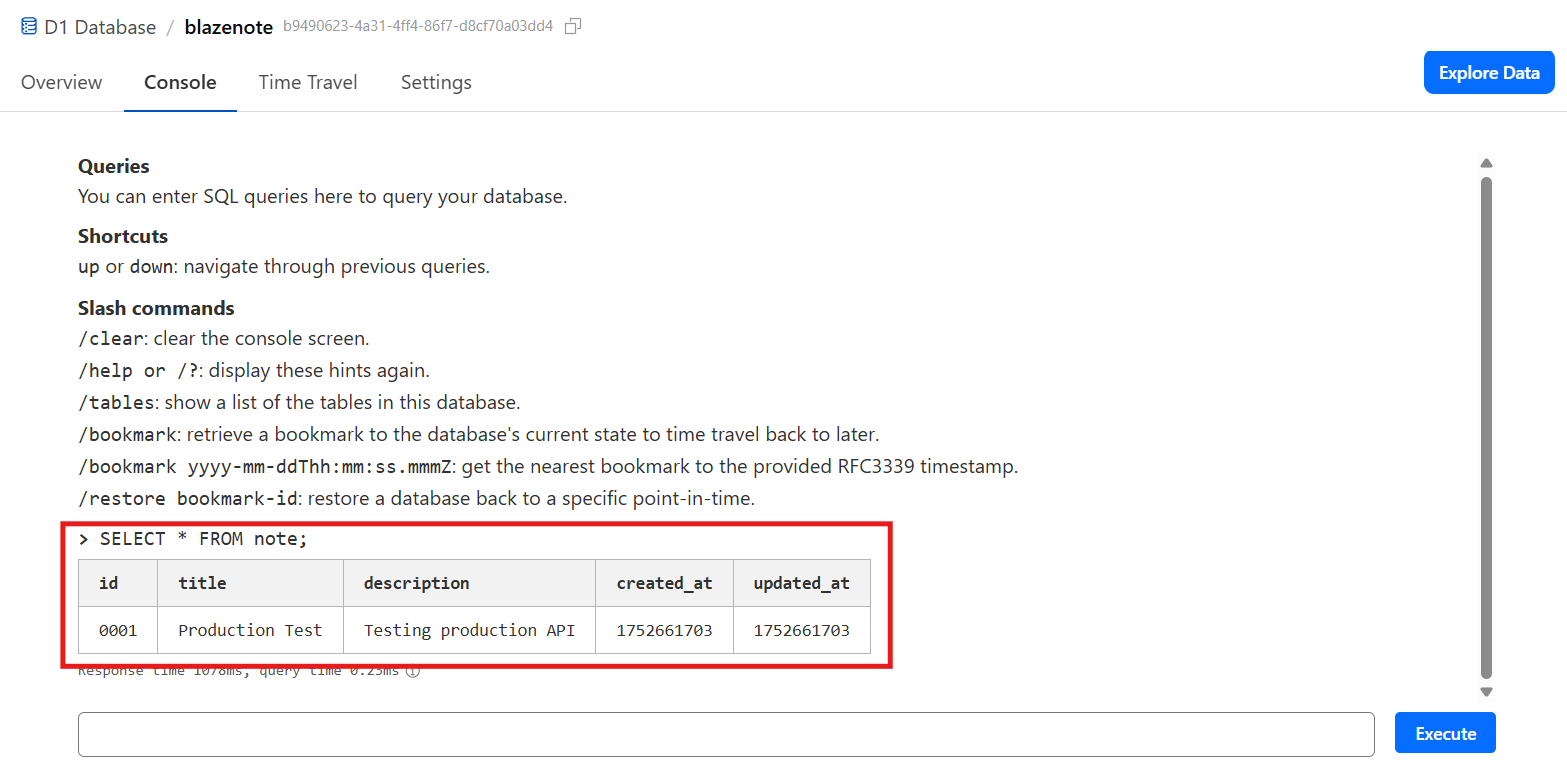
Verify Database via Dashboard
Check your data in Cloudflare:
- Go to Workers & Pages → D1 SQL Database
- Click on your "blazenote" database
- Go to Console tab
- Run query:
SELECT * FROM note; - Verify your notes appear in the database
Deployment Configuration Checklist
Verify all items below before proceeding:
CORS Configuration
- Frontend custom domain added to
allowedOrigins - CORS configuration includes
localhostfor development - Production domain uses
https://protocol - Backend code saved and committed
Environment Variables
-
VITE_API_BASE_URLset to production backend domain - Environment variable configured in Cloudflare dashboard or wrangler.toml
- API URL uses correct protocol (
https://) - Frontend redeployed with new environment variables
Deployment
- Backend deployed successfully to Cloudflare Workers
- Frontend redeployed with updated configuration
- Both deployments show "Success" status
- Production URLs are accessible
Integration Testing
- Can create notes via frontend interface
- Notes persist after page refresh
- Can edit existing notes
- Can delete notes
- Data visible in D1 database console
Troubleshooting Common Issues
CORS Errors
Issue: Browser shows CORS errors, requests blocked Solutions:
- Verify frontend domain exactly matches CORS configuration
- Check that CORS uses
https://for production domains - Ensure no typos in domain names
- Clear browser cache and try again
API Connection Errors
Issue: Frontend can't connect to backend API Solutions:
- Verify
VITE_API_BASE_URLis set correctly - Check backend deployment was successful
- Test API endpoints directly with curl
- Verify custom domain is properly configured
Environment Variable Issues
Issue: Environment variables not updating Solutions:
- Ensure frontend was redeployed after variable changes
- Check variable is set in correct environment (Production)
- Verify variable name matches exactly (
VITE_API_BASE_URL) - Wait a few minutes for changes to propagate
Database Connection Issues
Issue: API returns database errors Solutions:
- Verify D1 database configuration in
wrangler.toml - Check that migrations were applied to remote database
- Test database connectivity with
wrangler d1 execute - Ensure backend has proper database binding
Your application is live and ready for real-world use! 🎉